Step-by-Step Guide to Add Sales Reports
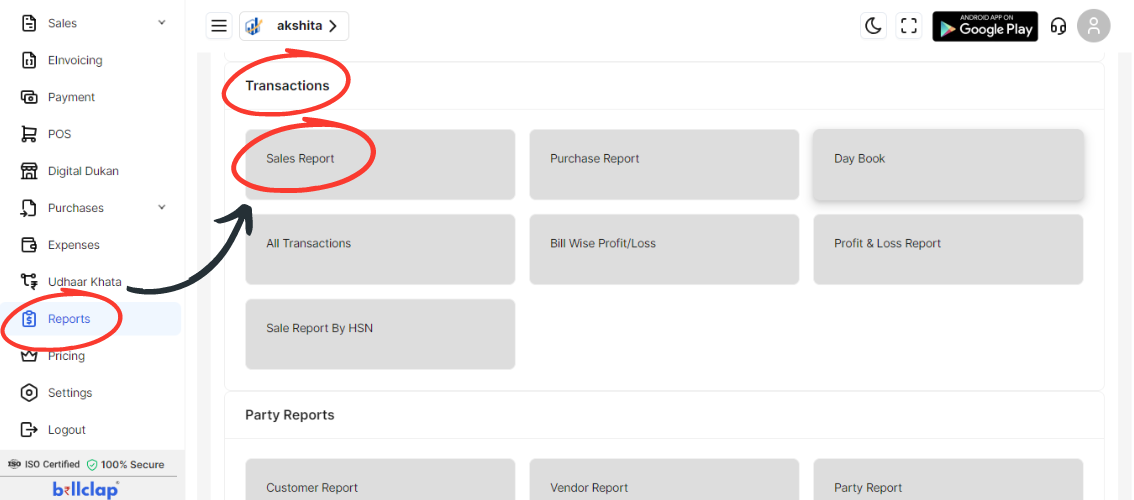
Click on Reports Option on Dashboard:
Log in to your POS system or dashboard.
From the main dashboard, locate and click on the “Reports” option.
Look for Transactions Category:
In the Reports section, find the “Transactions” category.
Under this category, you will see various reporting options.

Select Sales Report:
Click on the “Sales Report” option found under the Transactions category.
Add Sales Report Details:
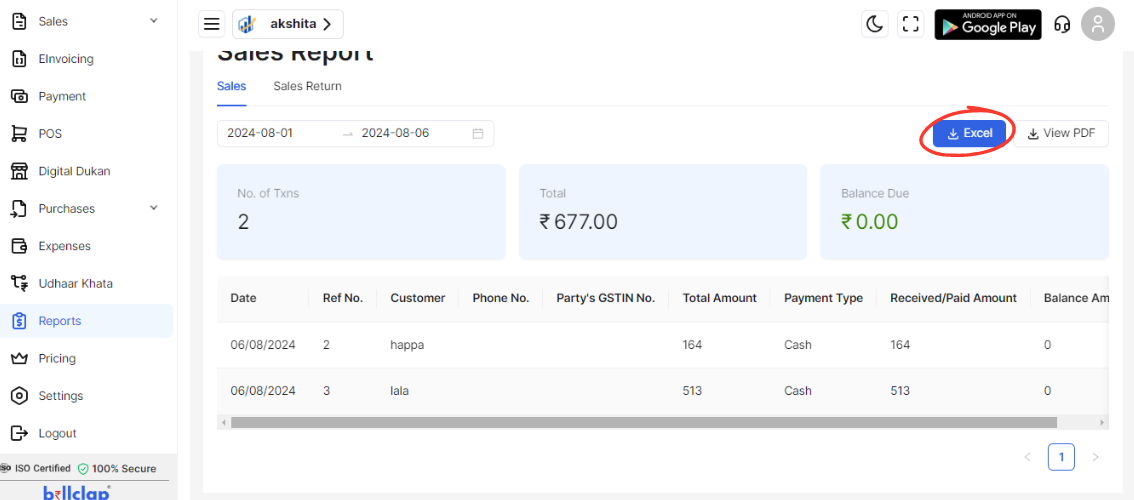
Date: Enter the date range for the sales report.
Ref No.: Input the reference number for the sales transaction.
Customer: Enter the name or details of the customer.
Phone No.: Provide the phone number of the customer.
Party's GSTIN No.: Enter the GSTIN number of the party or customer.
Total Amount: Input the total amount of the sales transaction.
Payment Type: Specify the type of payment used (e.g., cash, credit card).
Received/Paid Amount: Enter the amount received or paid.
Balance Amount: Calculate and enter the balance amount, if applicable.

Search Sales by Date:
Use the date range or calendar bar to search and filter sales reports by date or other criteria.
Download and View Report:
Download as Excel: Click on the option to download the report in Excel format.
View PDF: Choose the option to view or download the report as a PDF.
Verify Sales Report:
Review the generated sales report to ensure all details are accurate and complete.
Confirm that the report is correctly saved and available in the selected formats.