Detailed New User Creation Process
Login to Billclap: Access the Billclap platform using your administrator credentials.
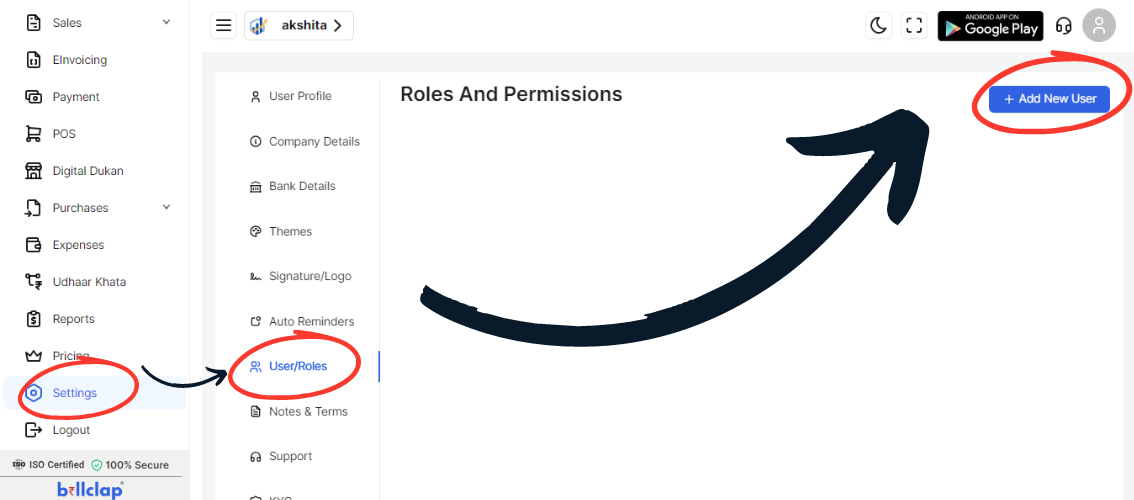
Navigate to User Management: Locate the "settings' section, typically found in the admin dashboard or settings menu.
Initiate New User Creation: Look for the option to "Add New User" or similar. Click on it to start the process.
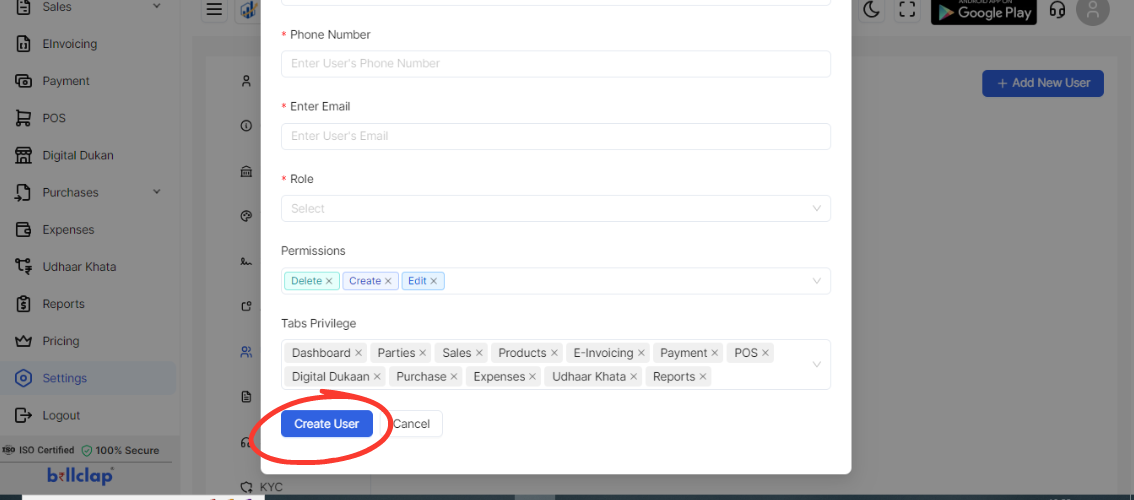
Enter User Details:
Full Name: Enter the new user's full name.
Email Address: Provide the email address associated with the new user's account.
Username: If applicable, set a username for the user.
Assign User Role: Choose the appropriate role for the new user. Roles define permissions and access levels within Billclap.

Configure Permissions: Set permissions specific to the user's role. This includes access to features, data, and administrative functions.

Activate Account: The new user follows the email instructions to activate their account. They may be prompted to set up initial login credentials (password).
Confirmation and Review: Verify that all entered information is accurate and matches the user's role and responsibilities
Post-Creation Tasks: After activation, ensure the new user has access to necessary resources and support for a smooth onboarding experience.