Navigate to the Products Section
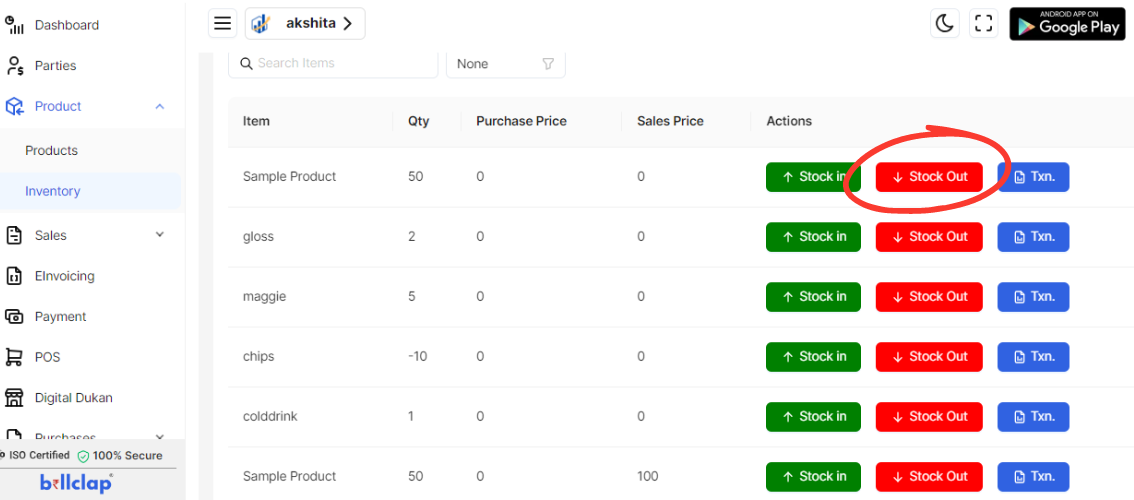
Once you are on the dashboard, locate the “Products” option. This is usually found in the main navigation menu or dashboard sidebar.
Click on “Products” to access the product management area.
Access Inventory Management
Within the “Products” section, look for the “Inventory” option. This is typically listed as a submenu or tab under “Products.”
Click on “Inventory” to view the current stock levels and manage inventory.
Initiate Stock Reduction
In the Inventory section, locate and click on the “Stock Out” button. This option is used to reduce the stock in your inventory.

Enter Stock Reduction Details
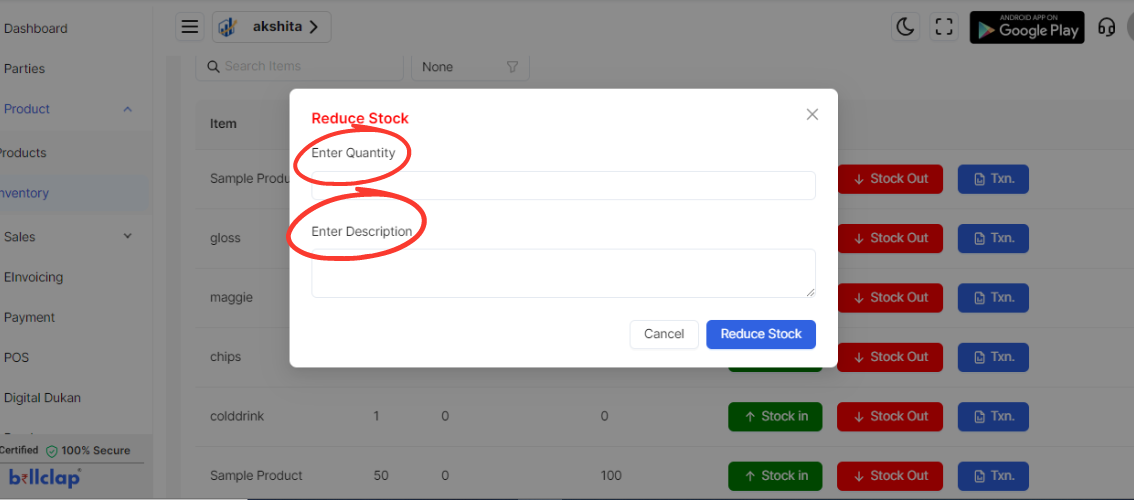
Enter Quantity: Input the number of units you are removing from the inventory. Ensure this number reflects the actual quantity being reduced.
Enter Description: Provide a brief description of the stock reduction. This could include details like the reason for reduction or any other relevant information.

Apply the Stock Reduction

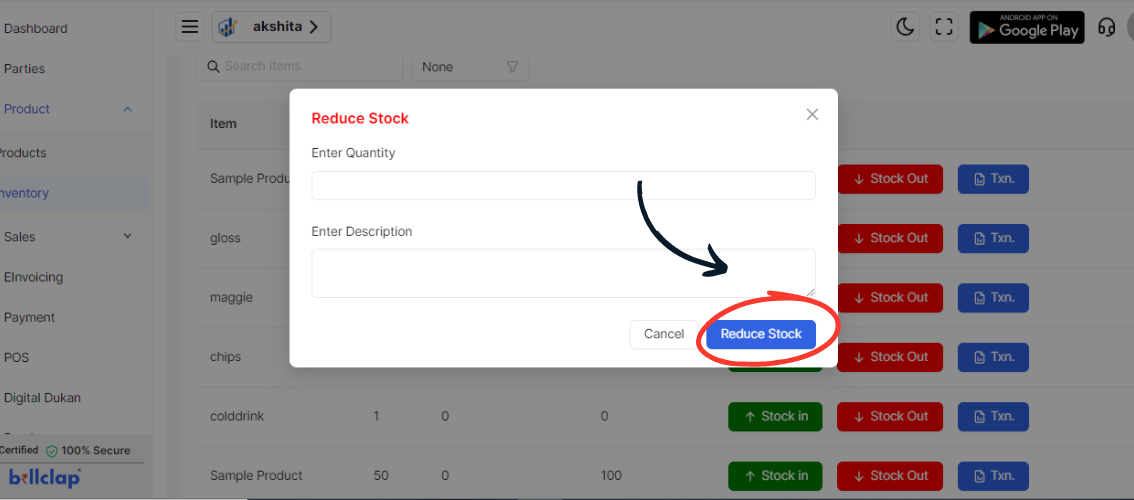
After filling in the quantity and description, review the details for accuracy.
Click on the “Reduce Stock” or similar button to confirm and complete the stock reduction process.