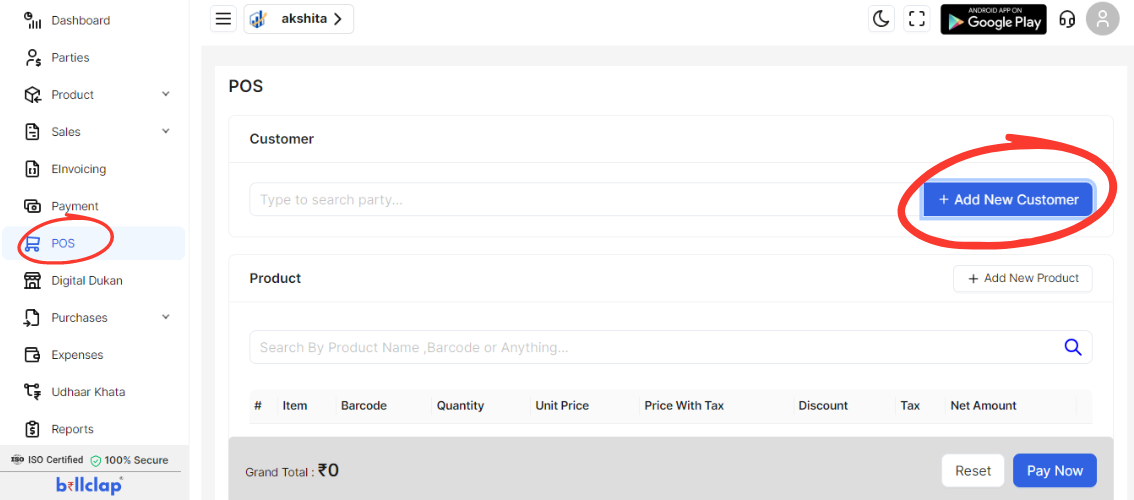
Go to POS Option in Dashboard:
Log in to your POS system.
From the dashboard, navigate to the main menu or options where you can find POS functionalities.
Click on the “POS” option to access POS-related features.
Click on Add New Customer:
Within the POS section, locate and click on the “Add New Customer” button or link.

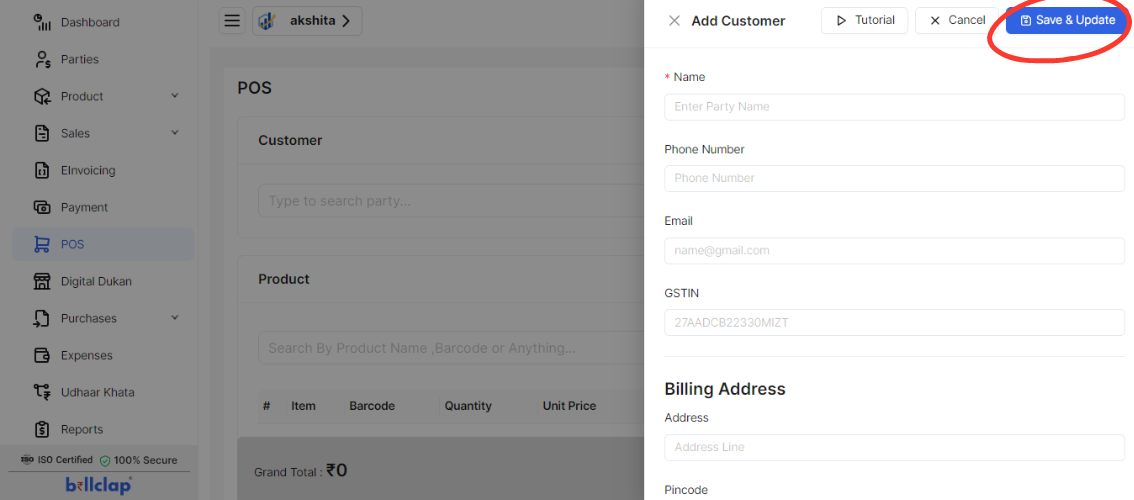
Fill in Customer Information:
Name: Enter the full name of the new customer.
Phone Number: Input the customer’s phone number.
Email: Enter the customer’s email address.
GSTIN: Provide the GSTIN number if applicable.
Billing Address:
Address: Enter the billing address of the customer.
Pincode: Input the postal code for the billing address.
City: Enter the city for the billing address.
Select State: Choose the state from the dropdown menu.
Enter Shipping Address:
Shipping Address Same as Billing Address: If the shipping address is the same as the billing address, check this option.
If the shipping address is different:
Address: Enter the shipping address.
Pincode: Input the postal code for the shipping address.
City: Enter the city for the shipping address.
Select State: Choose the state from the dropdown menu.
Additional Details:
Provide any additional details as required by your POS system for the new customer.

Save and Update:
Once all information is entered and verified, click on the “Save” button.
To finalize, click on “Update” if the option appears to ensure that the new customer information is saved correctly.
Verify Customer Addition:
Review the customer list or records to confirm that the new user has been added successfully.
Check that all details are accurate and correctly updated.