Step-by-Step Guide to Add a New Product in POS
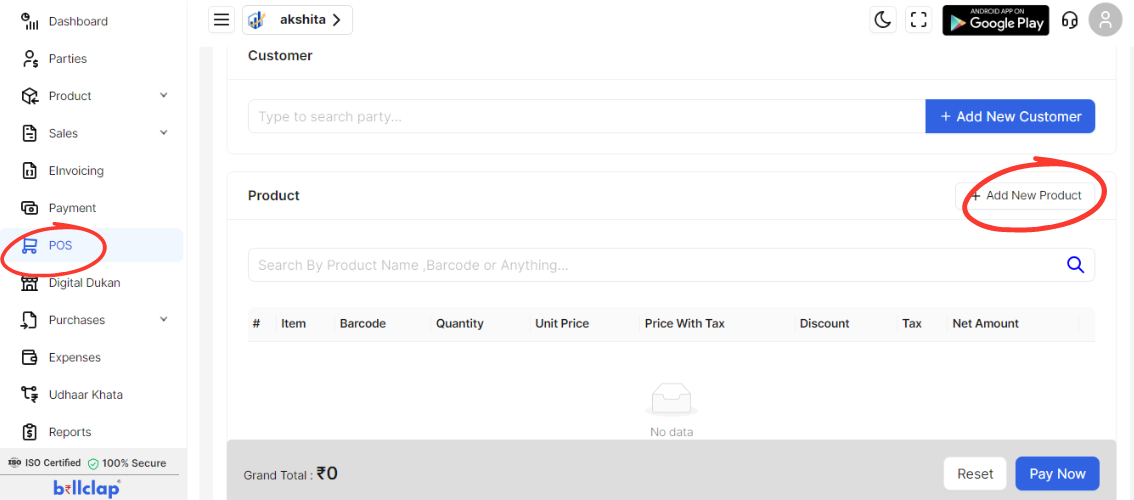
Access POS Dashboard:
- Log in to your POS system.
- Navigate to the main menu or dashboard area where you can find product management options.
Click on Add New Product:

- Look for and click on the “Add New Product” button or link within the POS product management section.
Fill in Product Details:
- Product Image:
- Click on the “+ Upload” button to add an image of the product.
- Ensure the image is in PNG or JPG format, and ideally 1024px by 1024px or with a 1:1 aspect ratio.
- Product/Service Name: Enter the name of the product or service.
- Product Type: Choose the type of product from the available options.
- Sell Price: Enter the selling price of the product.
- Tax Type: Select the appropriate tax type for the selling price.
- Purchase Price: Enter the purchase price of the product.
- Tax Type: Select the tax type for the purchase price.
- GST: Input the GST rate applicable to the product.
- MRP: Enter the Maximum Retail Price if applicable.
- Category:
- Click on “Select Category” to choose the relevant category for the product.
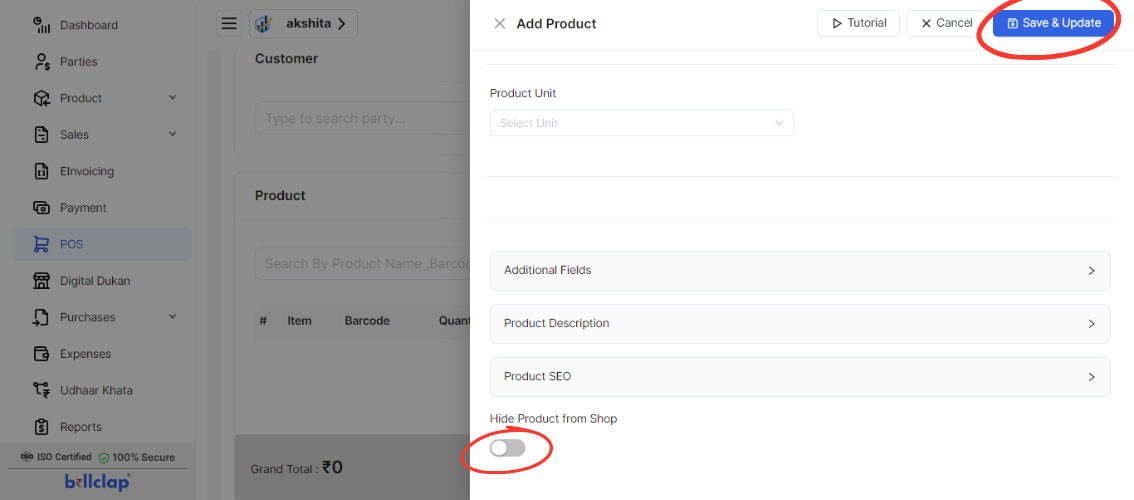
- Product Unit:
- Click on “Select Unit” to choose the unit of measurement for the product.
- Additional Fields:
- Product Description: Provide a description of the product.
- Product SEO: Enter SEO-related information if needed.
Set Product Visibility:
- Hide Product from Shop: Choose whether to make the product visible or hidden from the shop. Select "Unable" to hide or "Able" to show.
Save and Update:

- Once all the details are filled in, click on the “Save” button.
- To finalize the addition, click on “Update” if prompted to ensure the product information is saved correctly.
Verify Product Addition:
- Review the product list or records to confirm that the new product has been added successfully.
- Ensure all details are accurate and correctly updated.

