Step-by-Step Guide to Update Product Settings
Go to Product Section in POS:
Log in to your POS system.
Navigate to the main menu or dashboard.
Click on the “Product” section to access the product management area.
Select the Product:
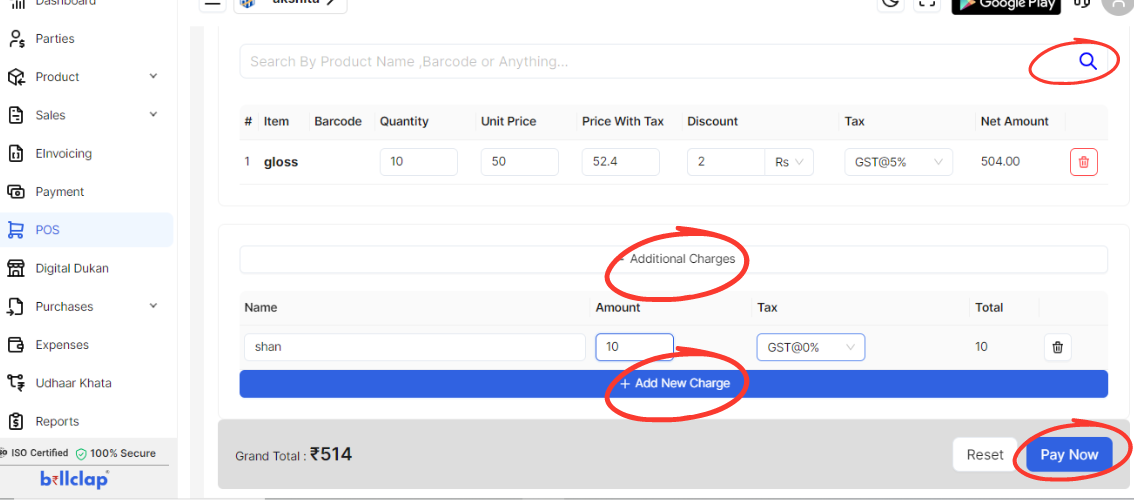
Use the search bar or space available to find the product you want to update.
Enter the product name, barcode, or other identifying information to locate it.
Select the product from the search results.
Update Product Information:
Item: Enter or update the item name or description.
Barcode: Enter or update the product’s barcode.
Quantity: Update the quantity of the product in stock.
Unit Price: Enter or update the unit price of the product.
Price With Tax: Enter the price including tax if applicable.
Discount: Enter any discount applied to the product.
Tax: Specify the tax applicable to the product.
Net Amount: Calculate and enter the net amount after applying the price, tax, and discount.
Add Additional Charges (if needed):
Click on “Additional Charges” if there are extra charges to be applied.
Name: Enter the name of the additional charge.
Amount: Enter the amount of the additional charge.
Tax: Specify the tax applicable to the additional charge.
Total: Enter the total amount including the additional charge.

Finalize and Pay:
Click on “Pay Now” to proceed with the payment.
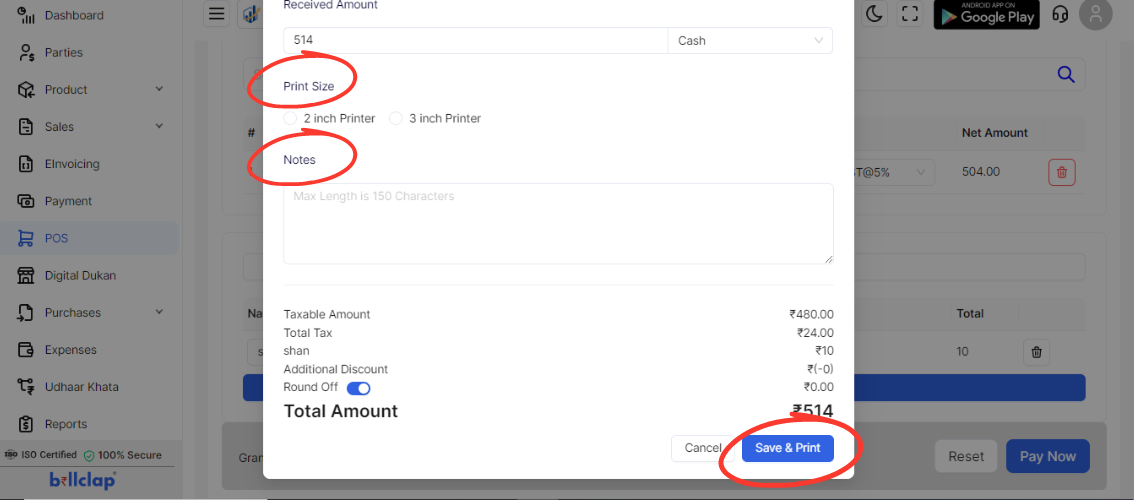
Additional Discount: Enter any extra discount if applicable.
Discount(-): Specify the discount amount (e.g., Rs 0 or other amount).
Received Amount: Enter the amount received from the customer (e.g., Rs 515).
Print Size: Choose the print size for the receipt:
2 inch Printer
3 inch Printer
Notes: Add any additional notes if needed.

Save and Print:

Click on “Save” to save all updated product settings.
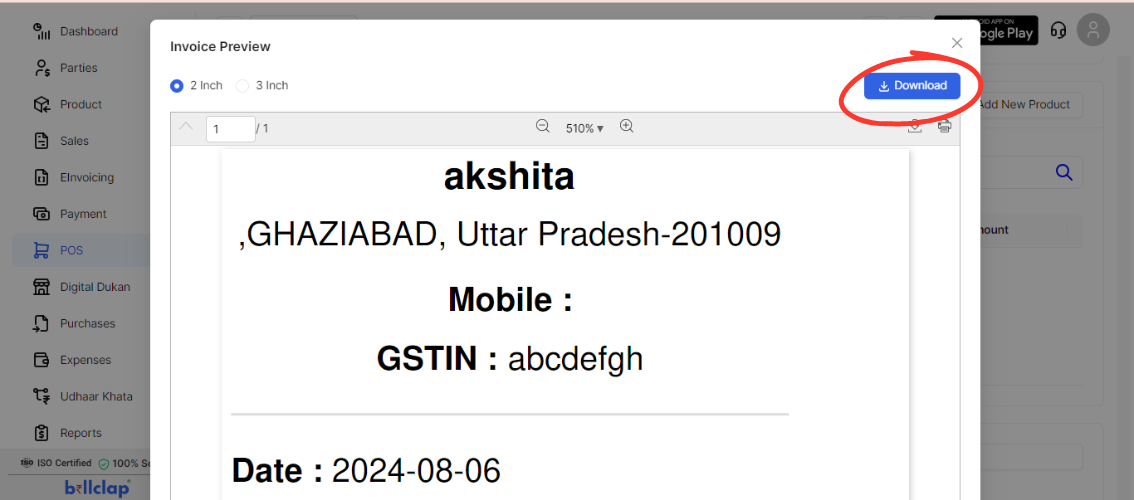
Click on “Print” to generate and print the updated bill.
You also have the option to download the bill by selecting the “Download” option.