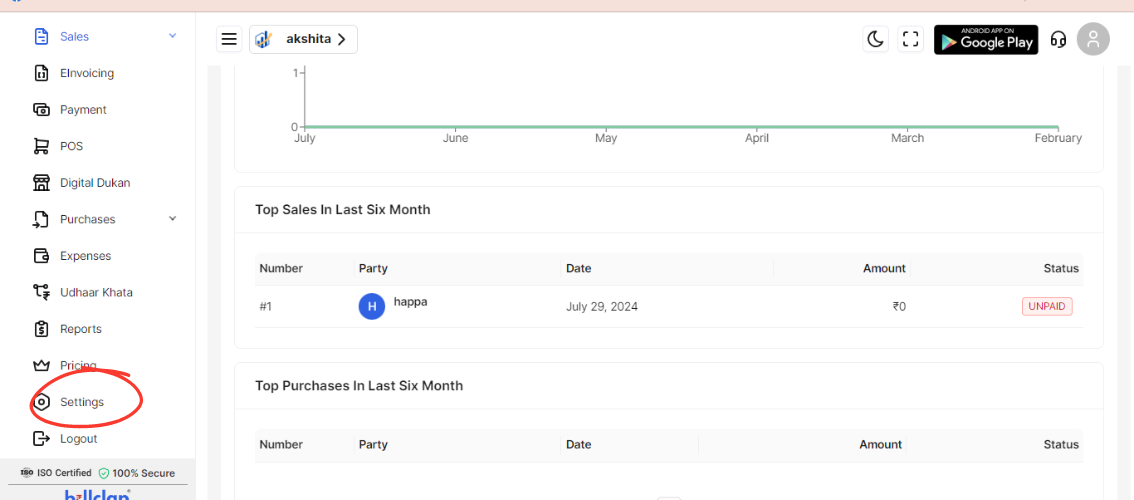
Go to Settings Tab on Dashboard:
Log in to your BillClap account.
Navigate to the Settings tab, located on the dashboard or main menu.

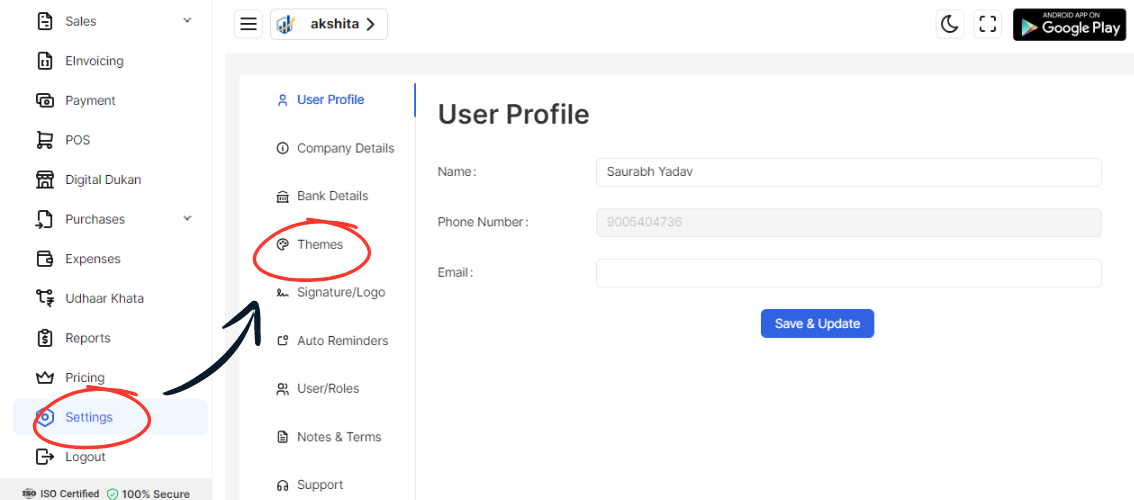
Click on Themes Option:
Look for an option labeled "Themes" and click on it. This is where you can customize the appearance of your invoices.

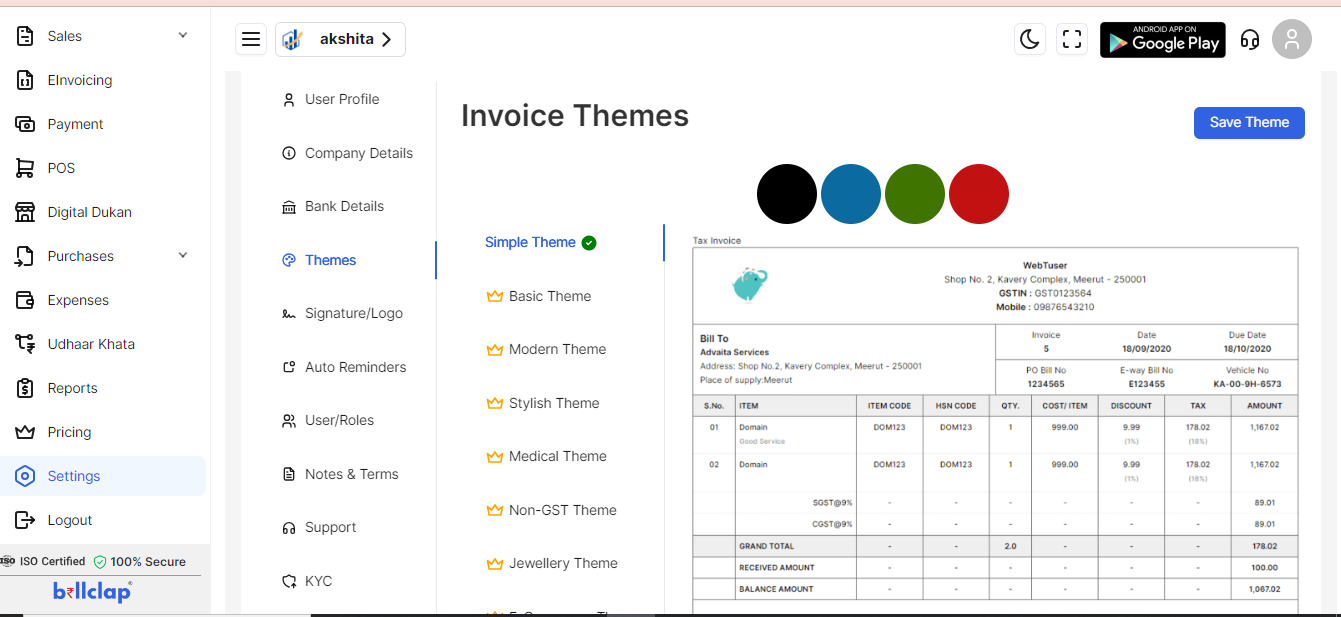
Choose Between Different Themes:
BillClap offers several themes for invoices. Here’s a brief description of each:
Simple Theme: A clean and minimalistic design, ideal for straightforward invoices.
Basic Theme: Provides essential features with a simple layout for clear presentation.
Modern Theme: Incorporates contemporary design elements for a sleek and professional look.
Stylish Theme: Offers a stylish and elegant appearance, suitable for businesses wanting a sophisticated invoice design.
Medical Theme: Tailored for medical and healthcare industries, featuring relevant color schemes and layout.
Non-GST Theme: Specifically designed for invoices without Goods and Services Tax (GST) information.
Jewellery Theme: Suited for jewelry businesses, showcasing a design that reflects the elegance of jewelry items.
E-Commerce Theme: Geared towards online retail businesses, with features that emphasize product details and order information.
Electronic Theme: Designed for electronics businesses, highlighting technical details and product specifications.
Bold Theme: Features a bold and impactful design, suitable for businesses that want to make a strong visual statement.
Tally Theme: Inspired by traditional accounting software designs, focusing on functionality and clarity.
Professional Theme: Offers a polished and professional appearance, suitable for corporate use.
Dual Color Theme: Incorporates two contrasting colors for a visually dynamic invoice layout.
Clarity Theme: Emphasizes clarity and readability, ensuring all invoice details are presented clearly.
Select Your Preferred Theme:
Click on the theme that best suits your business style and preferences.

Save Changes:
After selecting your desired theme, save your changes. This is typically done by clicking on a "Save" or "Update" button.