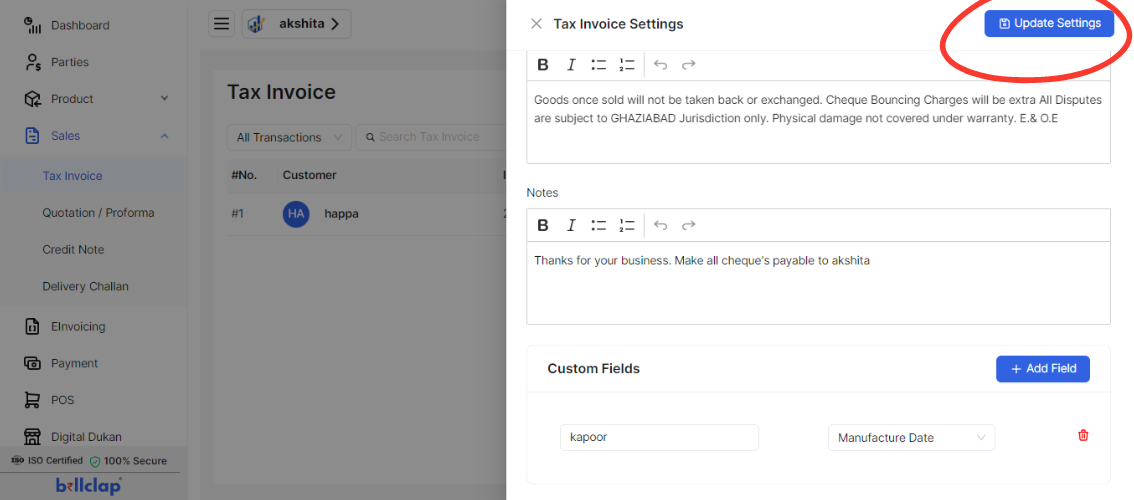
In Billclap, customization options for invoices are designed to help users tailor the appearance and content of their invoices to reflect their brand identity and meet specific business needs. Here’s a detailed explanation of the customization options typically available in Billclap invoices:
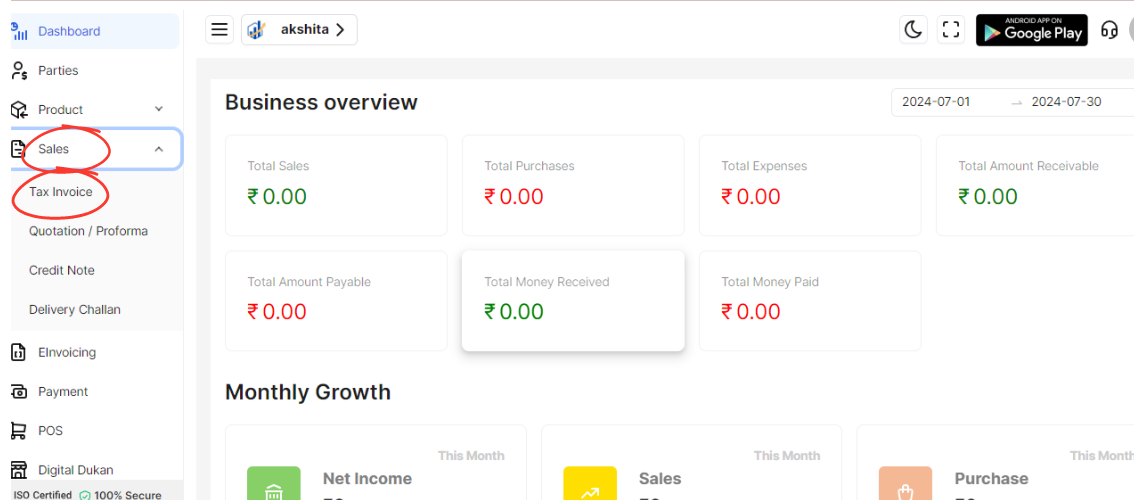
Navigate to Sales Column:
Log in to your BillClap account.
Go to the Sales or Invoices section.
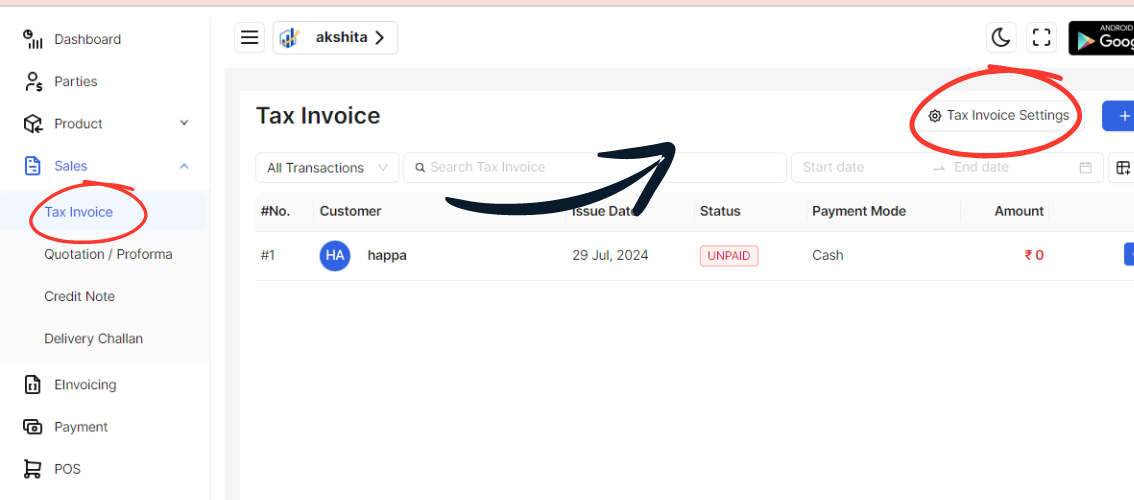
Access Tax Invoice Settings:
Find and click on the option Tax Invoice settings. This is usually located under settings or configurations within the Sales section.
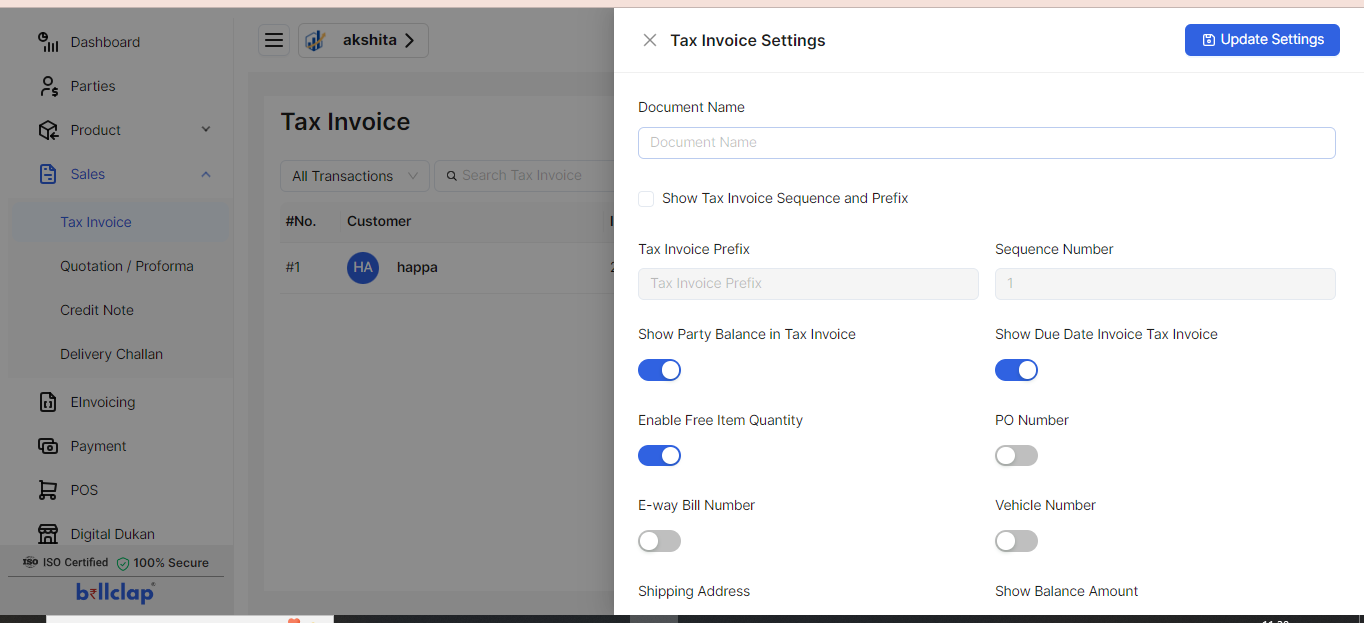
Fill in Document Name:
Enter a suitable Document Name for your tax invoices. This could be "Tax Invoice", "Invoice", or any specific name you prefer.
Configure Tax Invoice Sequence and Prefix:
Locate the settings for Tax Invoice Sequence and Prefix.
Enter a Prefix if needed (e.g., "INV-").
Specify the starting Sequence Number for your tax invoices.
Enable/Configure Optional Settings:
Check or fill in the following optional settings as required:
Show Party Balance in Tax Invoice: Enable this option if you want to display the customer's current balance on the tax invoice.
Show Due Date in Tax Invoice: Enable this option to display the due date of the invoice.
Enable Free Item Quantity: Check this box if you want to include free item quantities on the invoice.
PO Number: Enter a field for Purchase Order numbers if relevant.
E-way Bill Number: If applicable, enter the E-way Bill Number field.
Vehicle Number: If shipping goods, enter the Vehicle Number field.
Shipping Address: Specify if you want to show the shipping address on the tax invoice.
Show Balance Amount: Display the balance amount on the invoice.
Show Received Amount: Display the received amount on the invoice.
Show Free Item Quantity: Display the quantity of free items on the invoice.
Terms and Conditions: Enter any terms and conditions that should appear on every tax invoice.
Notes:
If there's a specific Notes section or field, fill it out with any additional information or instructions relevant to the tax invoice.
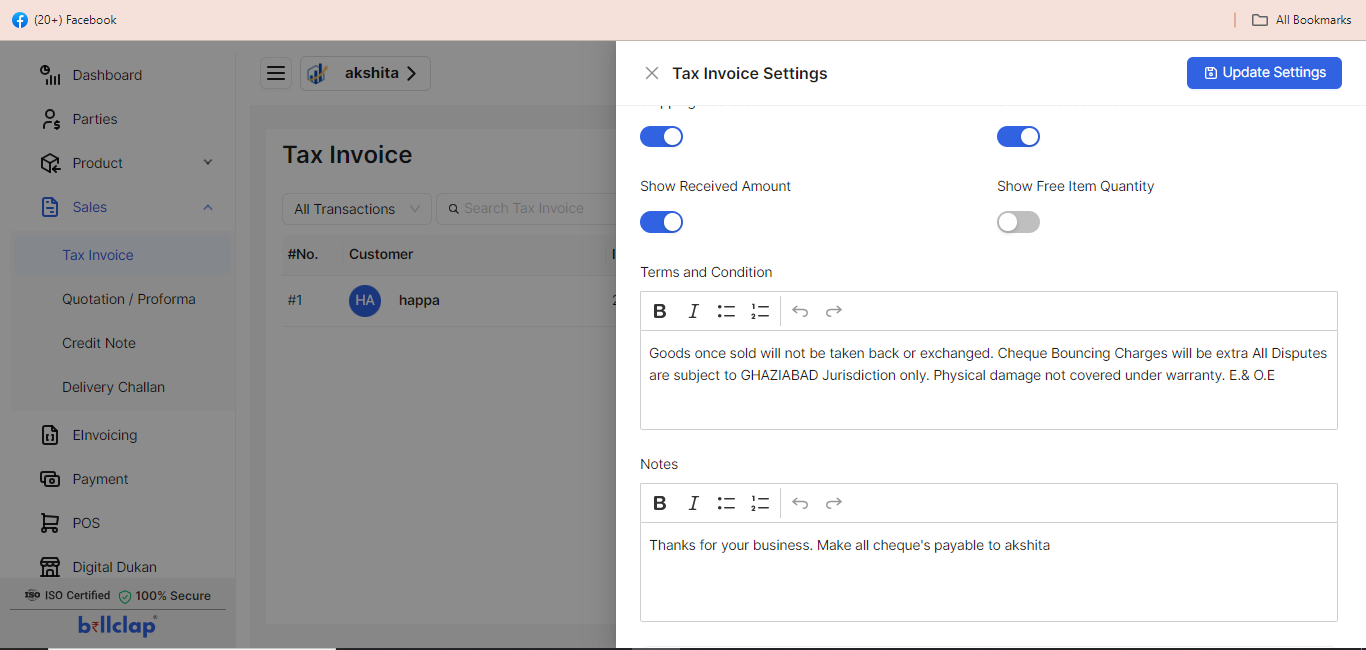
Save Settings:
After filling out and configuring all the necessary settings, make sure to save your changes. This is usually done by clicking on a "Save" or "Update" button at the bottom of the settings page.
