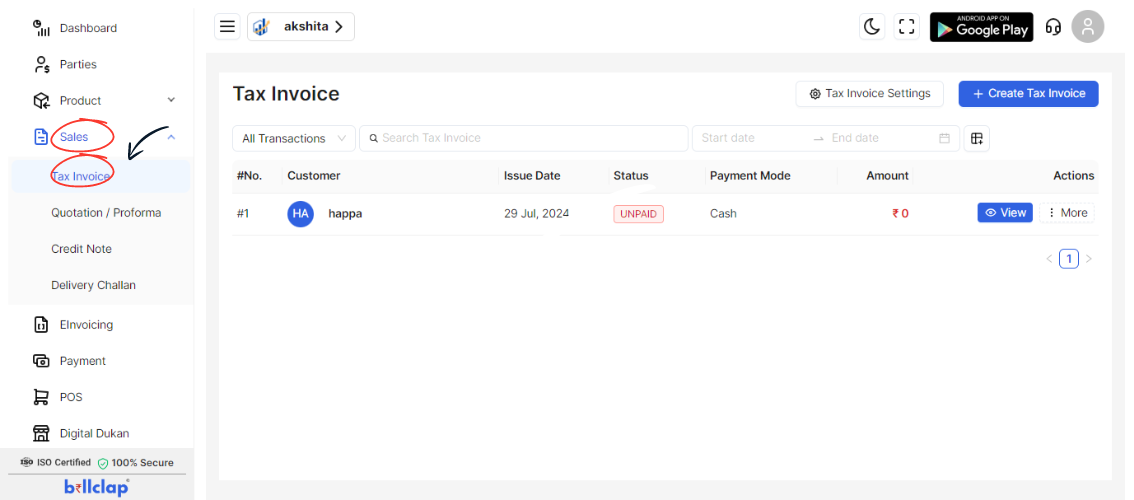
Navigate to Sales Tab:
Log in to your BillClap account.
Go to the Sales or Invoices section. This is where you manage all your sales transactions and invoices.

Select Tax Invoice Option:
Find and select the Tax Invoice option. This will be labeled as “Tax Invoice”.
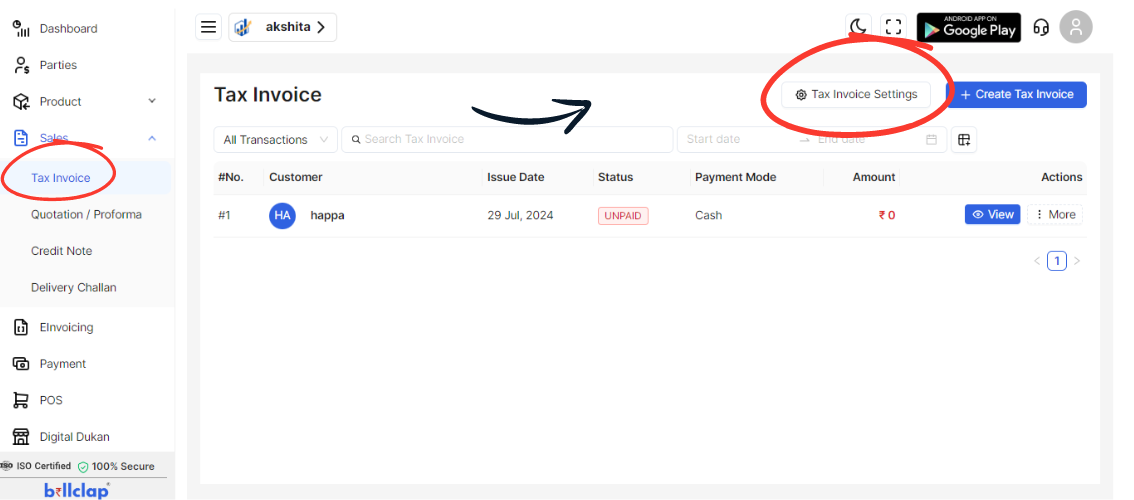
Access Tax Invoice Settings:
Within the Tax Invoice settings page, scroll down to locate the customization options.

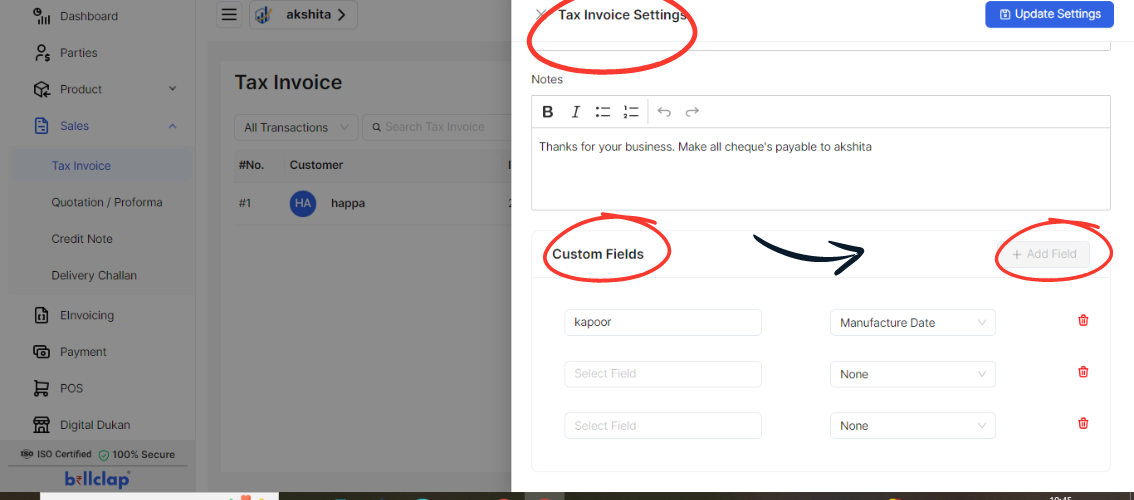
Add Custom Fields:
Look for an option that says “Add Custom Field”.
Click on this option to add a custom field to your invoice.

Fill in the Custom Field Details:
In the dialog box that appears:
Select Field: Choose from the list of available fields such as Serial No, Batch No, Manufacture Date, Product Size, Model No, Barcode, Expiry No, etc.
Label or Name: Enter a label or name for the custom field. This is how it will appear on the invoice.
Type: Specify the type of data this field will contain (e.g., text, number, date).
Add Up to Three Custom Fields:
Note that typically, you can add up to three custom fields per invoice. If you need more, you might need to adjust your requirements or contact support for assistance.
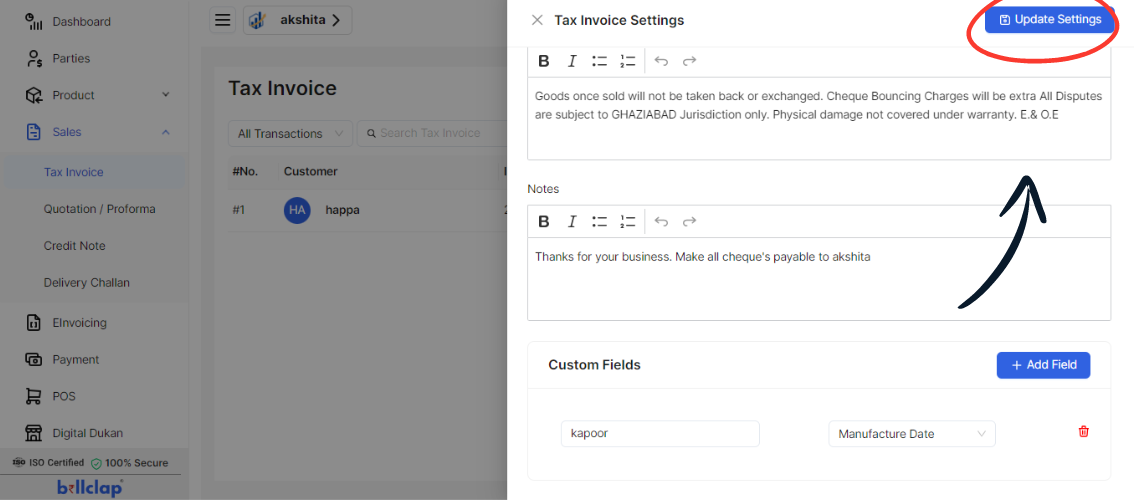
Save Your Custom Fields:
After filling out the necessary details for each custom field, scroll back up to the top of the page.

Update and Save Settings:
Click on the "Update" or "Save" button to apply your changes and save the custom fields to your invoice settings.