
How to Record Business Expenses in BillClap (Paid and Unpaid)
Record Your Business Expenses
Record every business expense, like shop rent, salaries, electricity or phone bills, in BillClap. Your expenses show on the dashboard and in your profit numbers, so you always know where your money is going.
Step 1: Start a New Expense
- Open Expenses from the menu
- Click Create Expense
Step 2: Pick a Category
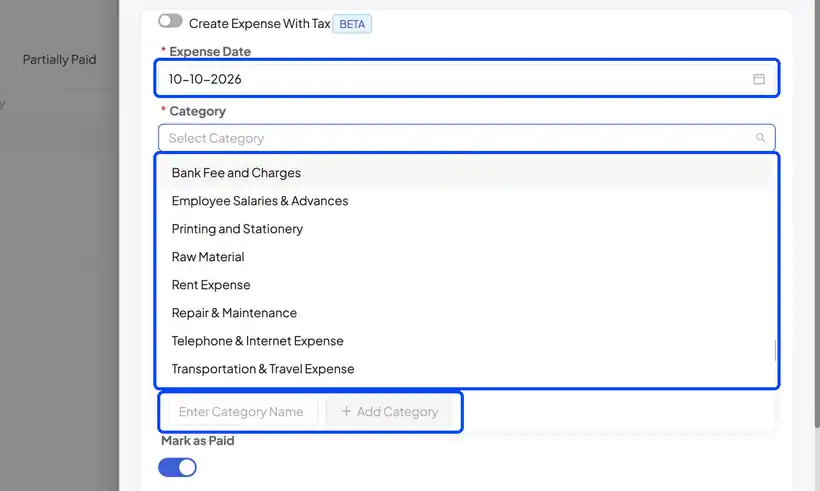
- Check the expense date
- Pick a category, like Rent, Salaries or Telephone
- Need a new one? Type its name and click Add Category
Step 3: Add the Item and Cost
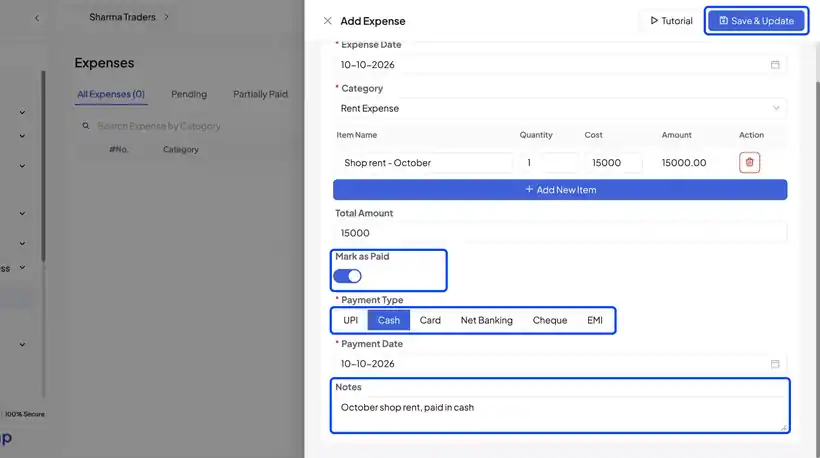
Add the item, for example "Shop rent – October", with its cost. The total amount fills in for you. Click Add New Item to add more lines to the same expense.
Step 4: Mark It Paid (or Leave It Unpaid) and Save
- Already paid? Keep Mark as Paid on, and choose the payment type, like Cash, UPI, Card, Net Banking or Cheque
- Not paid yet? Switch Mark as Paid off. The expense stays Unpaid until you pay it with the Pay Expense button in your list
- Add a note if you like, then click Save & Update
Step 5: Track Your Expenses
Your Expenses list shows every expense with its status. Use the tabs to see what is Pending, Partially Paid or Paid, and check your totals at the bottom.
Frequently Asked Questions
Q: How do I pay an unpaid expense later?
Open Expenses, find the expense and click Pay Expense. Choose the payment type and save.
Q: Can I add GST to an expense?
Yes. Switch on Create Expense With Tax at the top of the form.
Q: Where can I see my total expenses?
The total shows at the bottom of your Expenses list and on the dashboard under Total Expenses.
Need Help?
Our support team is available:
- 📞 Call/WhatsApp: 8882468190
- 📧 Email: support@billclap.com
- 🕐 Support Hours: Monday to Friday, 10 AM – 6:30 PM