
How to bill faster with POS: multiple bills, split payment and team billing
BillClap POS is a fast billing counter for your shop. Scan or search items, keep a separate bill open for every customer in the queue, take cash, UPI or both, and print a receipt in one click. Your stock and tax invoices update on their own. You can also add your staff, so several counters can bill at the same time in the same business, without any clash in bill numbers.
Watch the video
Prefer to watch? See the full POS tutorial (2:22) on YouTube: https://youtu.be/Jf0IjtNV9zo
Before you start
- Add your products with a sell price, MRP, GST rate and (optional) barcode. See Products > Add Product.
- For barcode scanning, connect any USB or Bluetooth barcode scanner to your computer. The POS screen shows Barcode Scanning Enabled at the top.
- For receipts, connect your thermal printer. BillClap shows a 2-inch thermal receipt preview.
Part 1: Start a bill
Step 1: Open POS
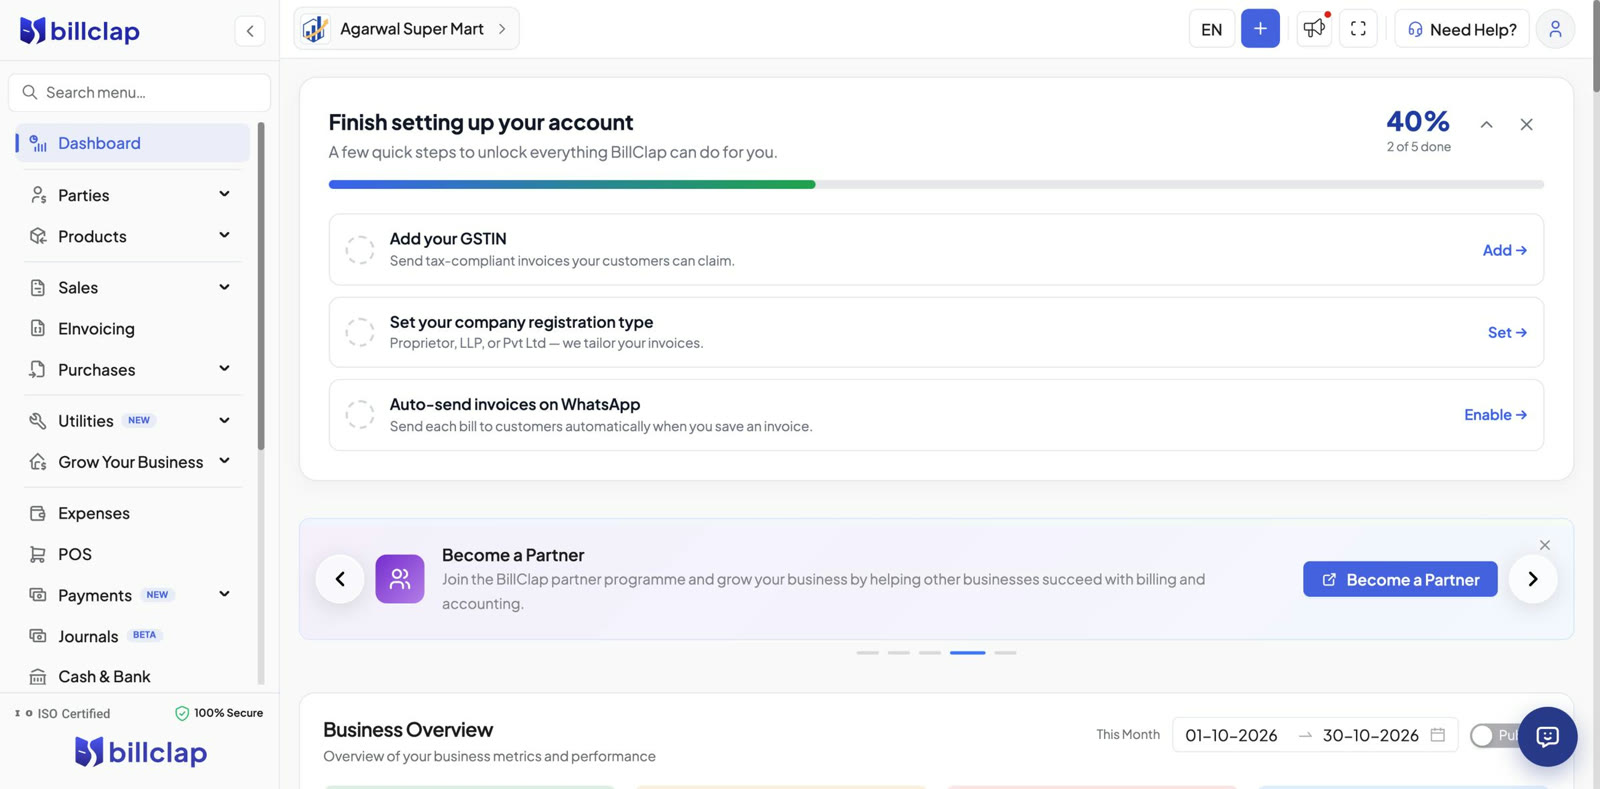
In the left menu, click POS. A clean billing counter opens with an empty bill called Bill #1. Press F11 (or click Fullscreen) to use the whole screen.
Step 2: Scan or search an item
Scan the item's barcode, or type a few letters of its name, code or model number in the search box (shortcut F1). Before you add it, you can see the item's Stock, Price and MRP. Click the item to add it to the bill.
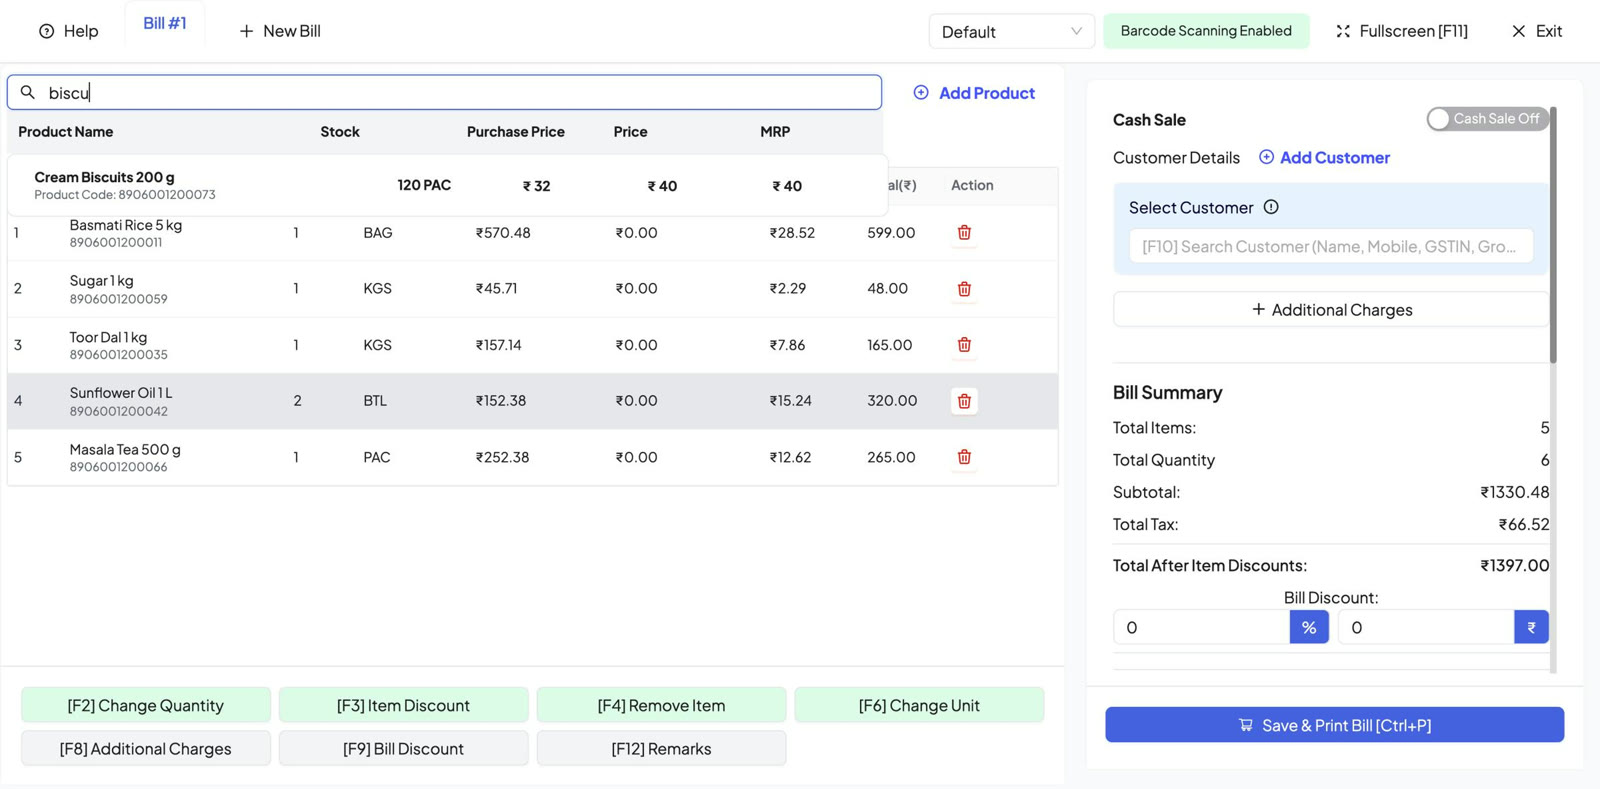
Each item lands in the cart with its price, tax and total worked out for you. The Bill Summary on the right updates live: total items, quantity, subtotal, tax and total.
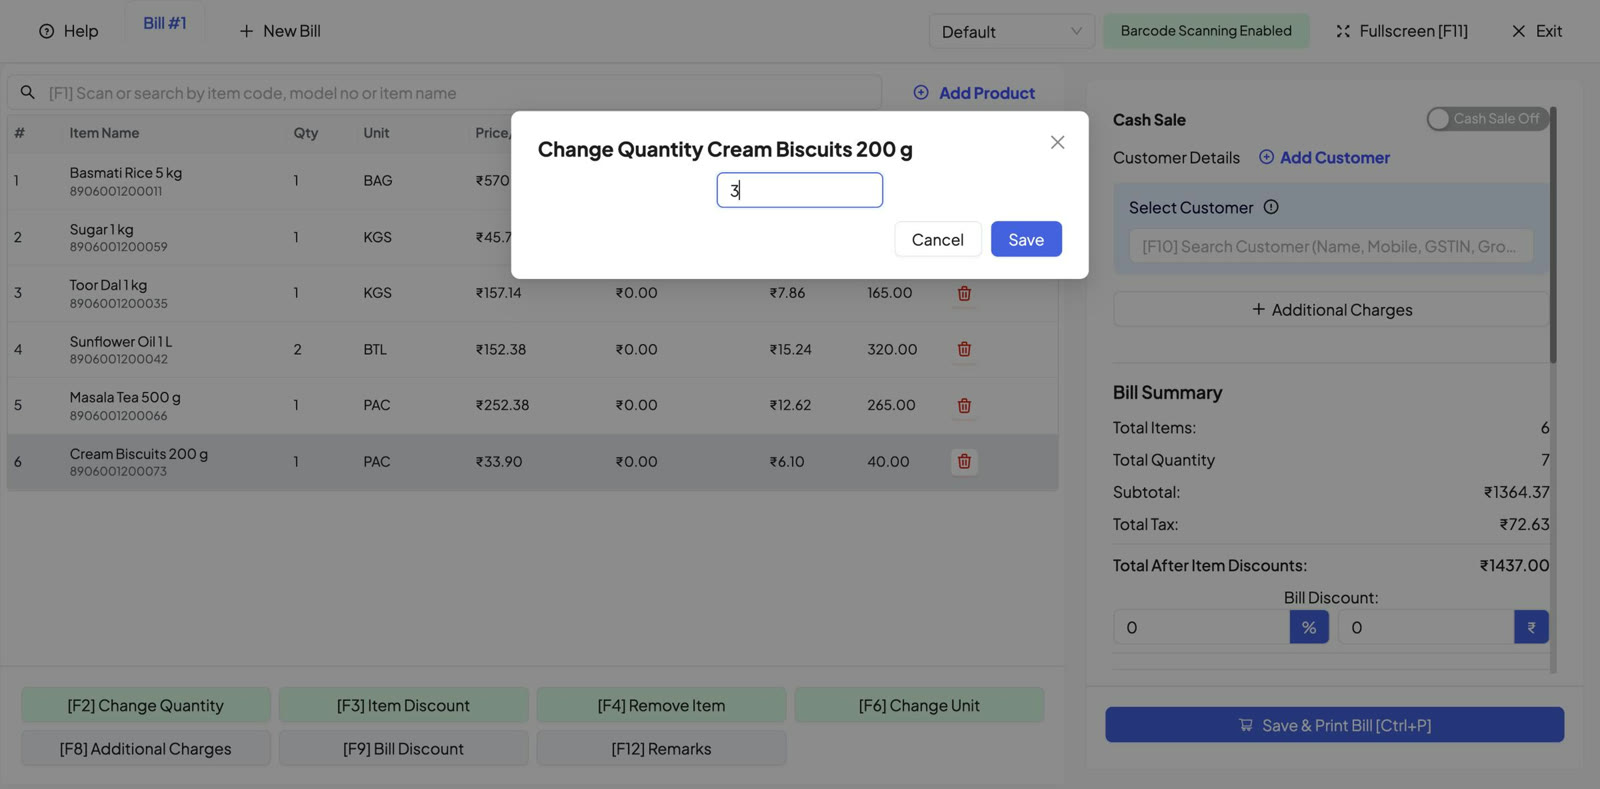
Step 3: Change quantity with F2
Select an item row and press F2. Type the new quantity and press Enter (or click Save).
Other keyboard shortcuts on the POS screen:
- F1: search or scan an item
- F2: change quantity
- F3: item discount
- F4: remove the selected item
- F6: change unit
- F8: additional charges
- F9: bill discount
- F10: search customer
- F12: remarks
- Ctrl + P: save and print the bill
Part 2: Serve many customers at once with bill tabs
Step 4: Open a new bill for the next customer
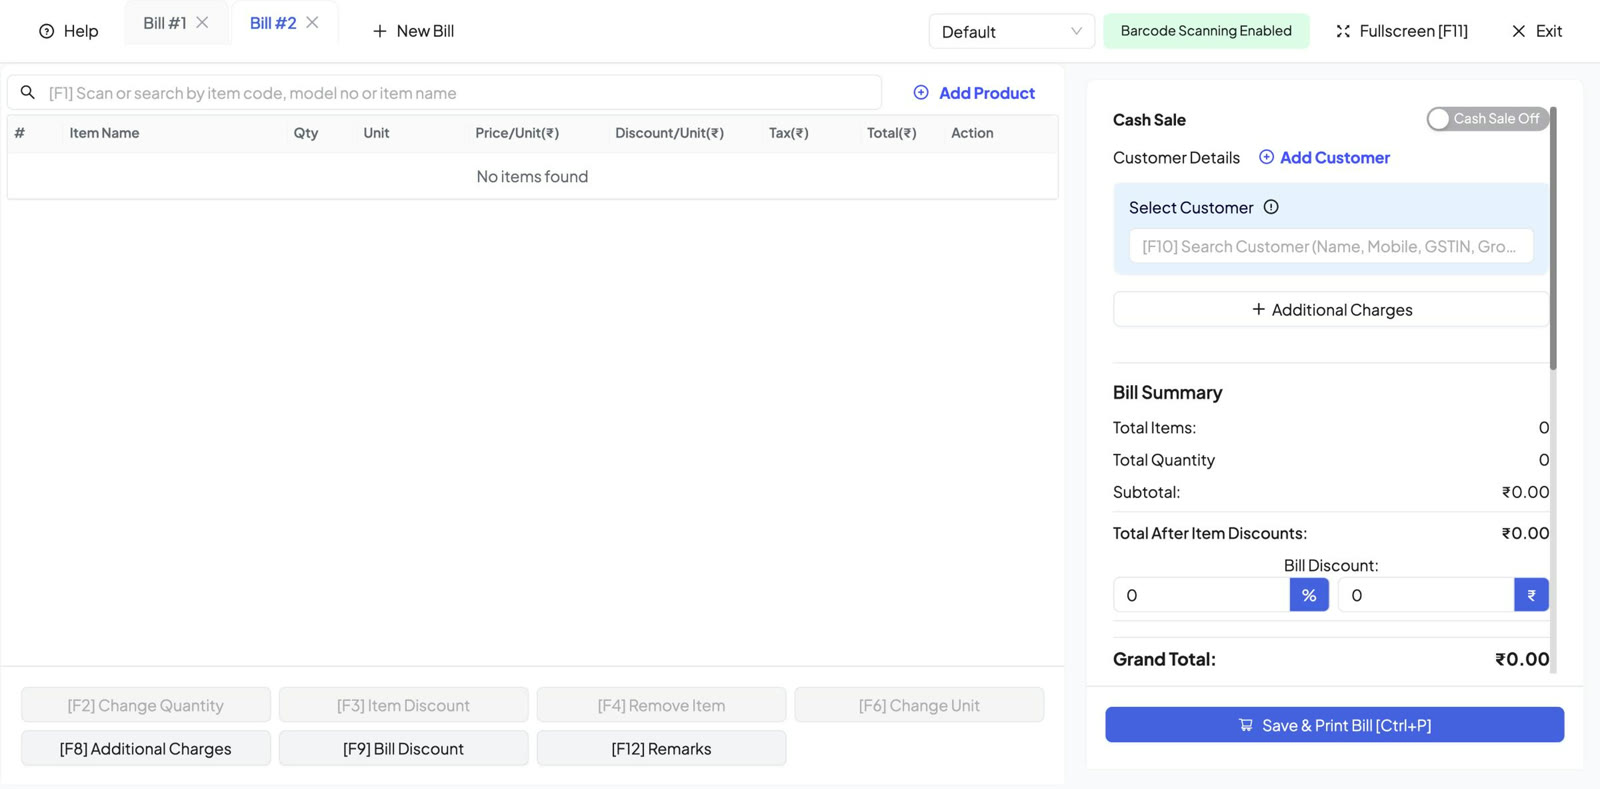
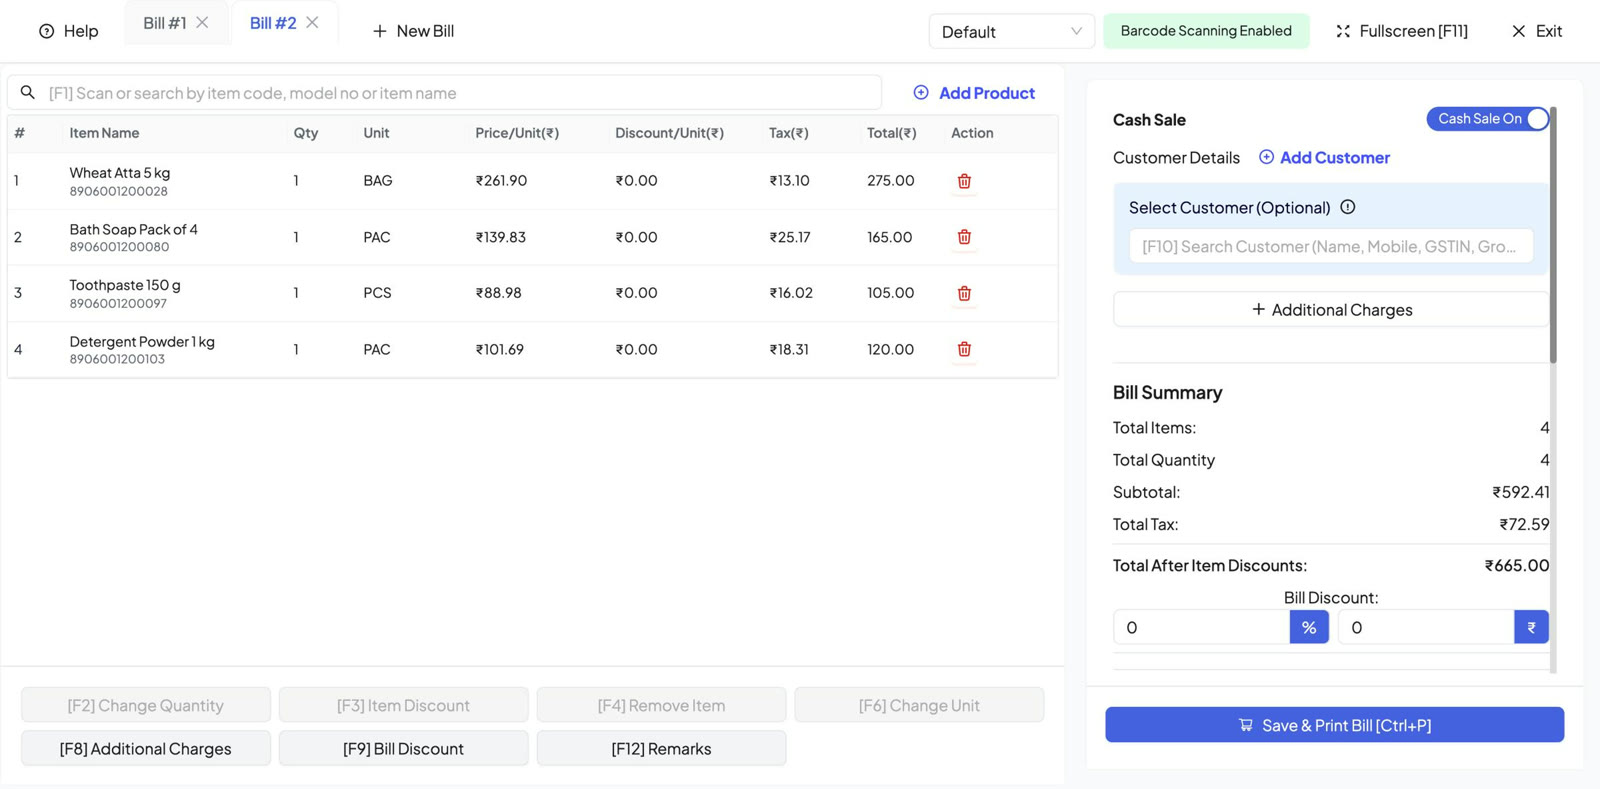
Another customer is waiting while the first one is still shopping? Click + New Bill. Bill #2 opens in its own tab, and Bill #1 waits safely on hold with its cart untouched.
Step 5: Bill a walk-in customer with Cash Sale
Add items to Bill #2 the same way. For a walk-in customer, switch on Cash Sale. The customer then becomes optional, so you can bill without entering any customer details.
Step 6: Switch back and pick the customer
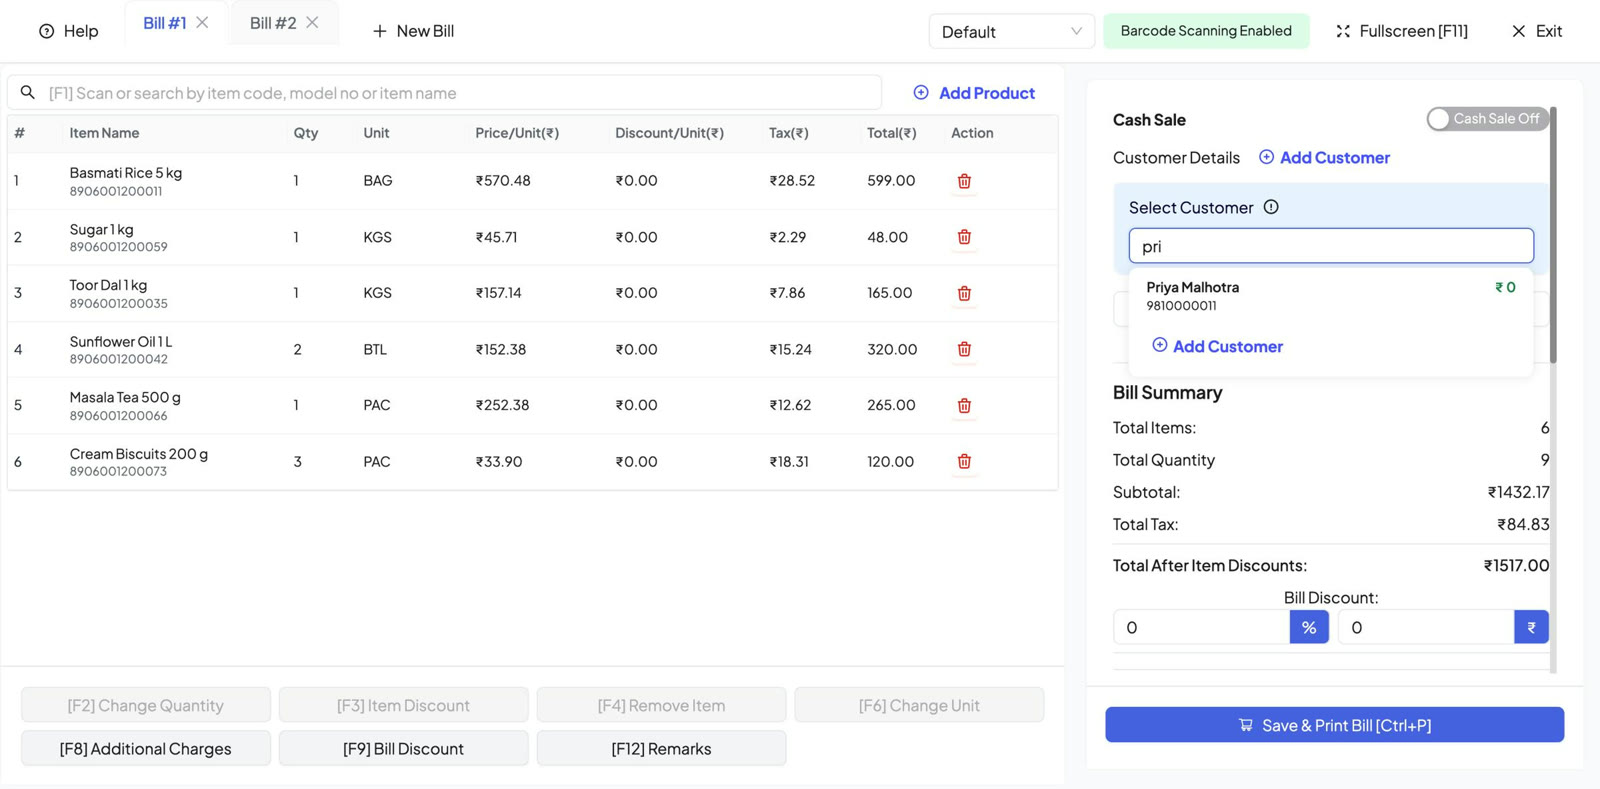
Click the Bill #1 tab to go back. The cart is exactly as you left it. To link the bill to a customer, press F10 and search by name, mobile number, GSTIN or group. Click the customer to select them, or click Add Customer to create a new one.
Part 3: Take payment and print
Step 7: Add a discount and take payment
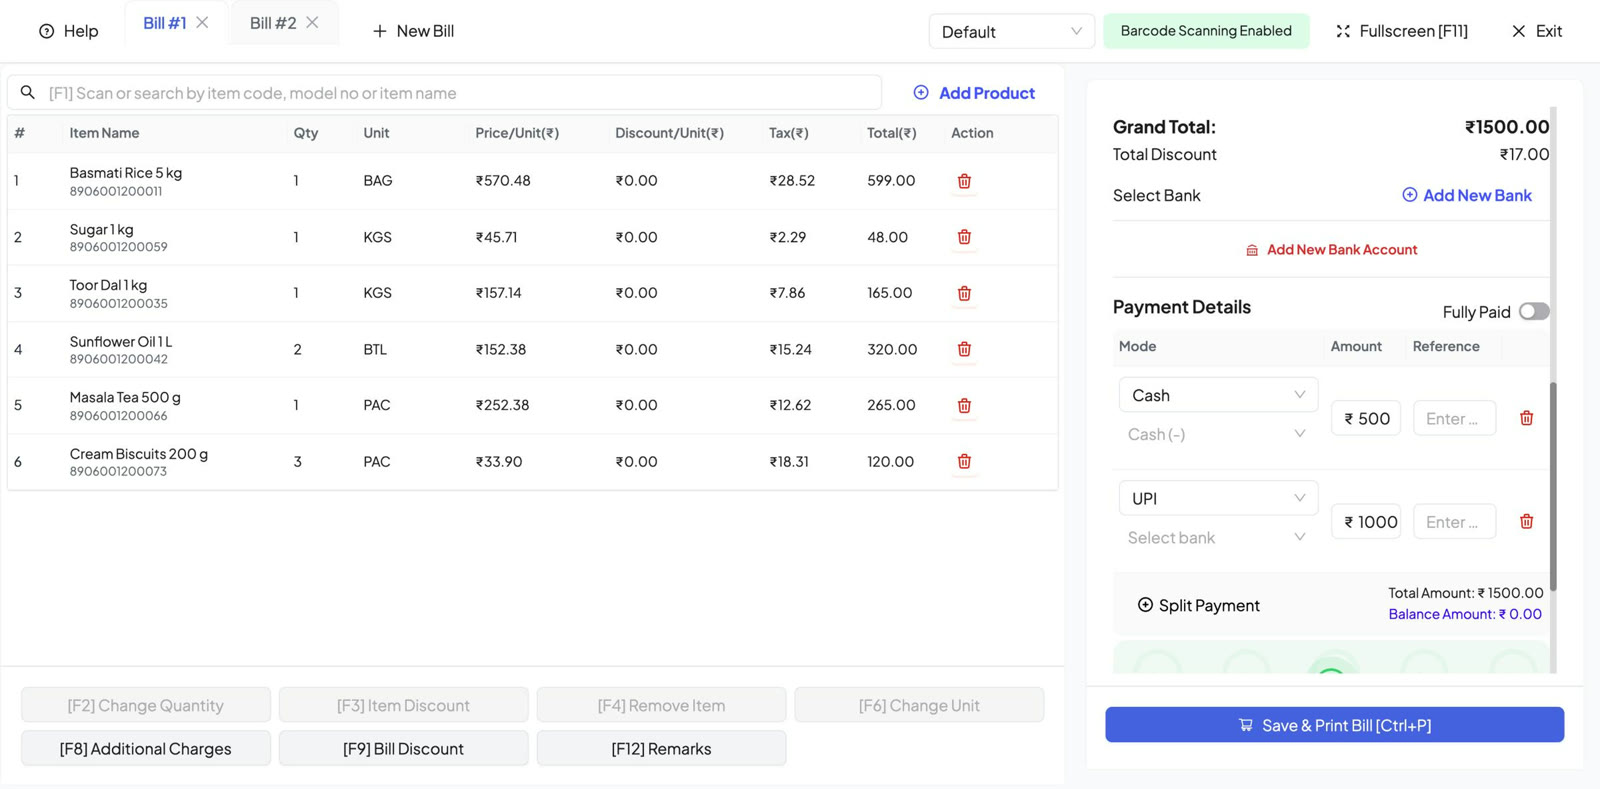
In Bill Discount, enter a discount in % or in ₹ if you want. Then fill Payment Details: choose the mode (Cash, UPI, Card, Cheque, Bank Transfer and more) and the amount. To split a payment, click Split Payment and add a second line, for example ₹500 in cash and ₹1,000 by UPI. When the Balance Amount shows ₹0, the bill is fully paid.
Step 8: Save and print the receipt
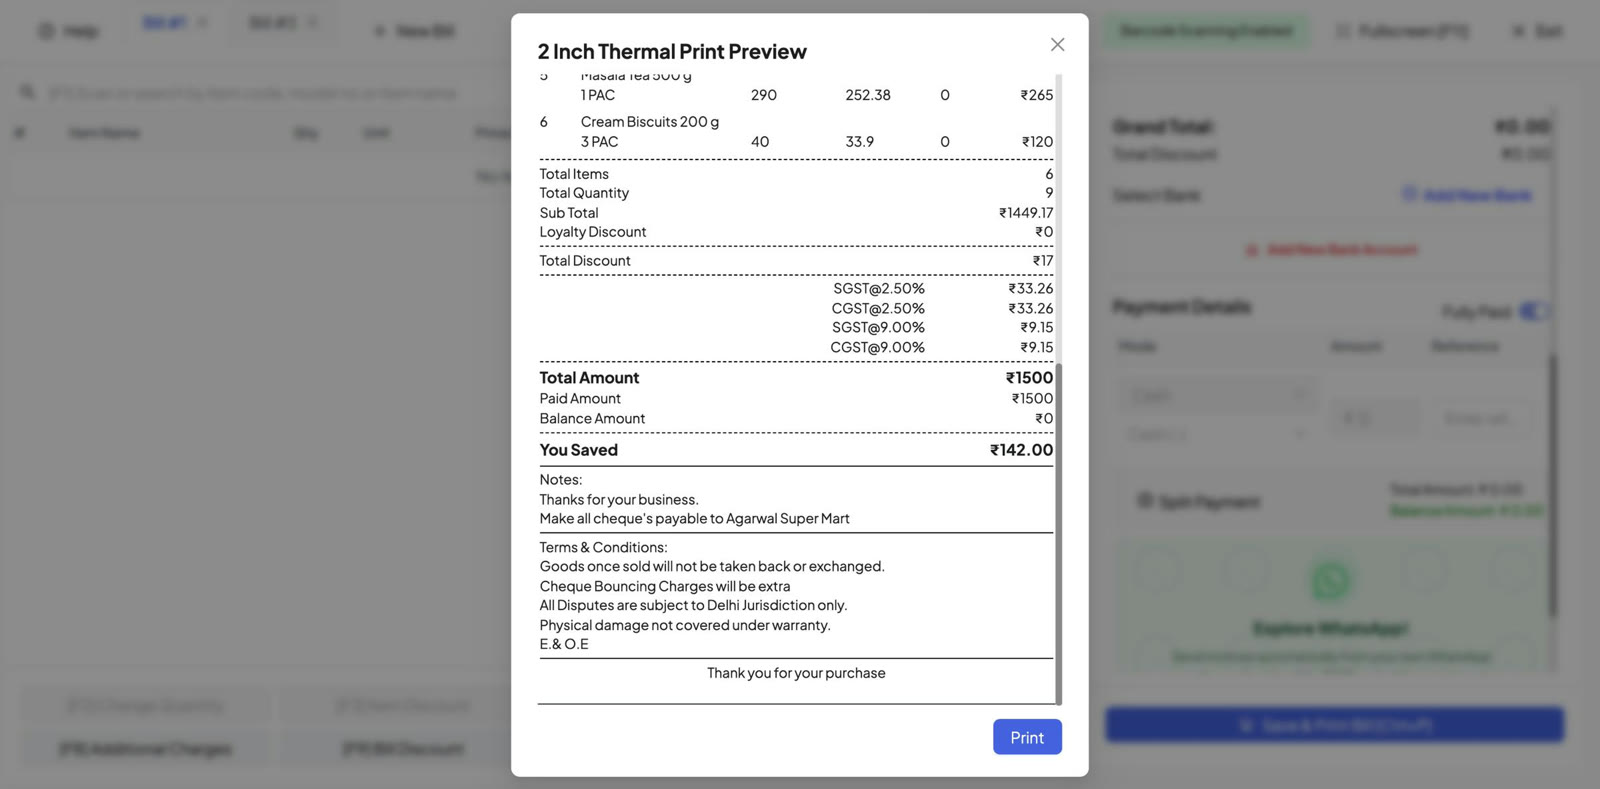
Click Save & Print Bill or press Ctrl + P. The bill is saved and a 2 Inch Thermal Print Preview opens straight away. Click Print to print it on your thermal printer.
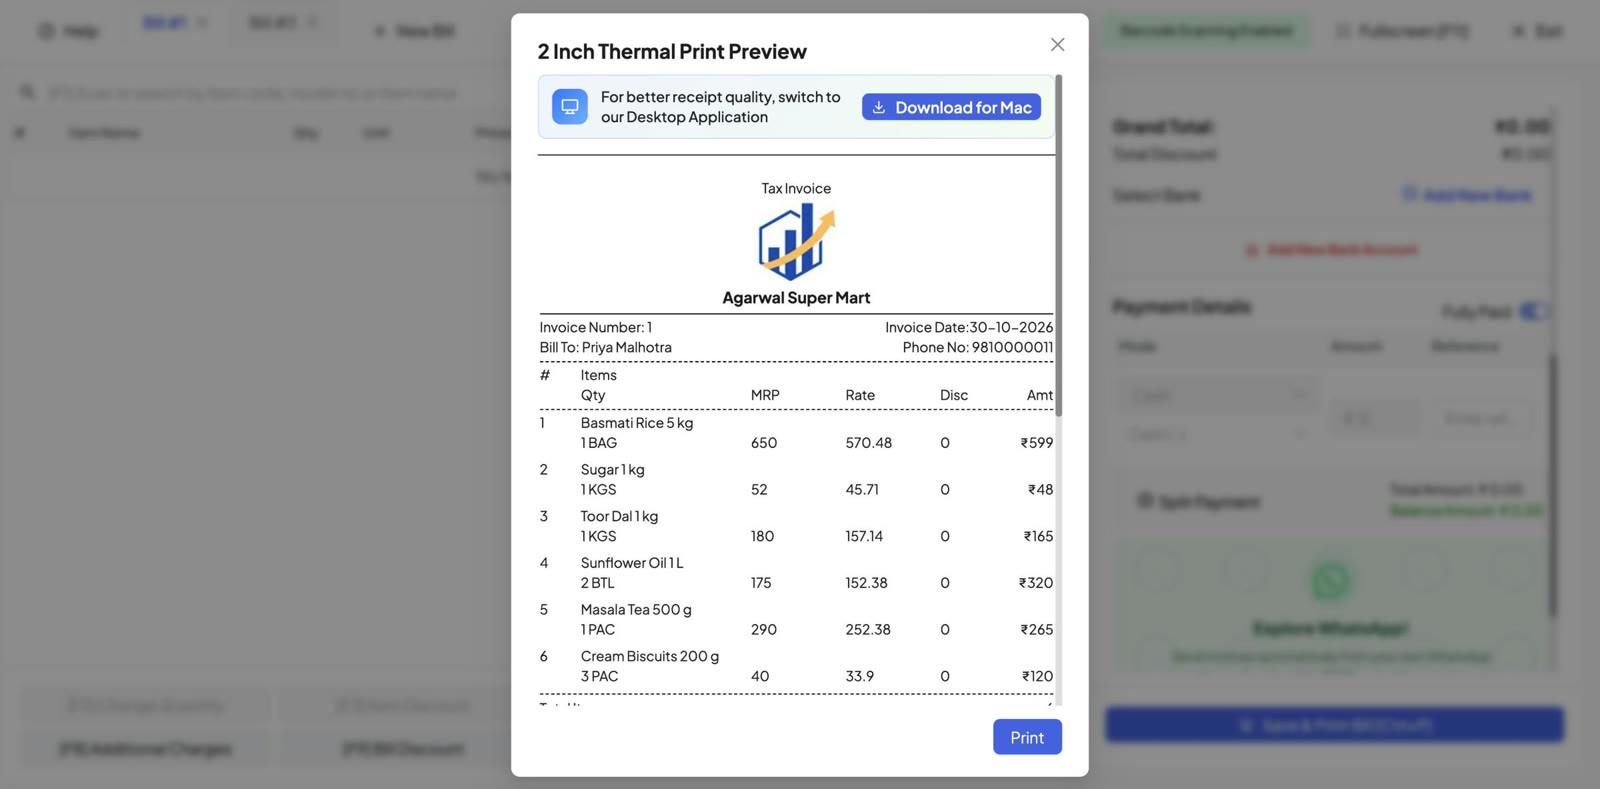
The receipt shows the invoice number, customer, items with MRP and rate, the GST breakup (CGST and SGST), total discount, amount paid, balance, and how much your customer saved on MRP.
Part 4: Every sale is on record
Step 9: Find your POS bills in Tax Invoices
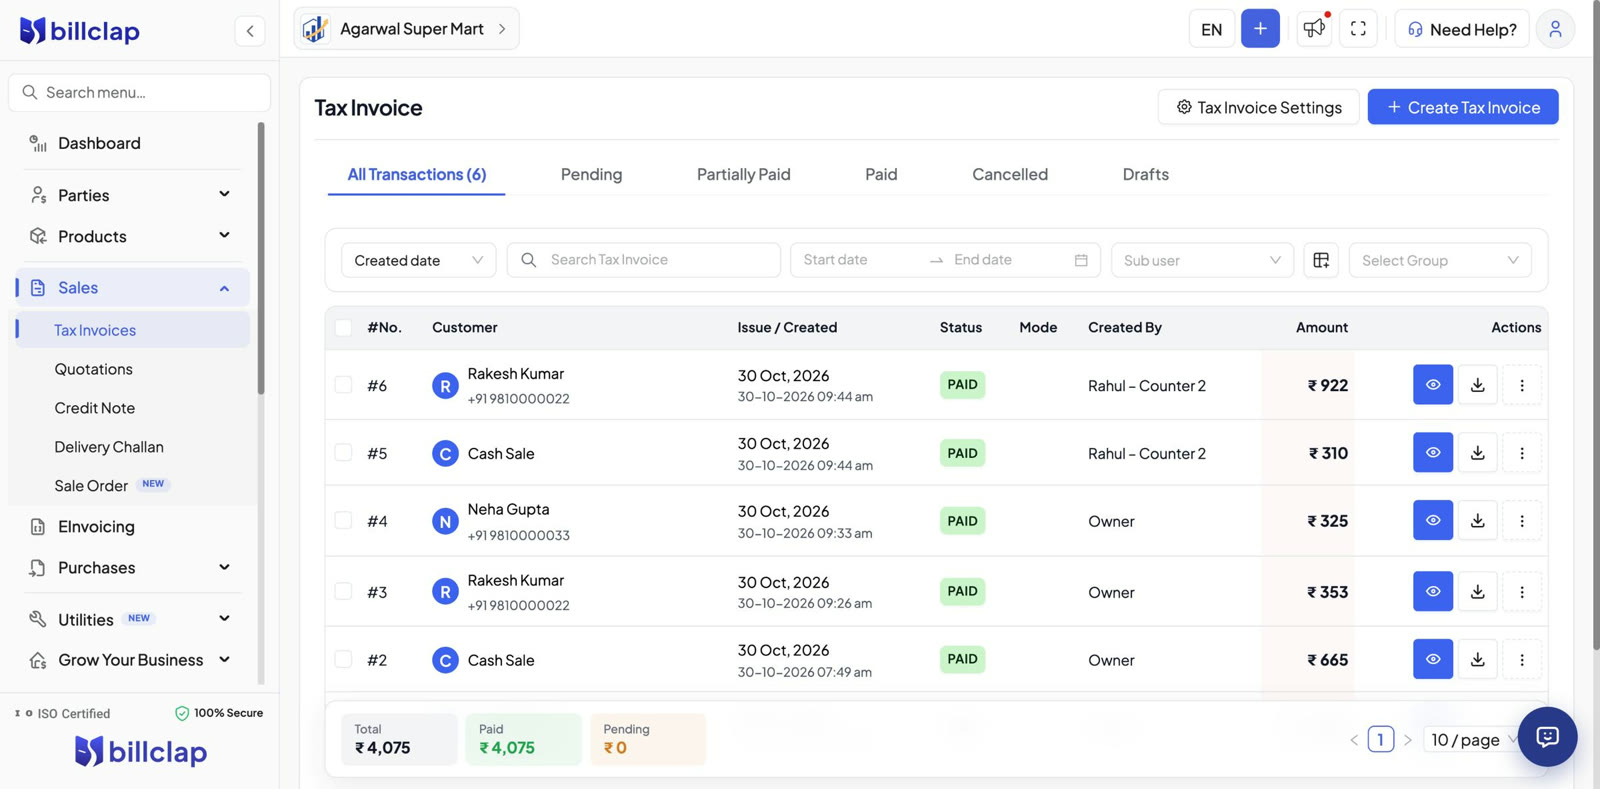
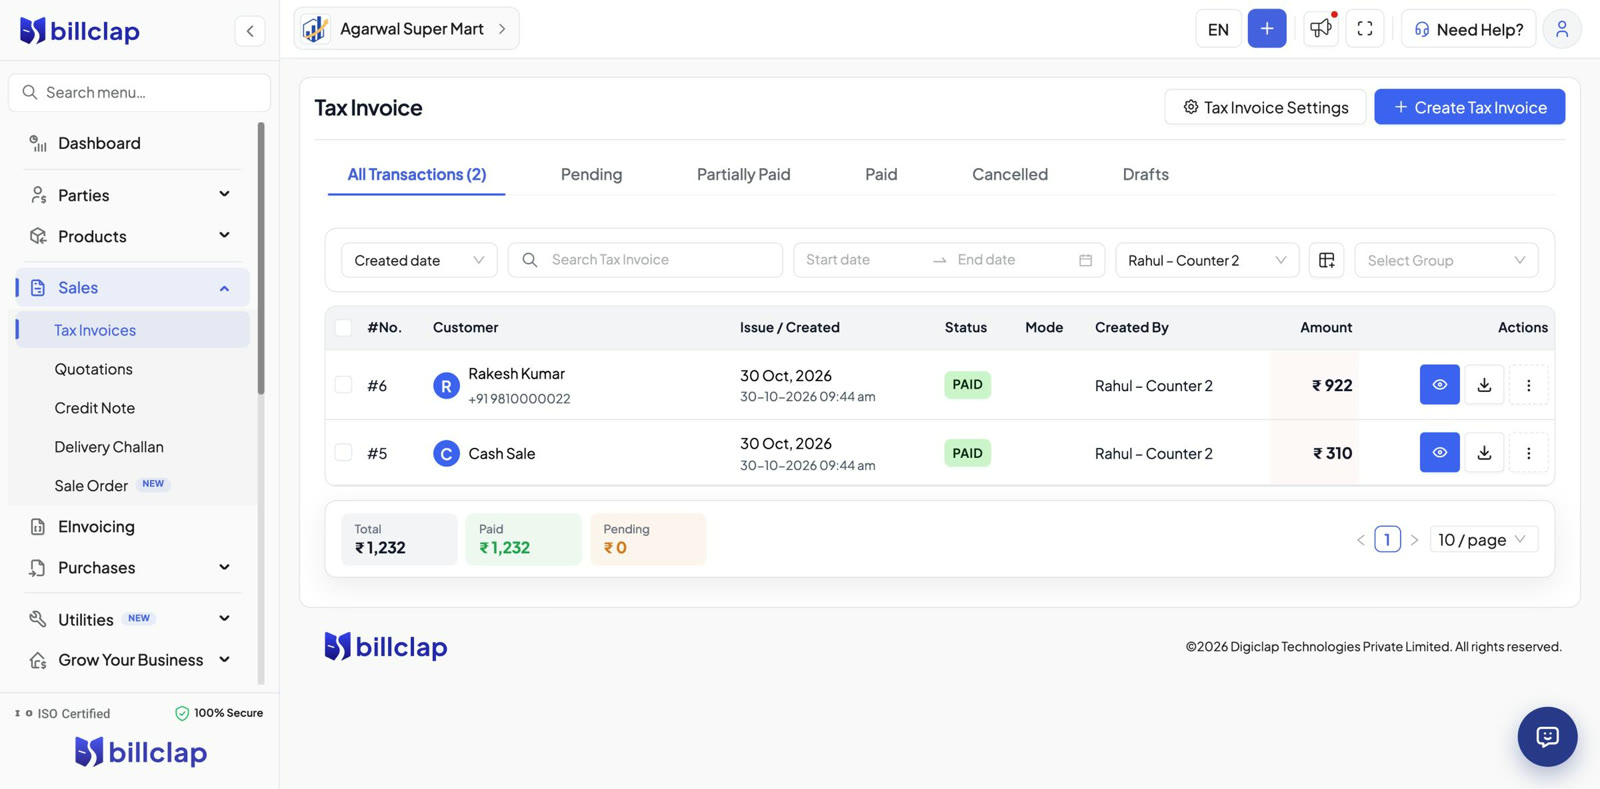
Every POS bill is saved as a tax invoice. Go to Sales > Tax Invoices to see all of them with status (for example PAID), customer, date and amount.
Step 10: Stock updates on its own
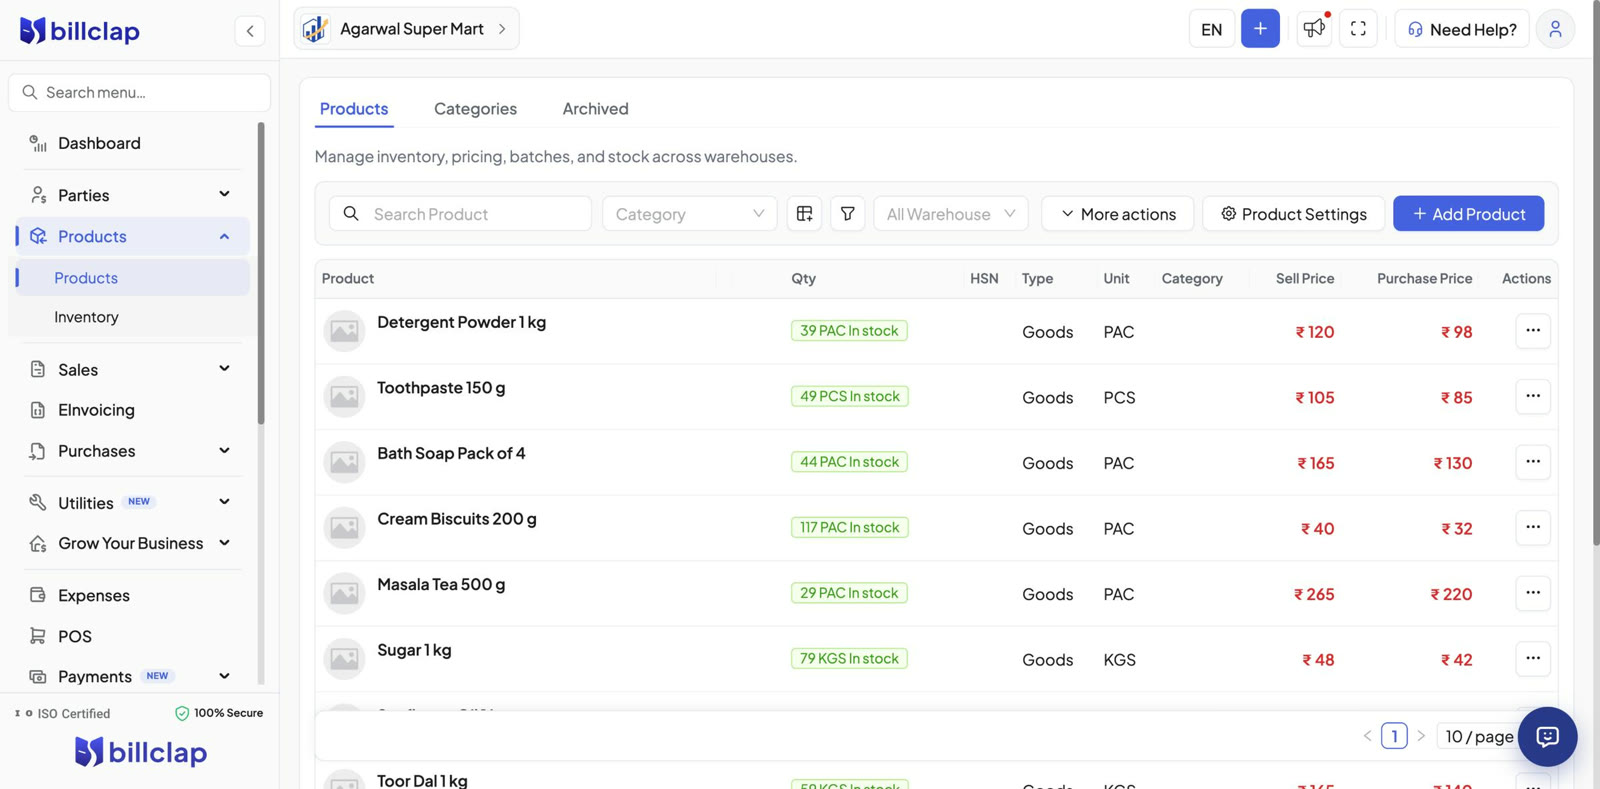
You don't need to update stock after a POS sale. Go to Products and you'll see the quantity has already gone down. For example, after selling 3 packs of biscuits, stock moves from 120 to 117.
Part 5: Let your whole team bill at the same time
If your shop has more than one counter, or more than one person billing, add each staff member as a user. Everyone bills in the same business at the same time.
Step 11: Add a staff member
Go to Settings > User/Roles and click Add New User. Enter the staff member's name, phone number and email, choose a Role (for example Sales), set Permissions (Create, Edit, Delete) and choose the Tabs Privilege: the modules they can open, such as POS. Click Create User.
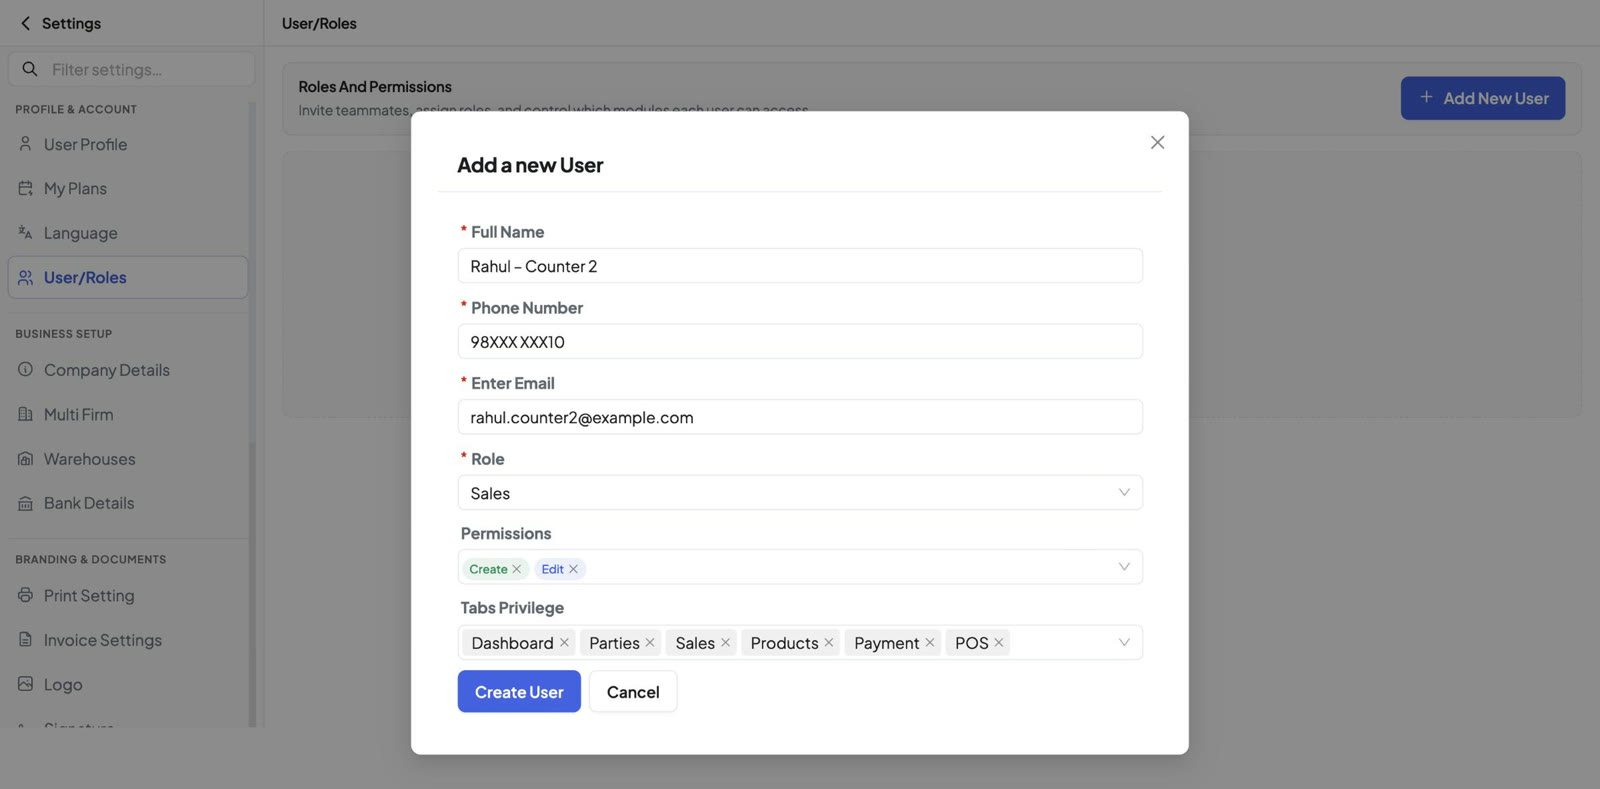
BillClap sends an invitation to the staff member's email. Once they accept it, your business appears in their own BillClap account, and they can log in with their phone number and start billing. Their menu only shows the modules you allowed.
Step 12: Bill numbers stay in sequence, with no clash
The owner and the staff can create bills at the same time, even seconds apart. BillClap gives every bill the next number in the same series, so there are no duplicate numbers and no gaps.
Step 13: See who made each bill
In Sales > Tax Invoices, the Created By column shows which user made each bill. Use the Sub user filter to see only one staff member's bills and their total. This makes end-of-day cash reconciliation for each counter quick and simple.
Frequently asked questions
Can I keep more than two bills open?
Yes. Click + New Bill as many times as you need. Each bill keeps its own cart, customer and payment until you save it or close its tab.
Do I need a barcode scanner?
No. You can search items by name, code or model number. A scanner just makes billing faster.
Can I bill without a customer's details?
Yes. Switch on Cash Sale and the customer becomes optional.
Will two staff members ever get the same bill number?
No. Bill numbers come from one shared series for the business, so every bill gets a unique number in sequence, even when bills are saved at the same time from different counters.
Can a staff member see everything in my account?
No. They only see the modules you select in Tabs Privilege, and can only do the actions you allow in Permissions. You can change this any time with Edit Role.
Need more help? Write to help@billclap.com or browse more tutorials at help.billclap.com.