Step-by-Step Guide to Add New User Roles
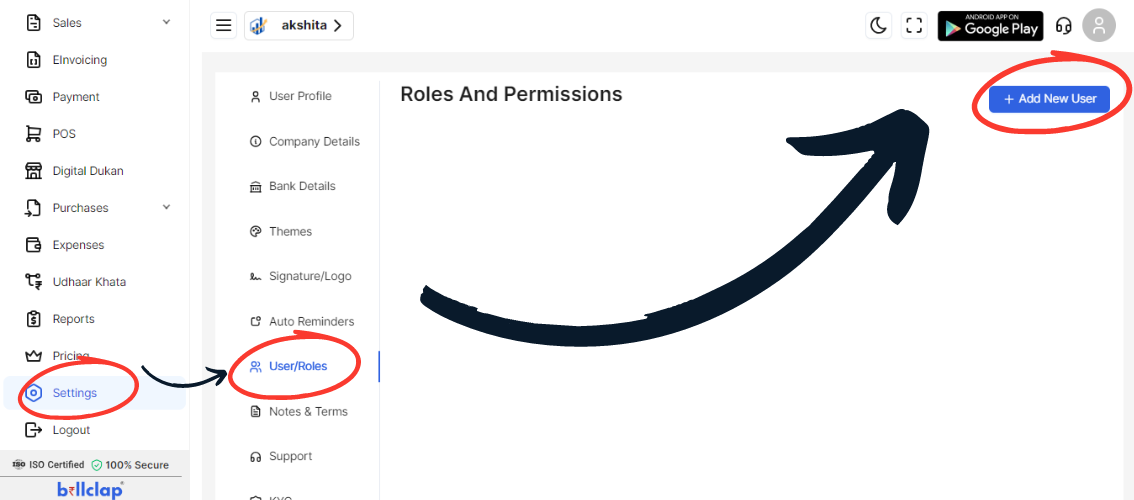
Access Settings from the Dashboard:
Log in to your account on the dashboard.
Navigate to the main menu or dashboard area where you can find various settings options.
Click on User Roles in Settings:
Look for a settings icon or gear symbol, often located in the top right corner or in the main menu.
Click on this icon to open the settings menu.
In the settings menu, select the “User Roles” option.
Click on Add New User Button:
Once in the User Roles section, find and click on the “Add New User” button.

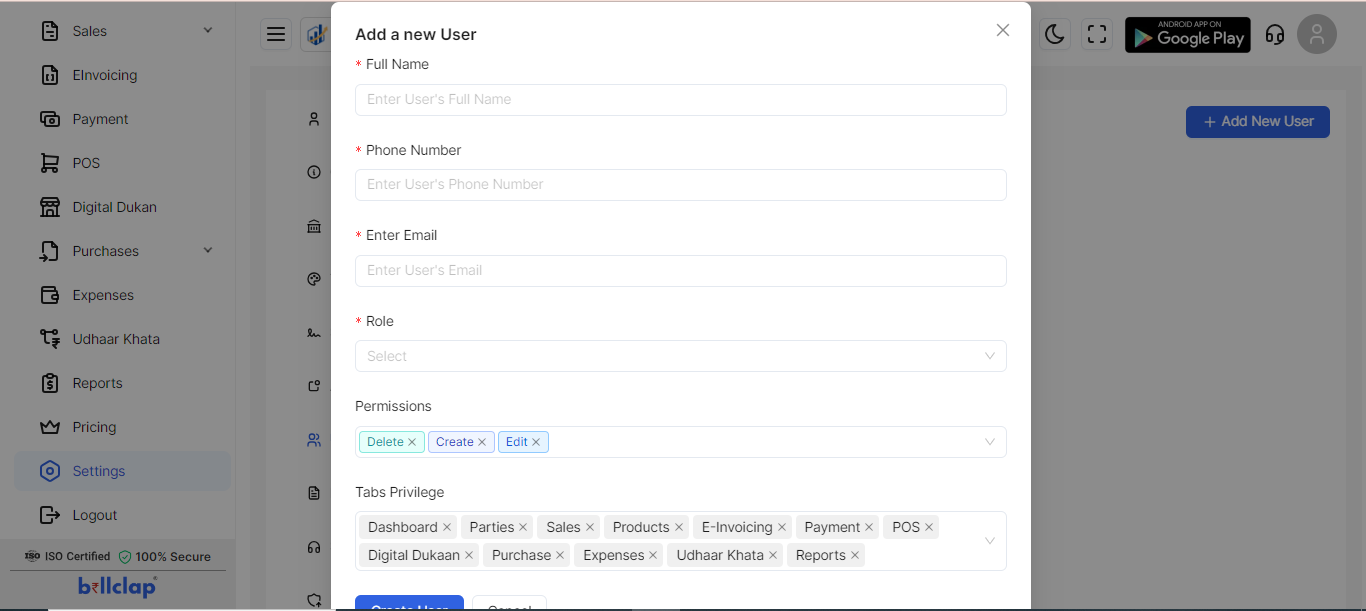
Fill in User Information:
Full Name: Enter the full name of the new user.
Phone Number: Provide the phone number of the new user.
Enter Email: Enter the email address of the new user.
Role: Select the appropriate role for the user from the dropdown menu.

Set Permissions:
Delete: Check this option if the user should have permission to delete items.
Create: Check this option if the user should have permission to create new items.
Edit: Check this option if the user should have permission to edit items.
Set Tabs Privilege:
Assign privileges for different tabs or sections as required by the user’s role.
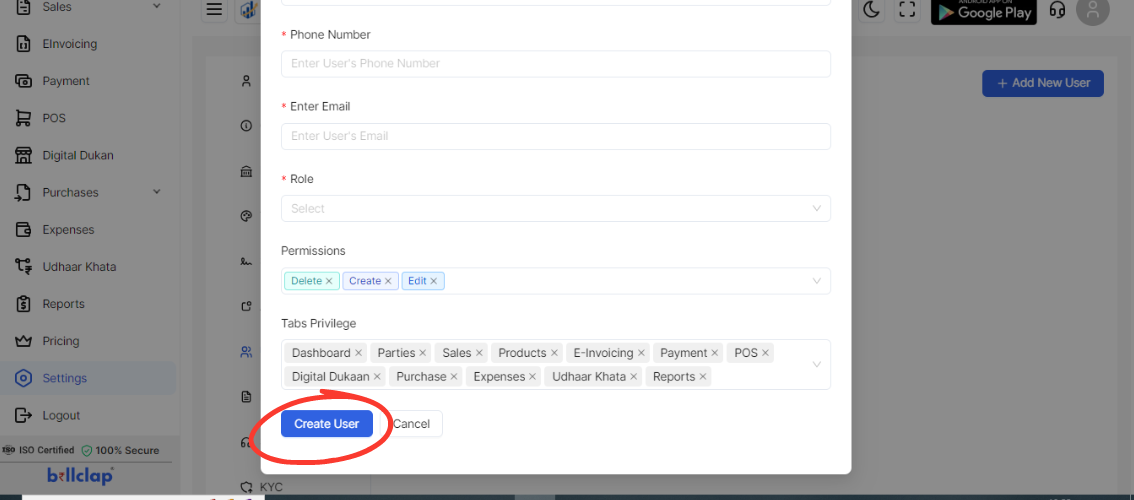
Click on Create User:
Once all information is filled in and permissions are set, click on the “Create User” button to finalize adding the new user role.

Verify New User Role:
Review the list of user roles to confirm that the new user has been added correctly.
Check if the user has the appropriate access and permissions.
Summary
Access Settings: Dashboard → Settings icon/gear.
Click on User Roles: Select “User Roles.”
Add New User: Click “Add New User.”
Fill in Information:
Full Name
Phone Number
Enter Email
Role
Set Permissions: Delete, Create, Edit.
Set Tabs Privilege: Assign as needed.
Create User: Click “Create User.”
Verify Role: Check the user list.