Step-by-Step Guide to KYC Verification
Access Settings from the Dashboard:
Log in to your account on the dashboard.
Navigate to the main menu or dashboard area where you can find various settings options.
Click on KYC in Settings:
Look for a settings icon or gear symbol, usually found in the top right corner or in the main menu.
Click on this icon to open the settings menu.
In the settings menu, select the “KYC” option.
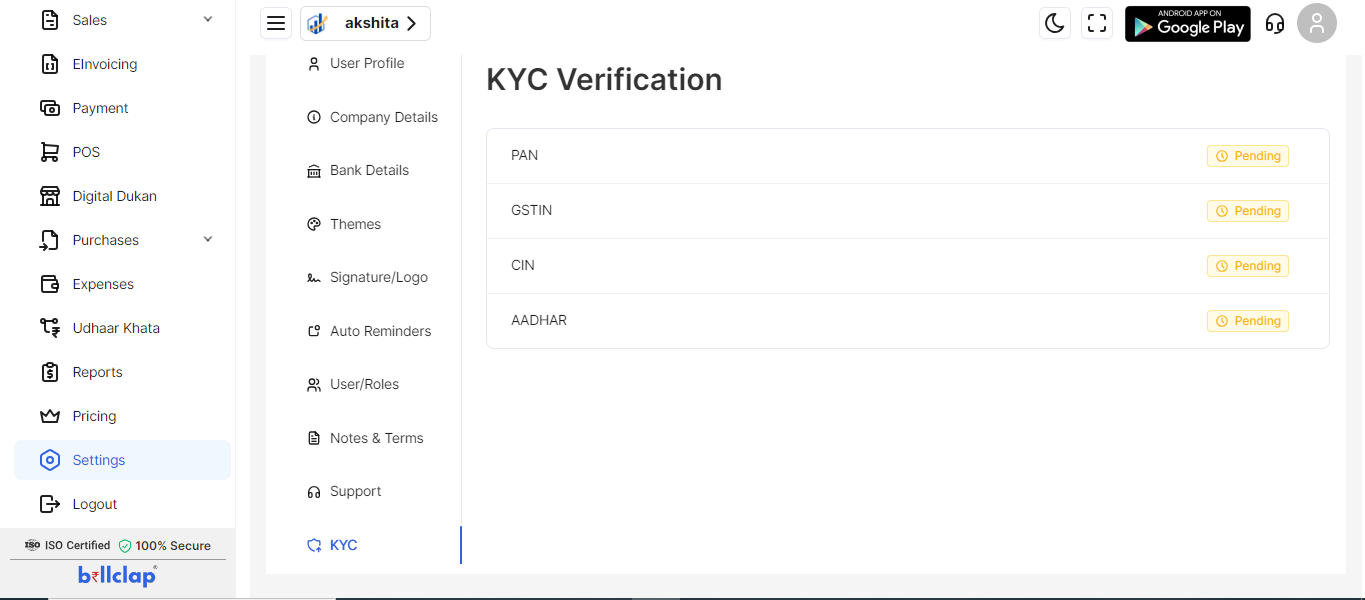
Choose the Verification Type:
You will have various options for verification:
GSTIN
PAN
CIN
Aadhar
Click on the type of verification you want to complete.
Complete PAN Verification:
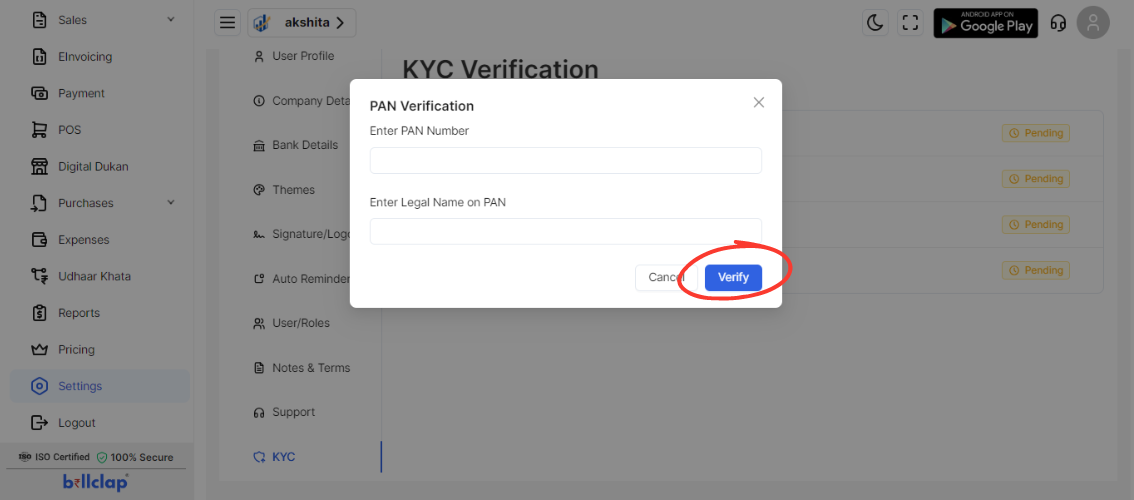
Enter PAN Number: Input your PAN number in the provided field.
Enter Legal Name on PAN: Enter the legal name as it appears on the PAN card.
Click on “Update” to save the PAN verification details.
Complete GSTIN Verification:
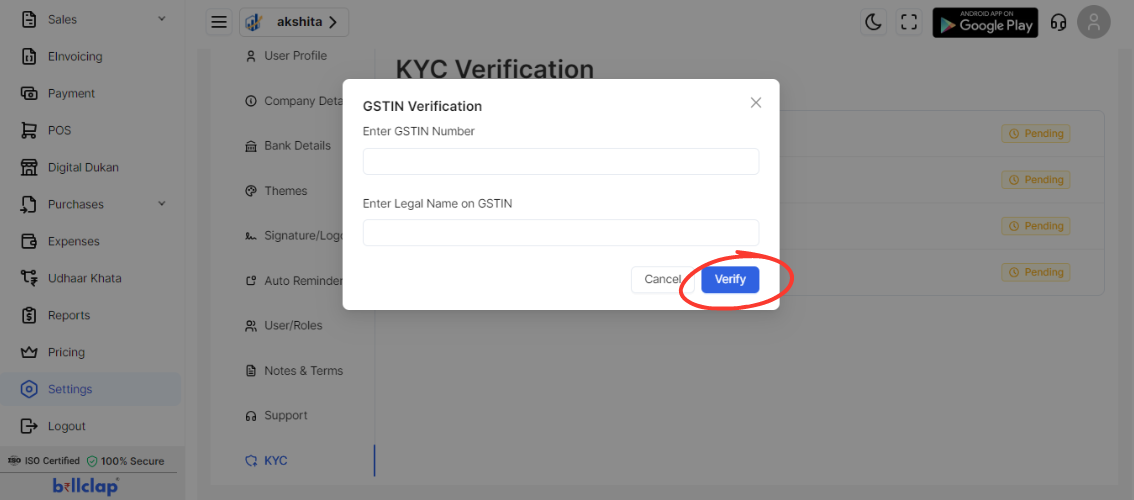
Enter GSTIN Number: Input your GSTIN number in the provided field.
Enter Legal Name on GSTIN: Enter the legal name as it appears on the GSTIN documentation.
Click on “Verify” to save and verify the GSTIN details.
Complete CIN Verification:
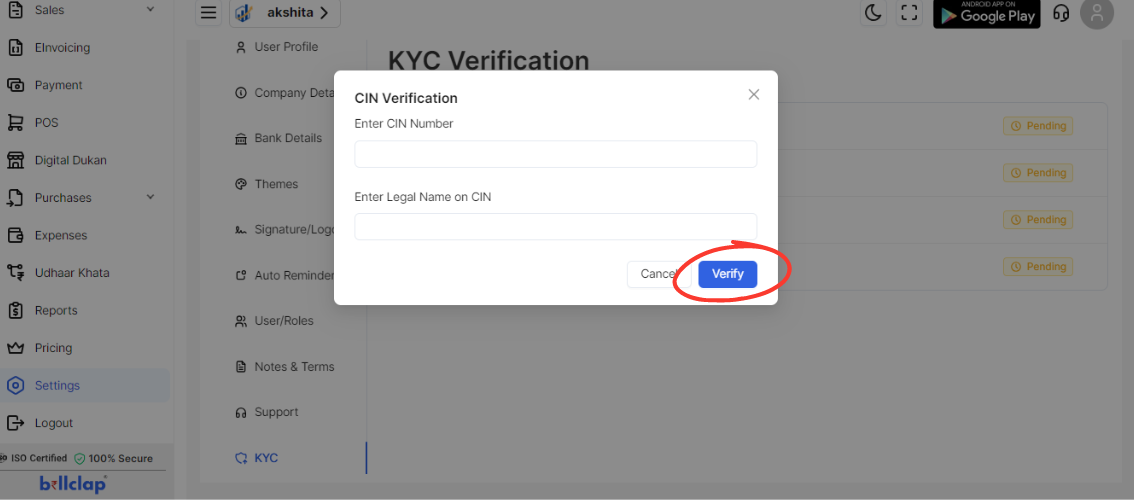
Enter CIN Number: Input your CIN number in the provided field.
Enter Legal Name on CIN: Enter the legal name as it appears on the CIN documentation.
Click on “Update” to save the CIN verification details.
Complete Aadhar Verification:
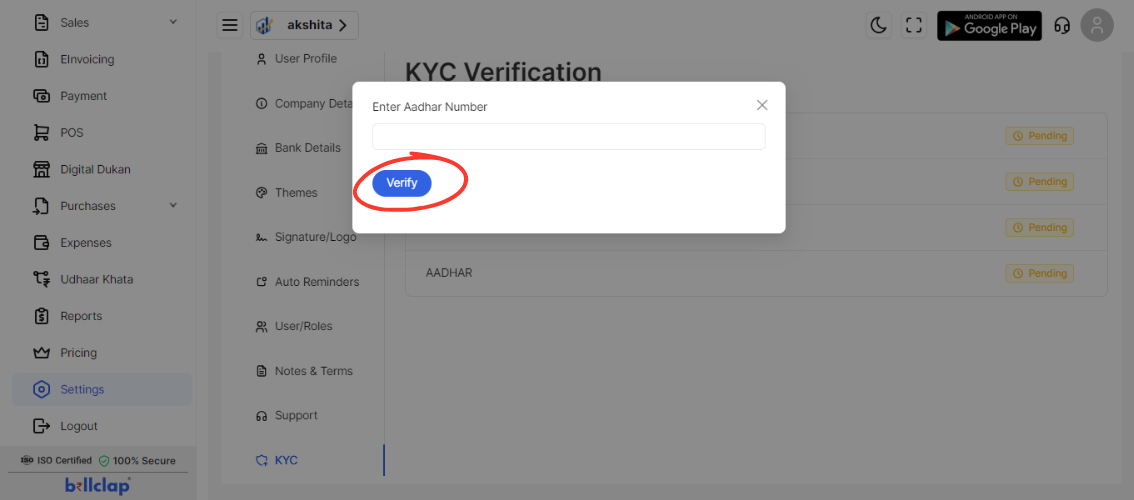
Enter Aadhar Number: Input your Aadhar number in the provided field.
Click on “Update” to save the Aadhar verification details.
Verify All Details:
Review all the entered details for accuracy.
Ensure that each verification step has been saved and verified correctly.