

Accessing Customer Management
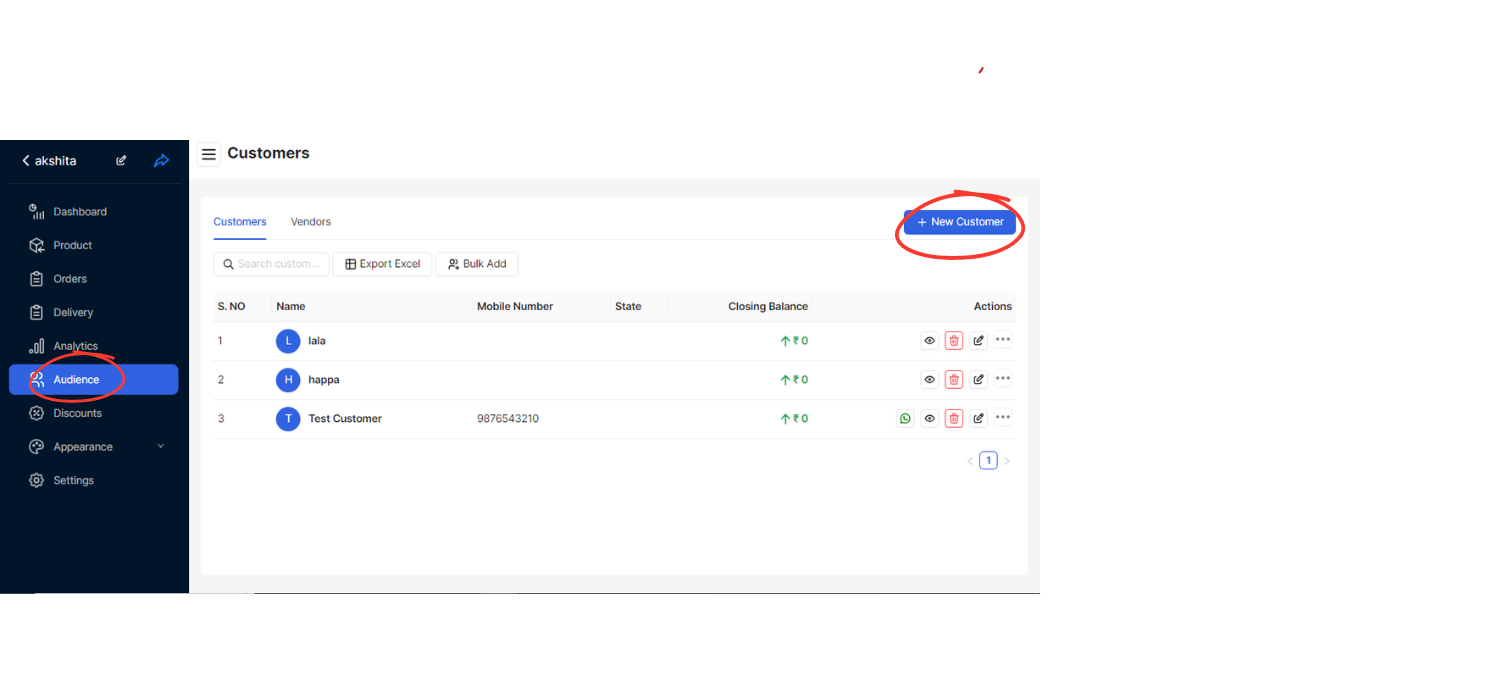
Log in to your Digital Dukaan 2.0 account and navigate to the dashboard or main menu.
Look for the option labeled "Add Customer" or similar. Click on it to begin adding a new customer.
Enter Customer Details
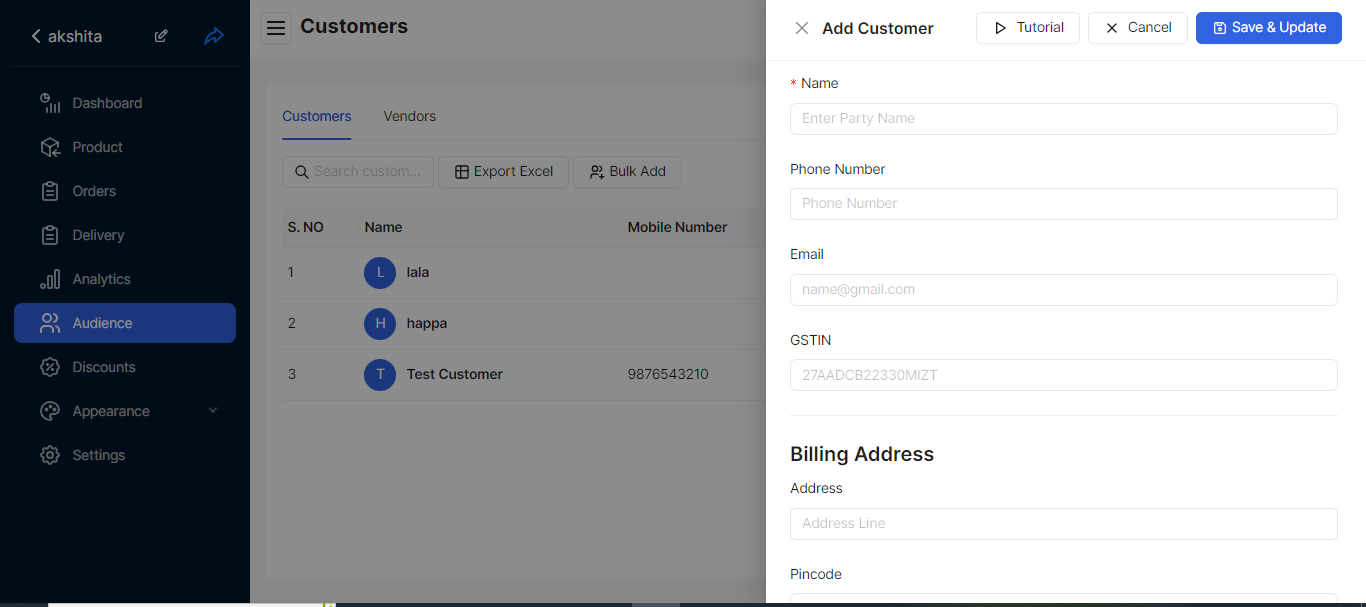
Fill in the following details for the customer:
Name: Enter the full name of the customer.
Phone Number: Input the customer's contact number.
Email: Provide the customer's email address (if applicable).
GSTIN (Goods and Services Tax Identification Number): Enter the customer's GST identification number, if required.
Billing Address: Input the complete billing address where invoices will be sent.
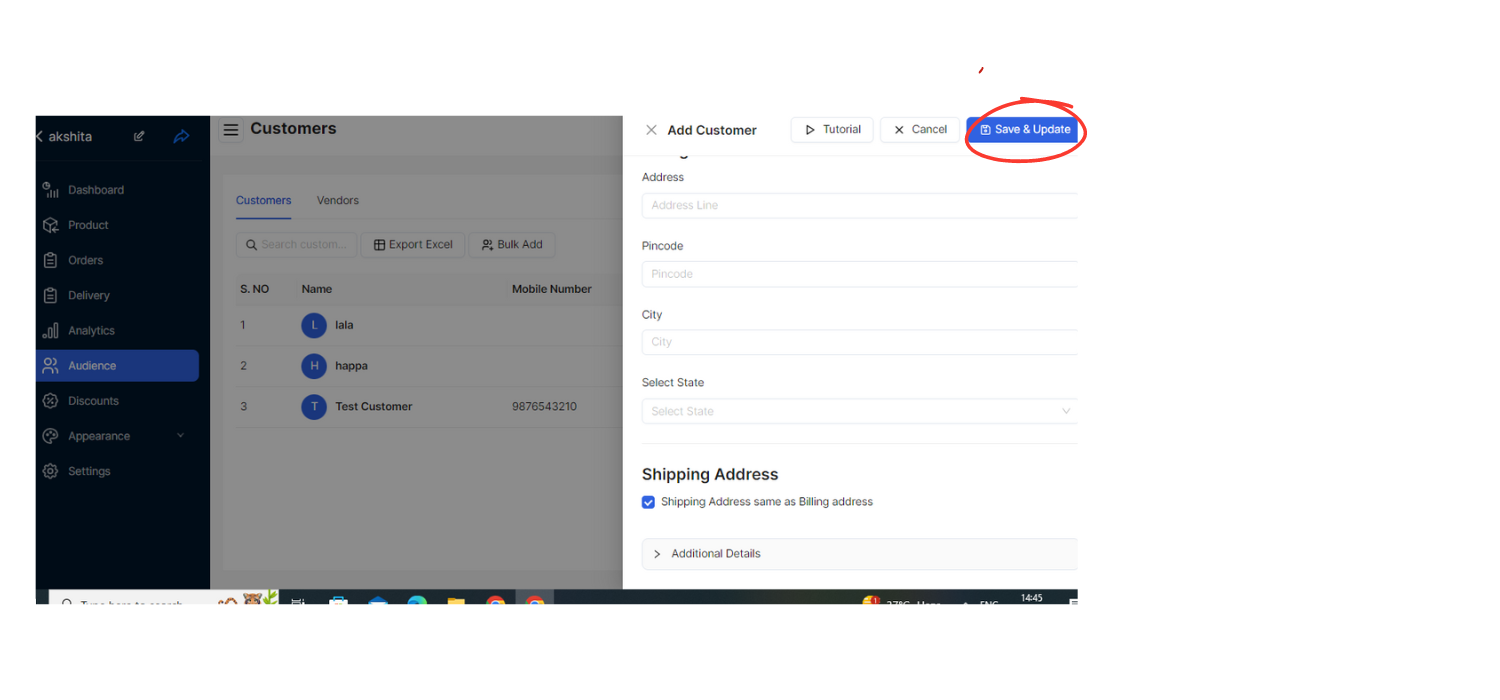
Pincode: Enter the postal code or ZIP code of the billing address.
City: Specify the city or locality associated with the billing address.
State: Select the state from a dropdown menu provided.
Shipping Address: If the shipping address differs from the billing address, check the appropriate option and provide the complete shipping address details.
Save Customer Information
Double-check all entered details for accuracy, ensuring all mandatory fields are filled correctly.
Once verified, save the customer's information by clicking on a "Save" or "Submit" button (depending on the platform's interface).
Confirmation
After saving, you should receive a confirmation message indicating that the customer has been successfully added to your Digital Dukaan 2.0 account.
Further Management
Manage customer details as needed, such as editing contact information, adding notes, or updating addresses.