
Accessing Blog Creation
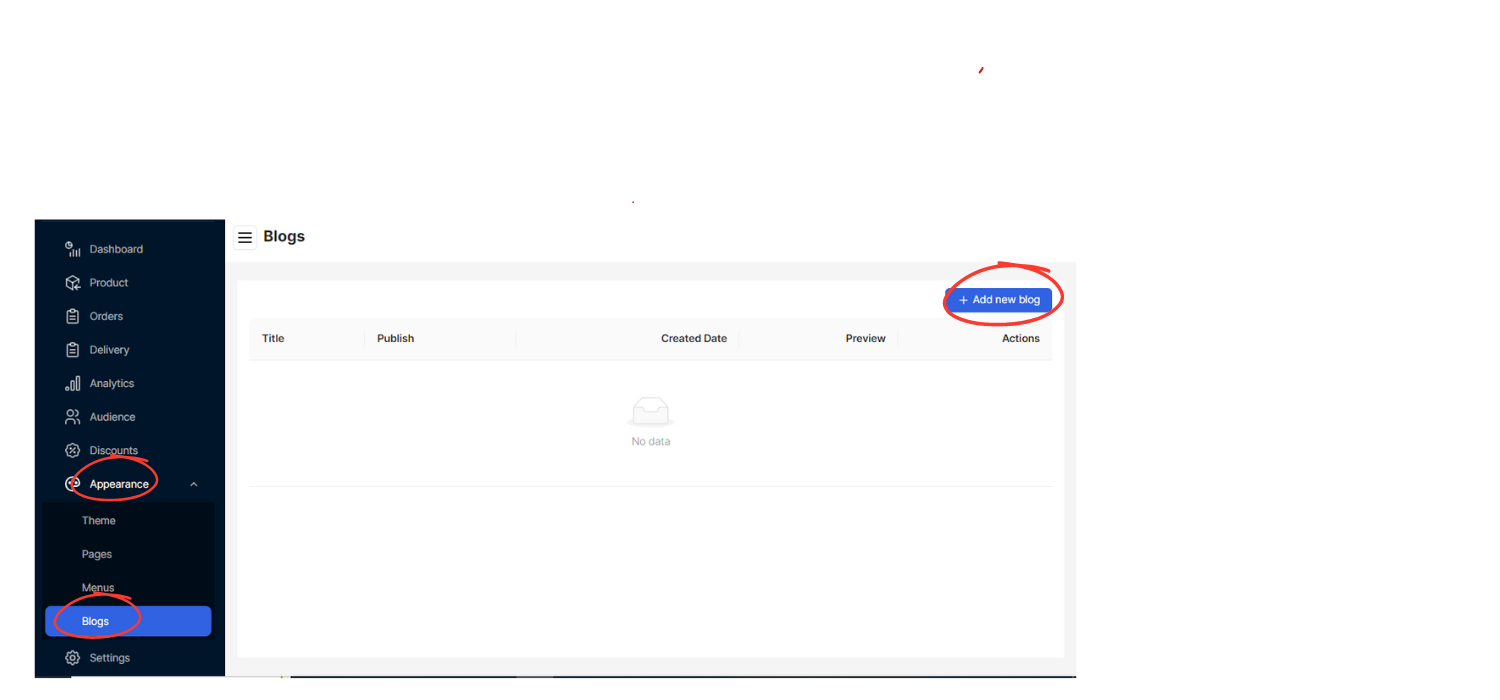
Log in to your Digital Dukaan 2.0 account on BillClap and navigate to the dashboard.
Look for the option labeled "Blog" or "Posts" in the menu. Click on it to proceed to the blog management section.
Adding a New Blog Post
Look for the "Add New" button or similar option within the blog management section. Click on it to start creating a new blog post.
Blog Details
Blog Title: Enter a title for your blog post. This should be descriptive and attention-grabbing.
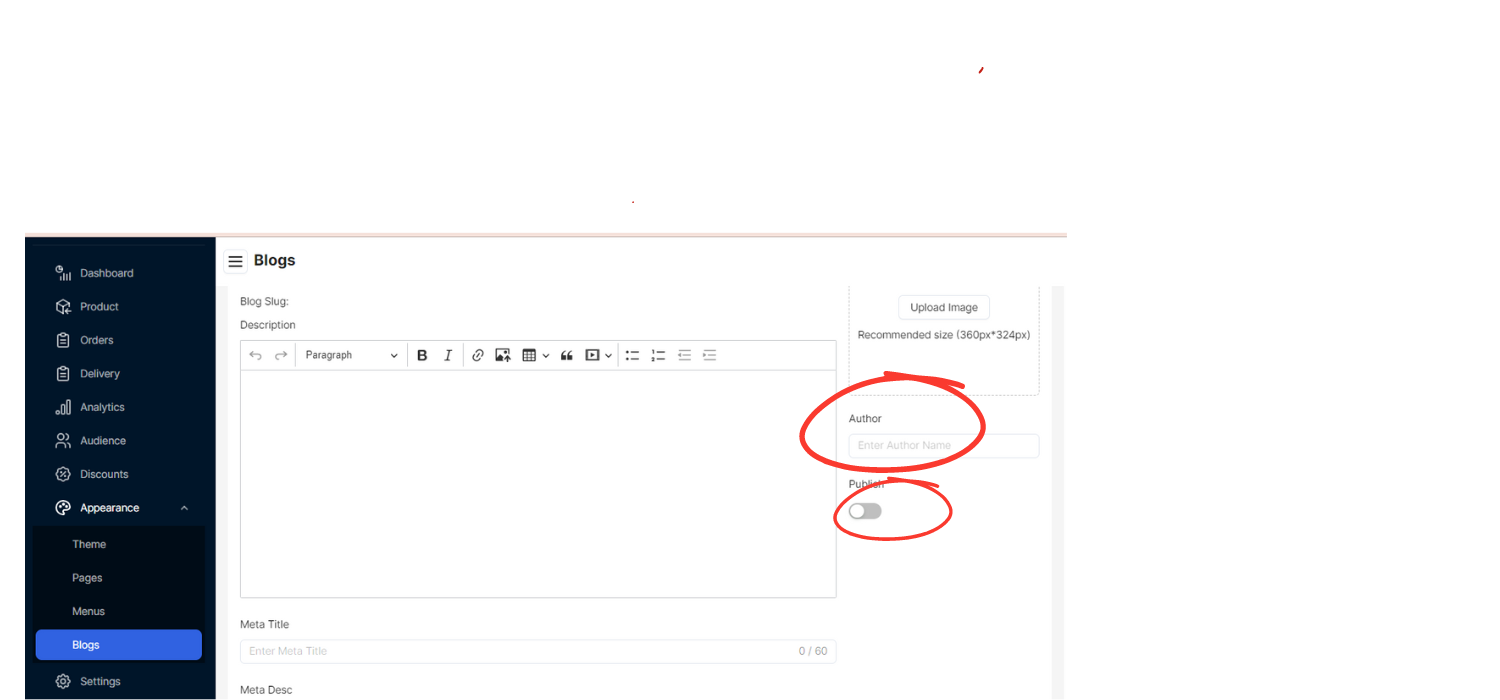
Blog Slug: The blog slug is the URL-friendly version of the blog title. It should be unique and descriptive, typically lowercase with hyphens separating words (e.g., "my-new-blog-post").
Meta Information
Meta Title: This is the title that appears in search engine results. It should accurately reflect the content of your blog post.
Meta Description: Provide a concise summary of the blog post. This description is also visible in search engine results and should entice users to click through to your blog.
Upload Image
Upload Image: Prepare an image with dimensions approximately 360px x 324px (or adjust as needed based on platform requirements).
Click on the "Upload Image" or "Set Featured Image" button, then select the image file from your computer.
Once uploaded, set the image as the featured image for your blog post. This image typically appears at the top of the blog post or as a thumbnail in blog listings.
Enter Author Name
Author Name: Enter the name of the author of the blog post. This could be your name or the name of a guest author.
Publish
Publish: When you're ready to publish your blog post, click on the "Publish" button. This makes the blog post live on your Digital Dukaan 2.0 store.
Preview and Adjustment
Preview: Use the preview feature to see how your blog post will appear to readers.
Make any necessary adjustments to layout, formatting, or content based on the preview.
Finalize
Finalize: After previewing and making adjustments, finalize your blog post by confirming the settings and ensuring everything looks as expected.
Manage and Update
Manage: Manage your blog posts as needed by editing, updating, or deleting them from the "Blog" or "Posts" section of your Digital Dukaan 2.0 dashboard.