
How to Add and Use Multiple Signatures on Invoices in BillClap
In many shops more than one person signs the bills: the owner signs some, the store manager signs others and the accountant signs the rest. In BillClap you can save a signature for each of them, choose one as the default, and switch to a different signer on any invoice. This guide also explains how to upload a signature image so it looks sharp on the PDF.
Watch the video
Prefer to watch? See the full multiple signatures tutorial (2:21) on YouTube: https://youtu.be/U8CM09I9JQ4
Quick summary
- Settings › Signature › Add New Signature: upload, type or draw a signature.
- Set as Default: this signature is added to every new invoice automatically.
- Settings › Print Setting › Page Settings › Signature: keep it on so the signature prints.
- Create Tax Invoice › Signature: pick a different signer, or No Signature, for that bill only.
Part 1: Add your signatures
Step 1: Upload a signature image
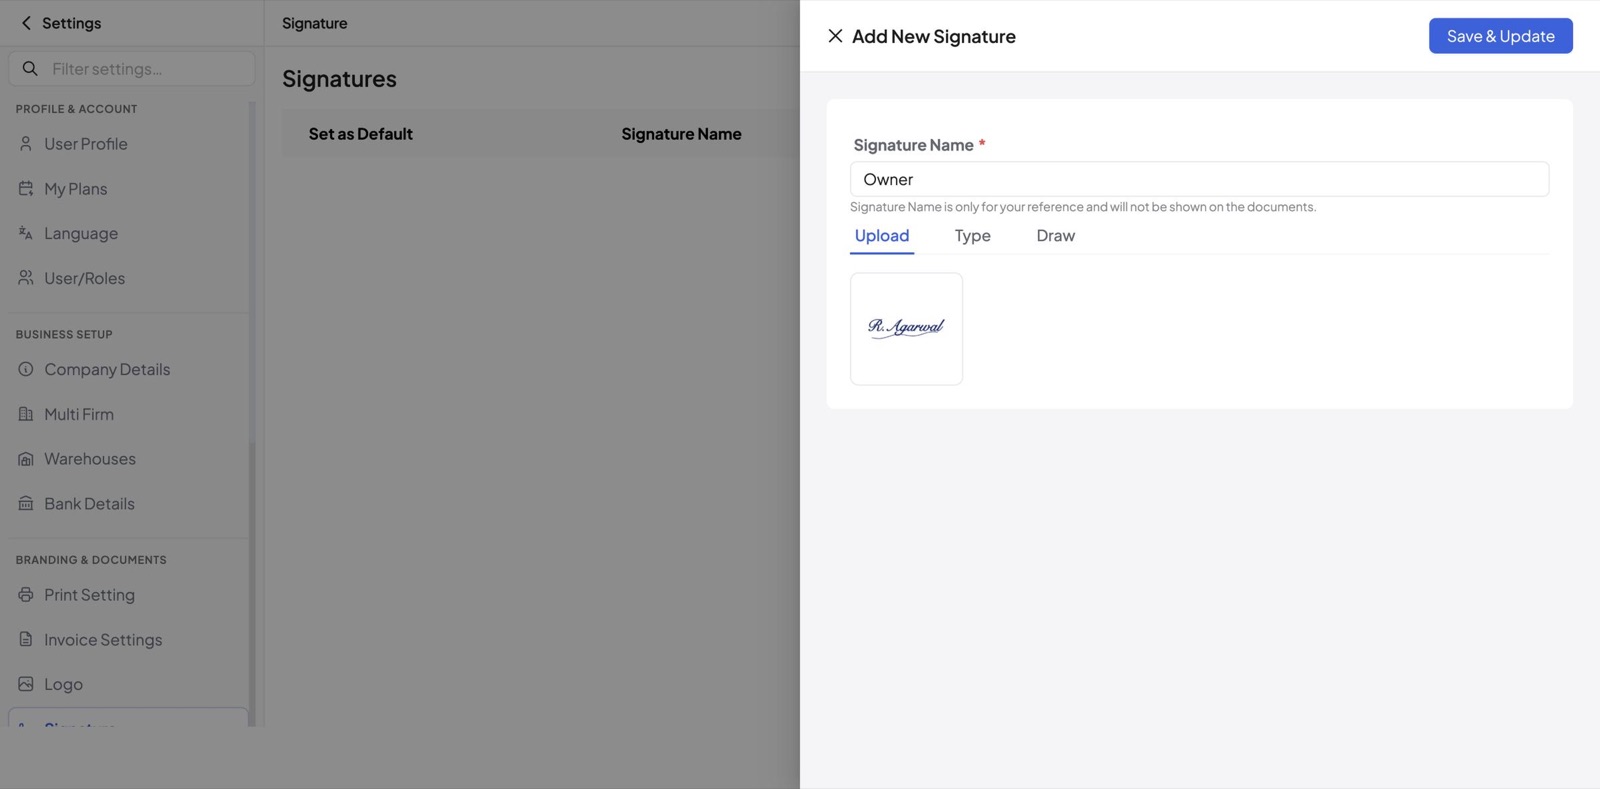
Go to Settings › Signature and click Add New Signature. Enter a Signature Name, for example Owner. The name is only for your reference and never prints on the invoice.
On the Upload tab, choose your signature image (PNG, JPG or JPEG). An Edit image window opens where you can zoom, rotate and move the signature to fit the frame. Click OK, then Save & Update.
Step 2: Or type a signature
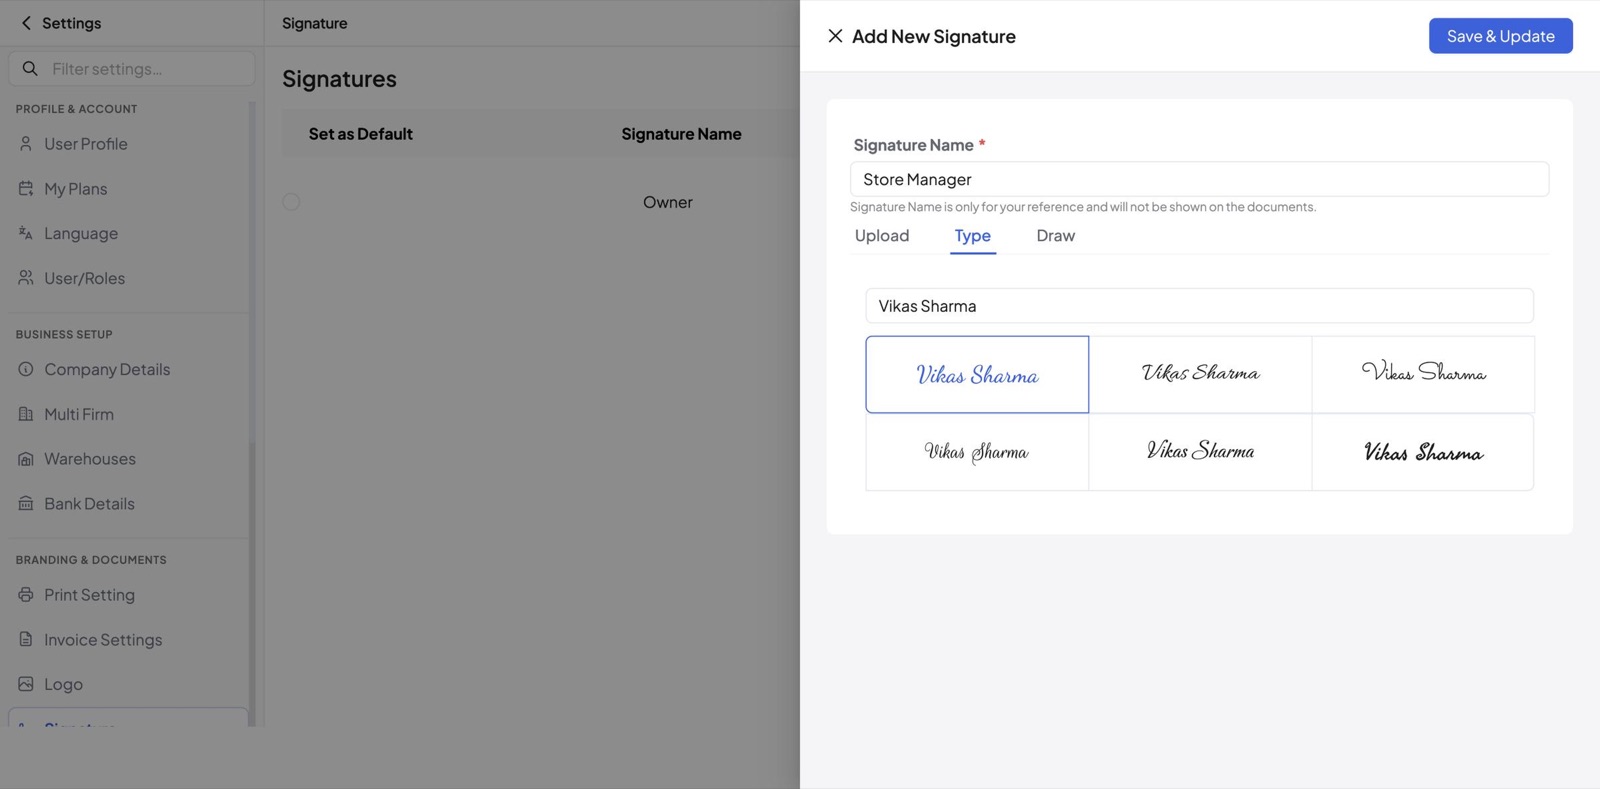
No image? Open the Type tab, type the name and pick one of six handwriting styles. Here the store manager signs as Vikas Sharma.
Step 3: Or draw a signature
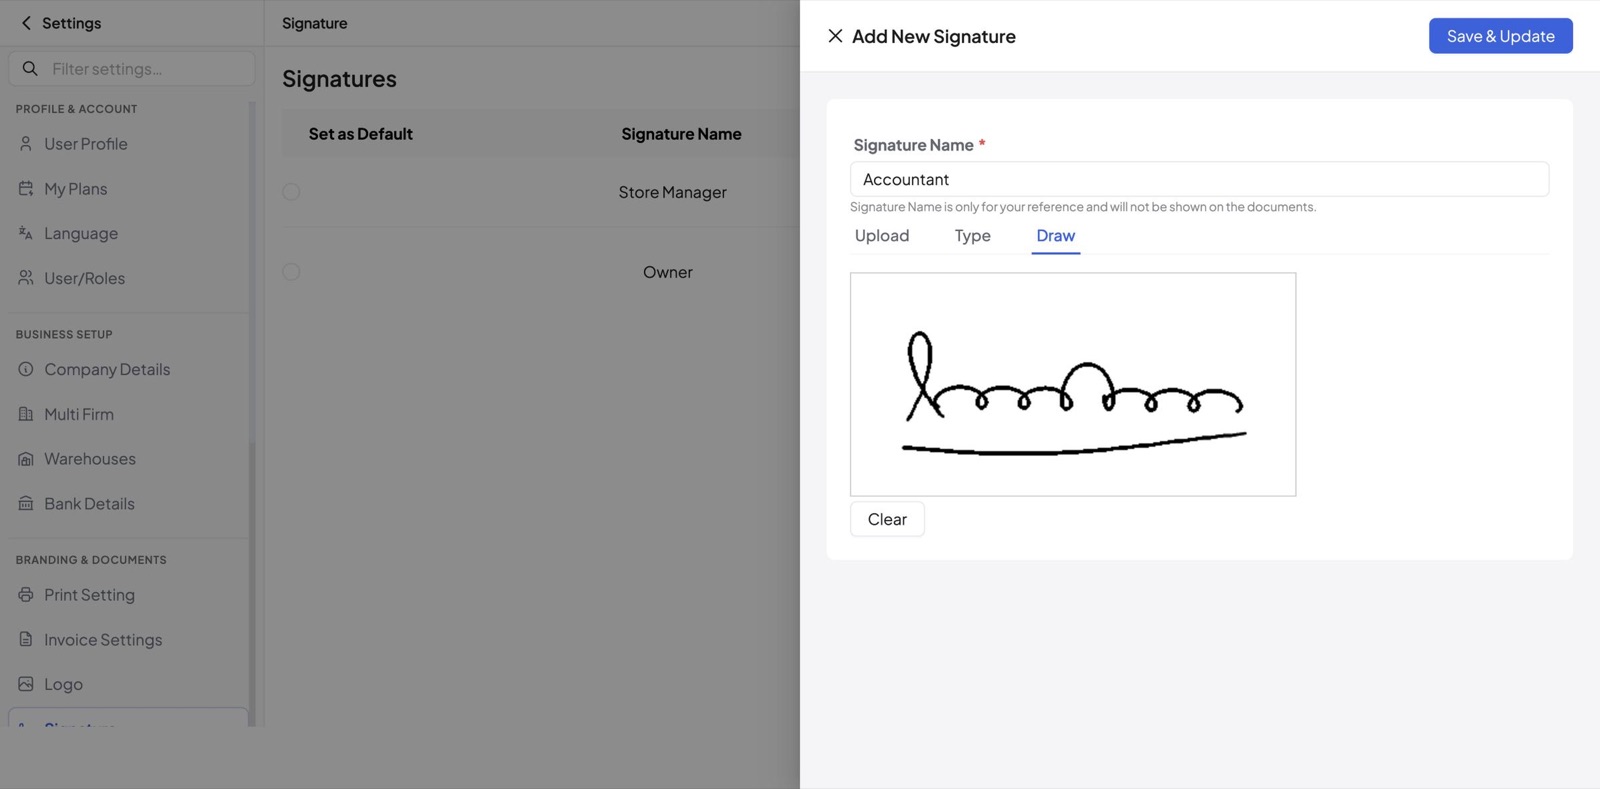
Open the Draw tab and sign in the box with your mouse or touchpad. Click Clear to wipe the box and sign again.
Repeat these steps for each person who signs your bills.
Part 2: Default settings
Step 4: Choose the default signature
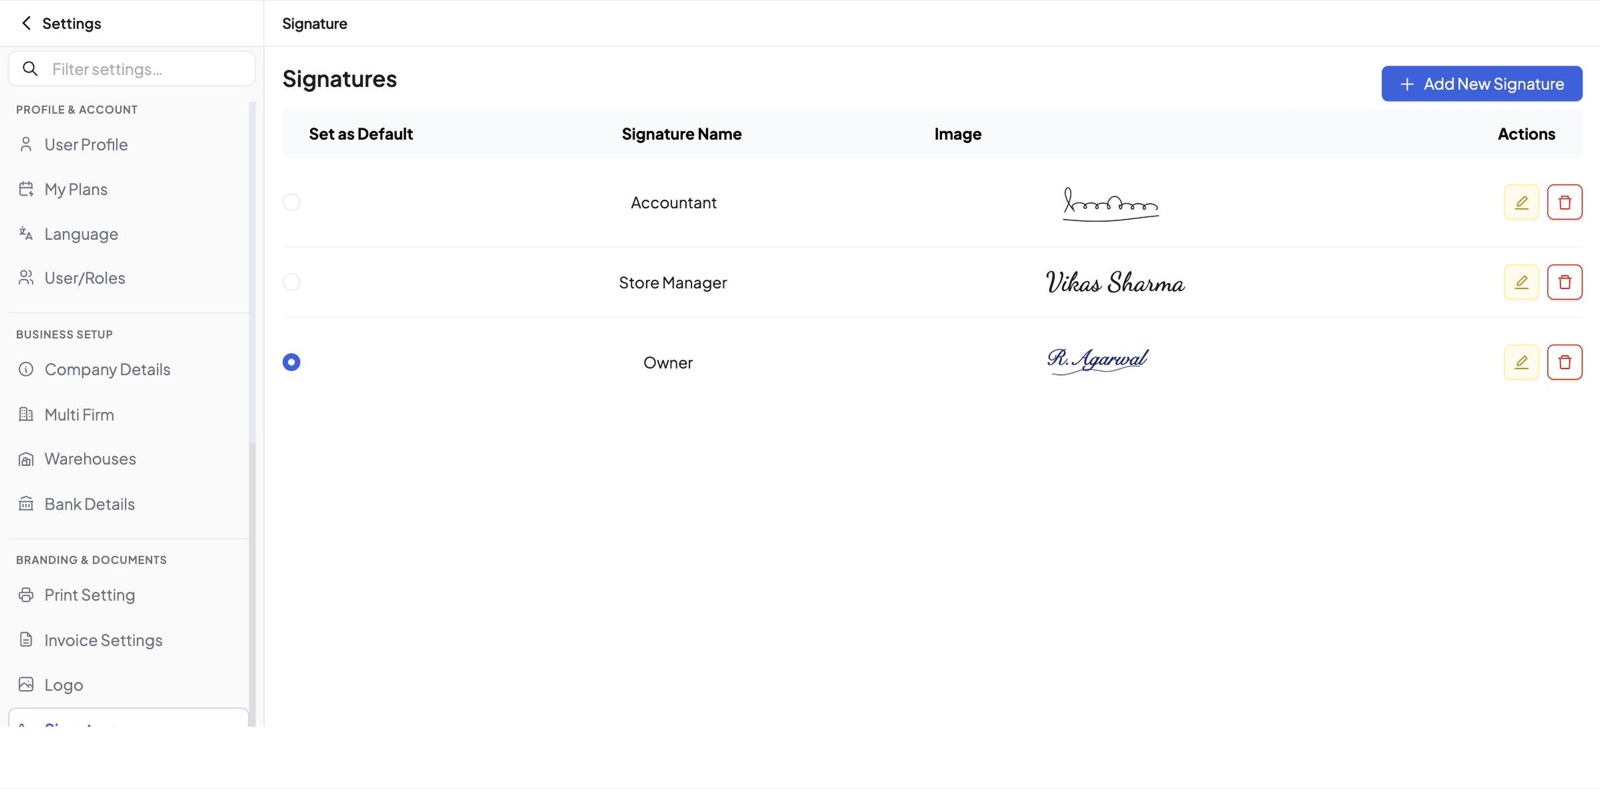
All your signatures appear in one list on Settings › Signature. The one marked Set as Default is added to every new invoice automatically. Click the radio button next to another signature to make it the default instead. Use the pencil to edit a signature and the bin to delete it.
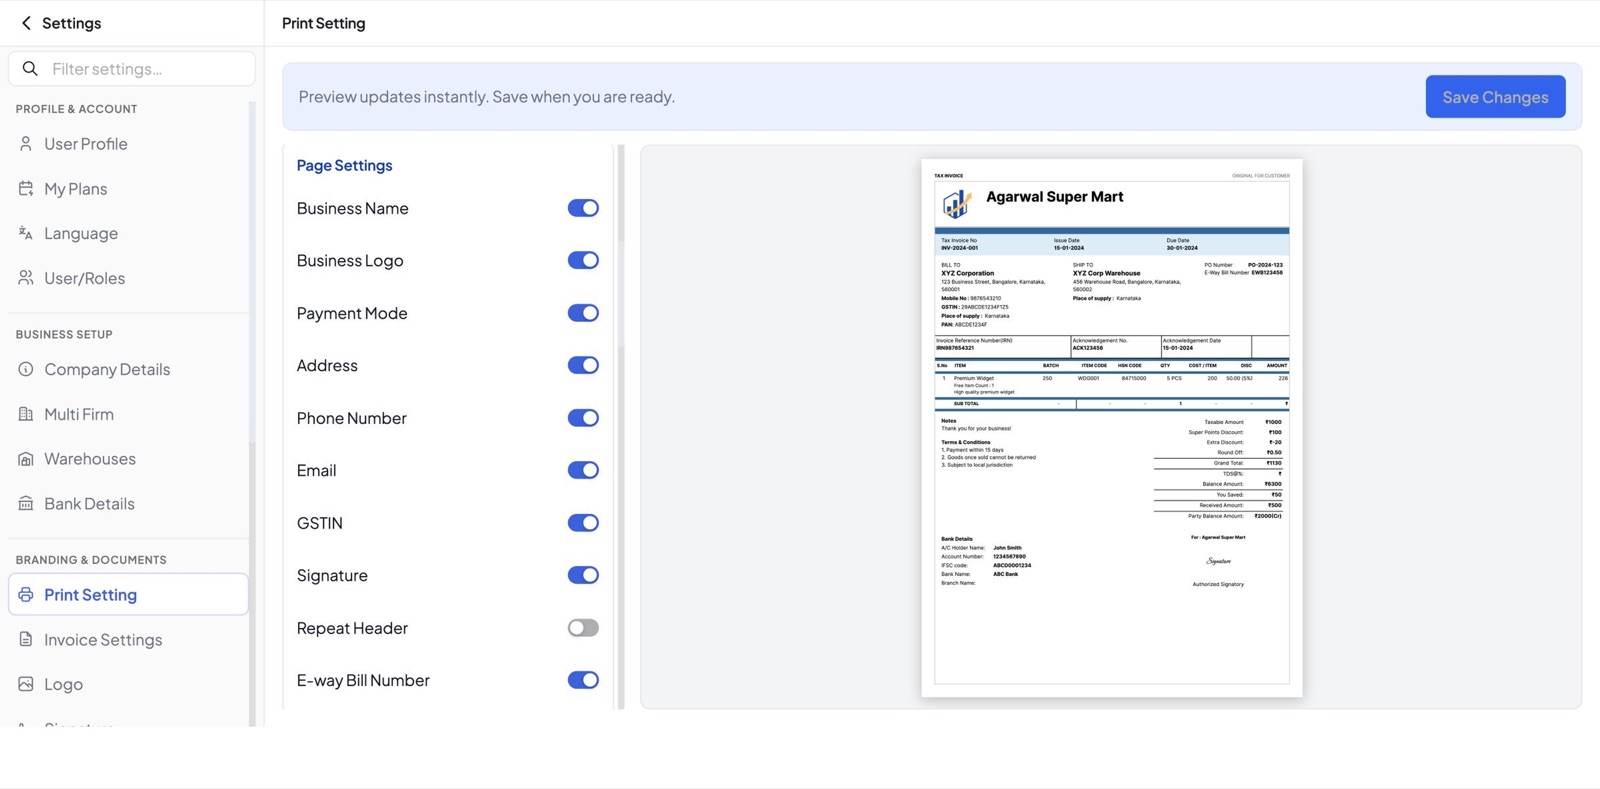
Step 5: Keep Signature on in Print Setting
Go to Settings › Print Setting. Under Page Settings, keep the Signature switch on. The signature then prints above Authorized Signatory on your invoice PDF.
Part 3: Choose the signer on each invoice
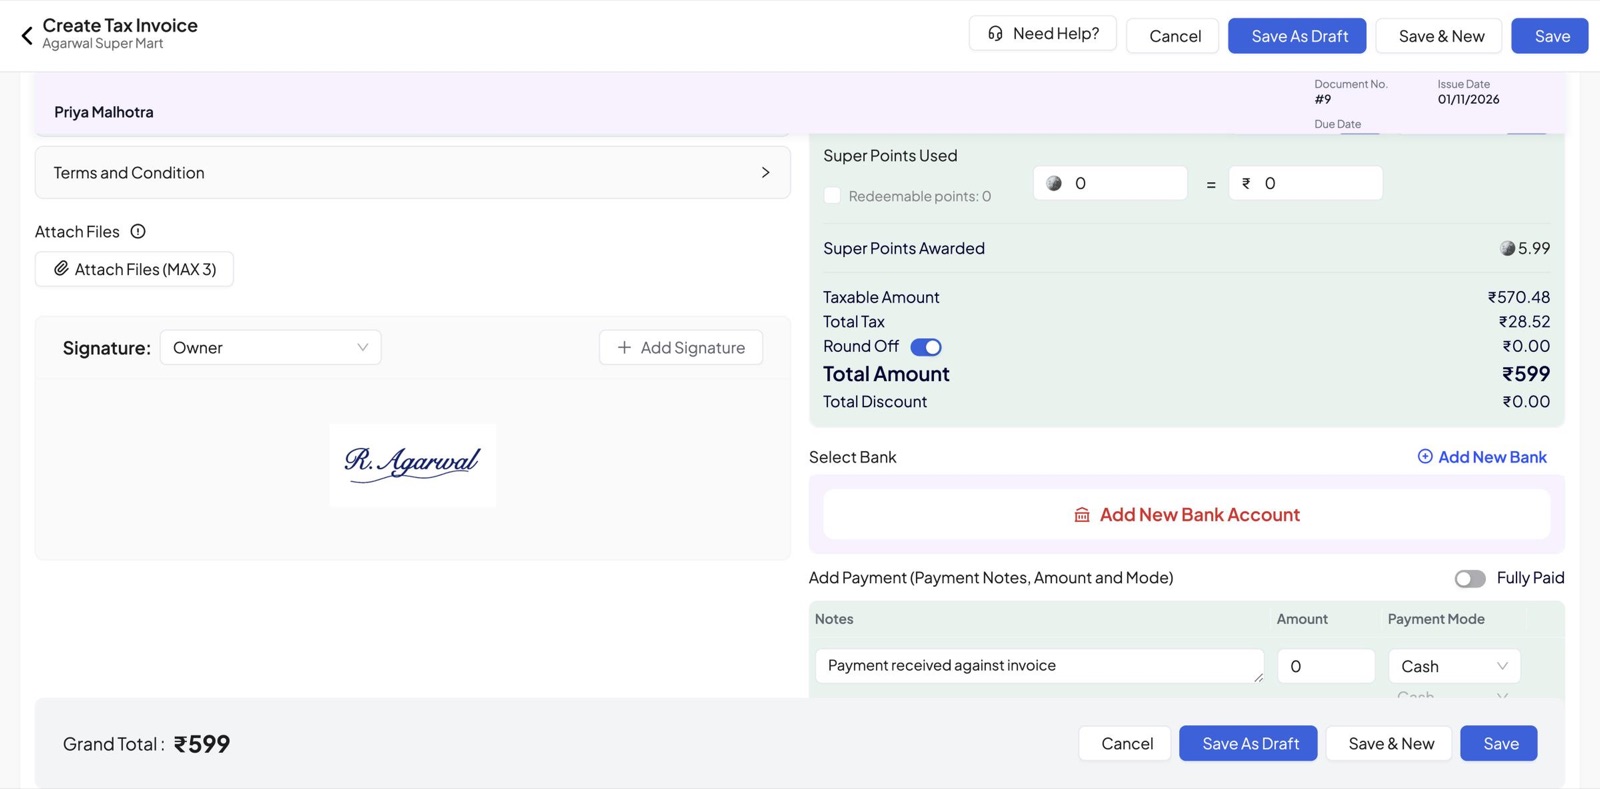
Step 6: The default is already selected
Open Create Tax Invoice and scroll down. The Signature dropdown already shows your default signature, with a preview below it.
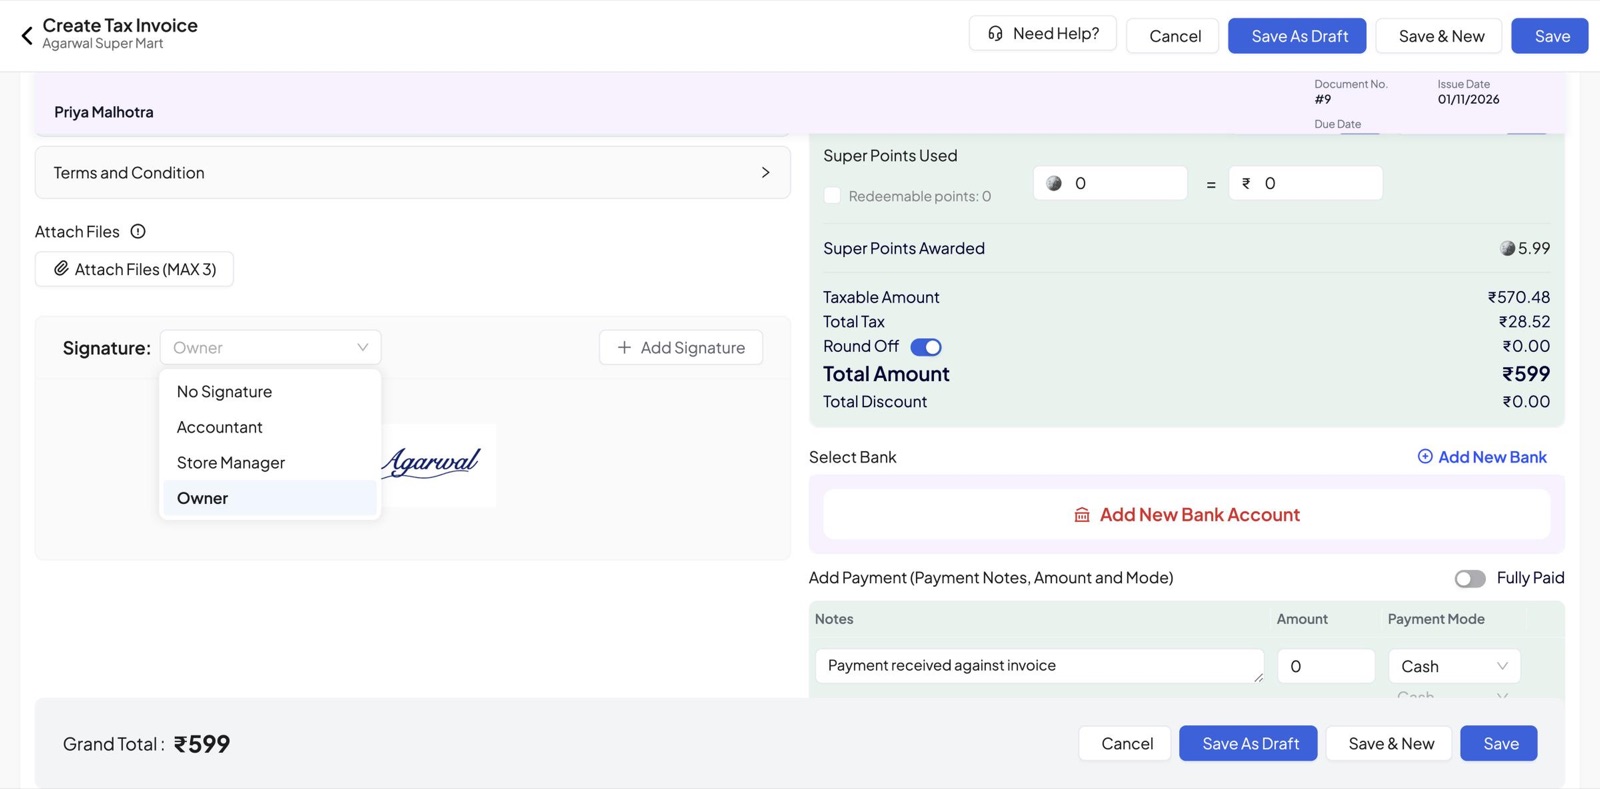
Step 7: Switch to another signer
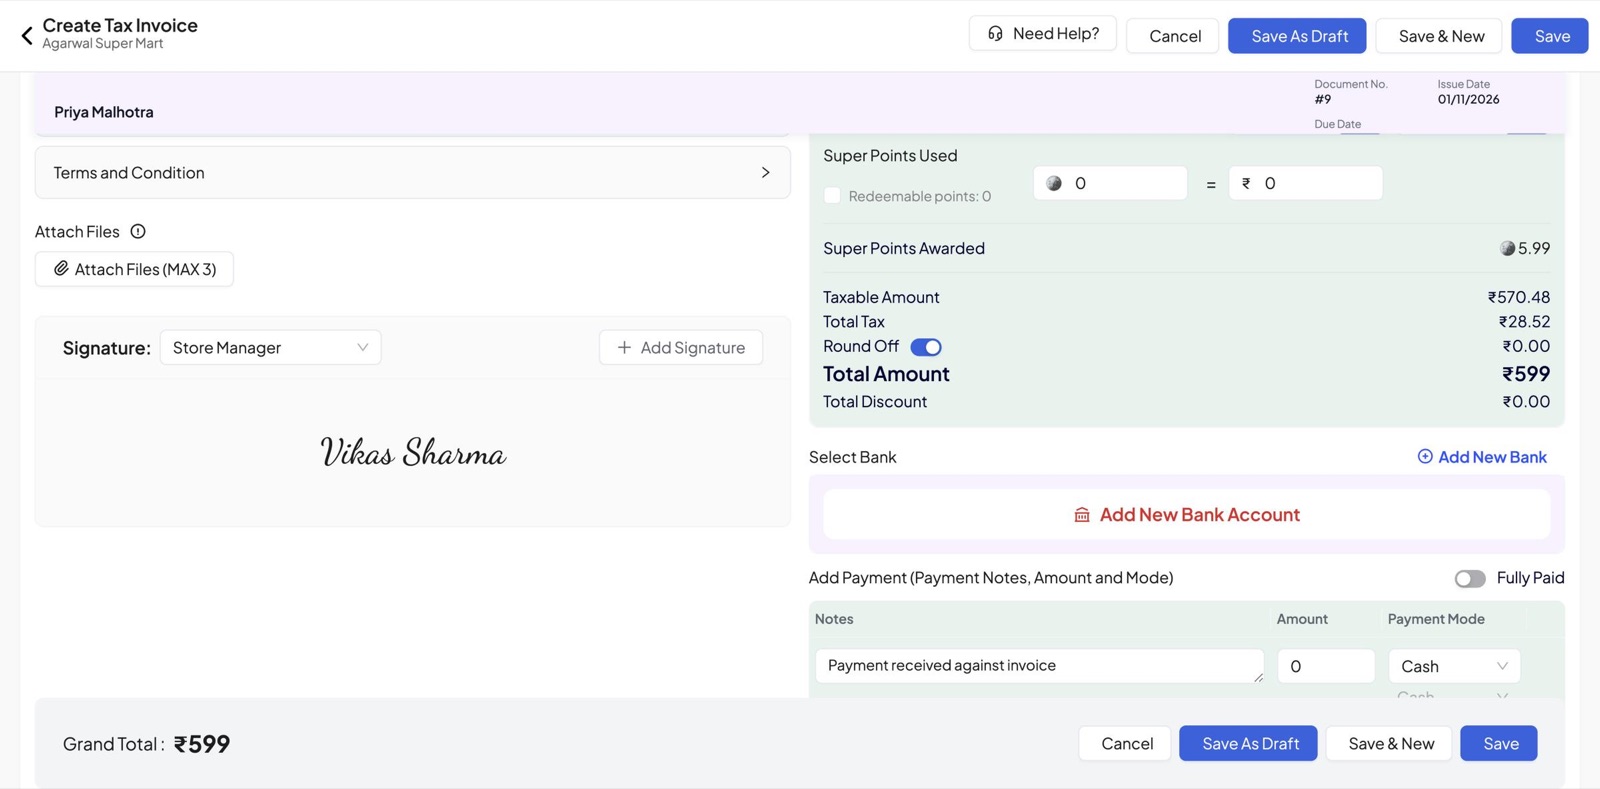
If someone else is signing this bill, open the dropdown and pick their signature, or choose No Signature. The preview updates right away. This changes only this invoice; your default stays the same.
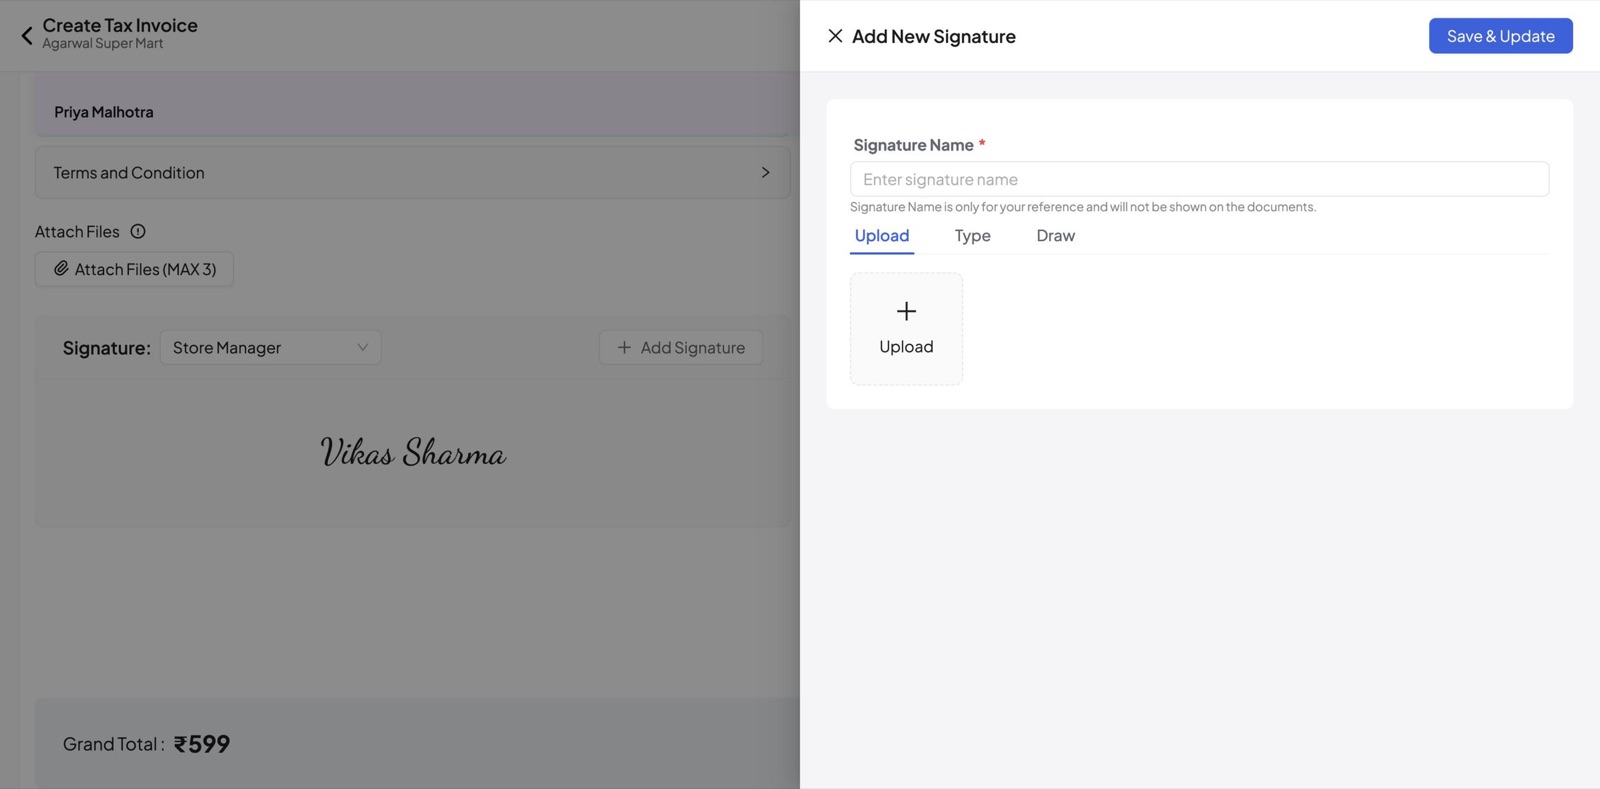
Step 8: Add a new signature from the invoice
Signer not in the list? Click Add Signature next to the dropdown. The same Add New Signature drawer opens, so you can create one without leaving the invoice.
Best practices for uploading a signature
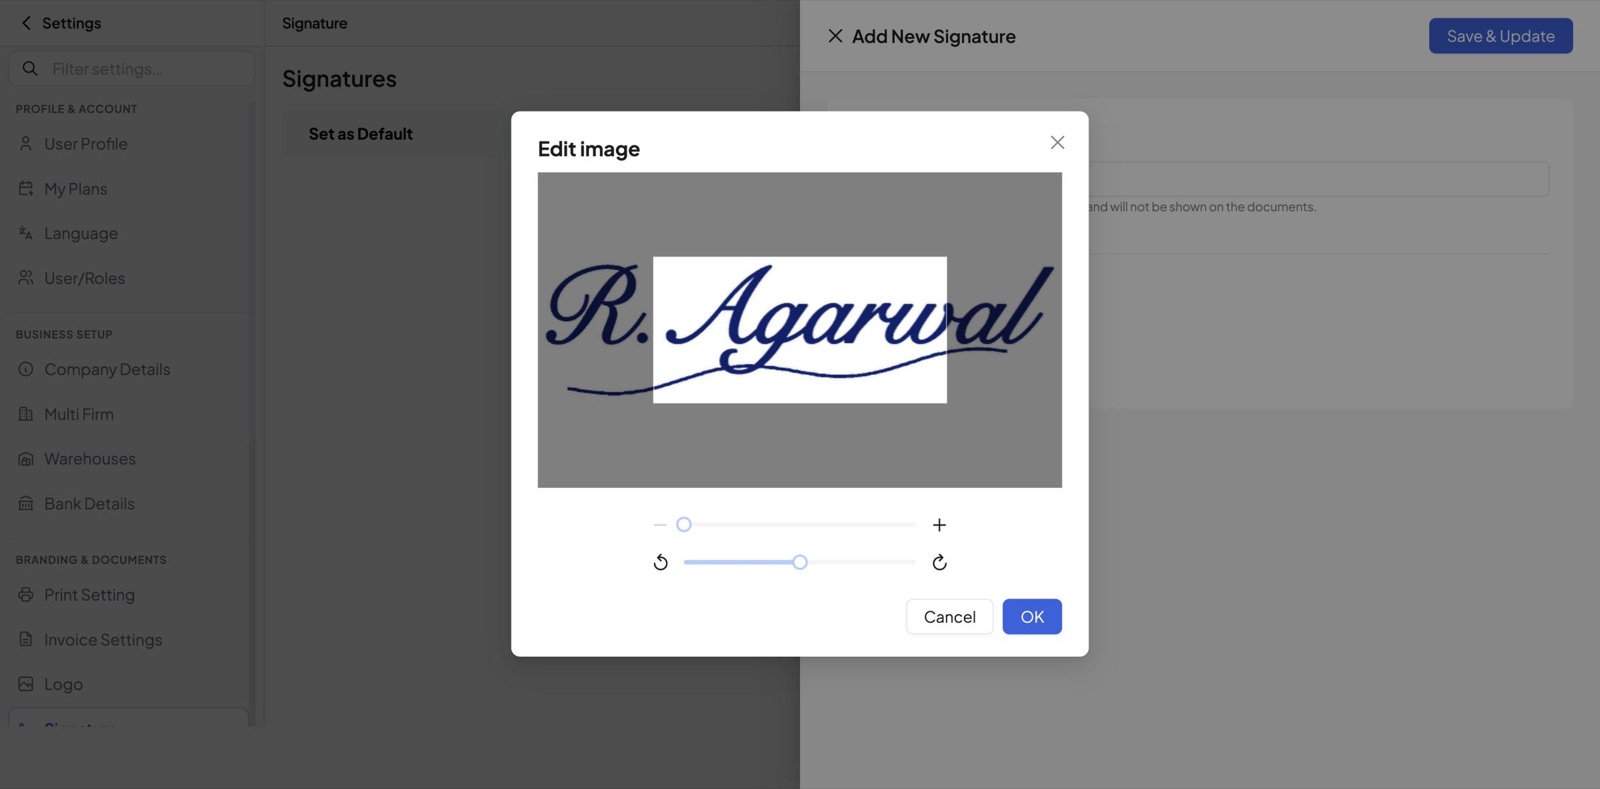
Use a 2:1 image
The image editor crops your signature to a wide frame, about twice as wide as it is tall. A long, thin image loses its edges, like this:
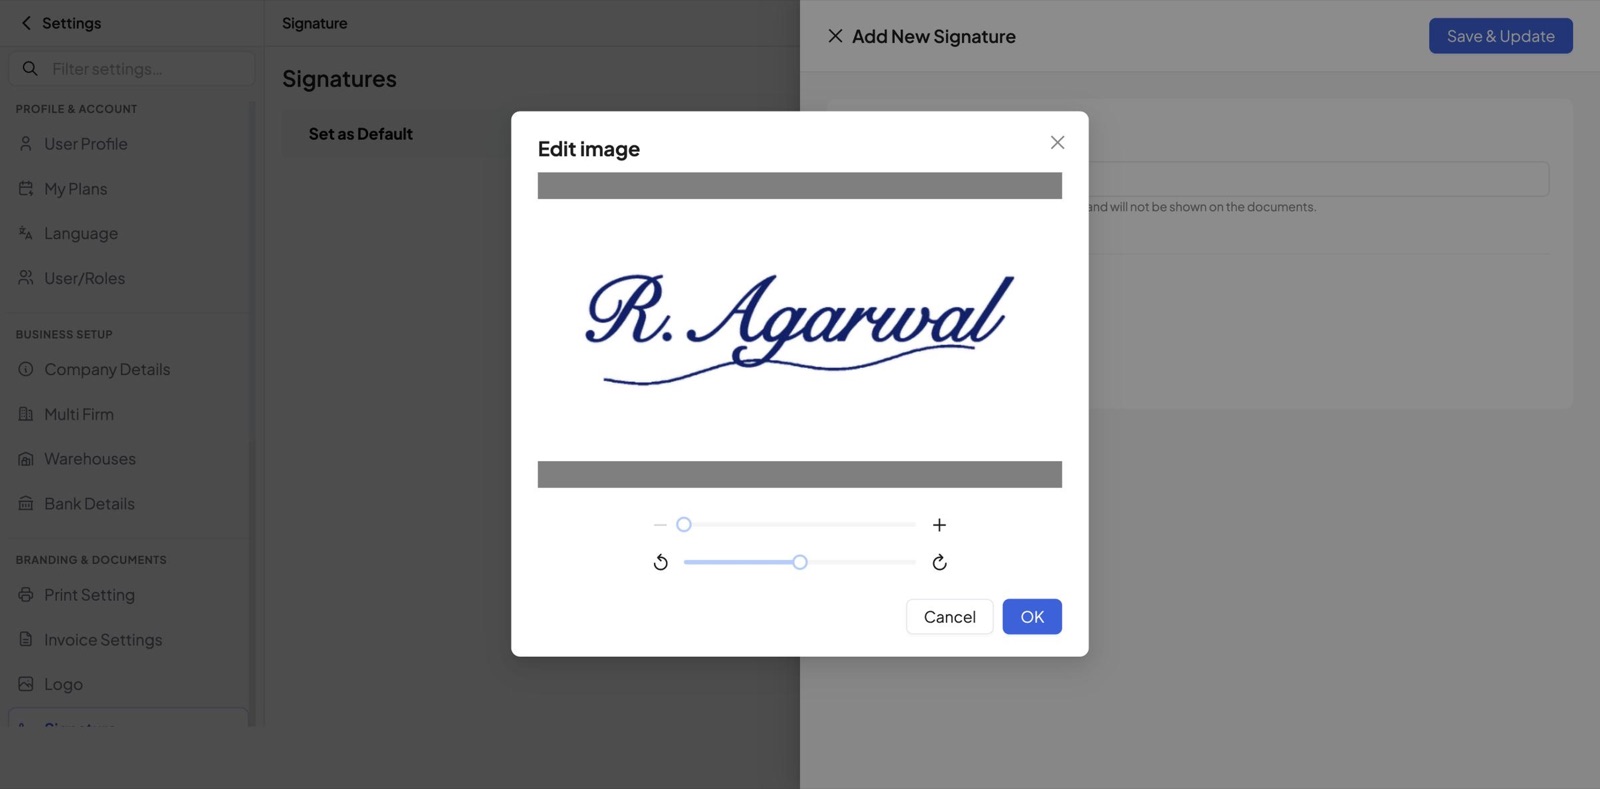
Save your image at about 2:1 (for example 800 × 400 pixels) with a little space around the signature, and it fits perfectly:
More tips
- Sign in dark blue or black ink on plain white paper.
- Scan it, or take a straight, well-lit photo with no shadows or folds.
- Crop away the extra paper, but leave a small margin around the signature.
- Upload it as a PNG or JPG.
- Check the result in Print Setting or the invoice preview before you send bills.
Frequently asked questions
Does the signature name print on the invoice?
No. The name is only to help you find the signature in the list.
Why is my signature not showing on the PDF?
Check that a signature is selected in the invoice's Signature dropdown and that Signature is switched on in Settings › Print Setting › Page Settings.
Does changing the signature on one invoice change my default?
No. Only Set as Default in Settings › Signature changes the default.
Related: Customize your invoice · Adding business logo and signature · Change your invoice template and colour