
Cash & Bank: Manage Multiple Bank Accounts in BillClap
Most businesses don't keep all their money in one place. Customers pay by UPI, card and cash, suppliers want a bank transfer, and you may have two or three bank accounts. BillClap's Cash & Bank keeps track of every account separately: add all your banks once, choose which bank each payment goes into or comes out of, move money between accounts, and see a live balance and passbook for every bank.
Watch the video
Prefer to watch? See the full Cash & Bank tutorial (2:28) on YouTube: https://youtu.be/rZaCJdEJsYI
Quick summary
- Settings › Bank Details › New Bank Details: add each bank account. The IFSC code fills in the bank name and branch for you.
- Default: the default bank is pre-selected on new invoices and payments, and its details and UPI payment QR print on your invoices.
- Payment In / Payment Out: pick the payment mode and the bank the money came into or left from.
- Transfer Funds: move money between Cash and your banks, for example when you deposit the day's cash.
- Cash & Bank: live balance of every account, and a passbook for each bank.
Where this helps
- Keep one current account for customer UPI payments and another for paying suppliers and rent.
- Card swipe and online settlements go to a different bank? Record them there, so each balance stays right.
- Deposit the day's cash and record it in a few seconds.
- Know how much is in each account before you pay a supplier.
- At month end, match each bank's passbook in BillClap with your bank statement.
Part 1: Add your bank accounts
Step 1: Open Bank Details
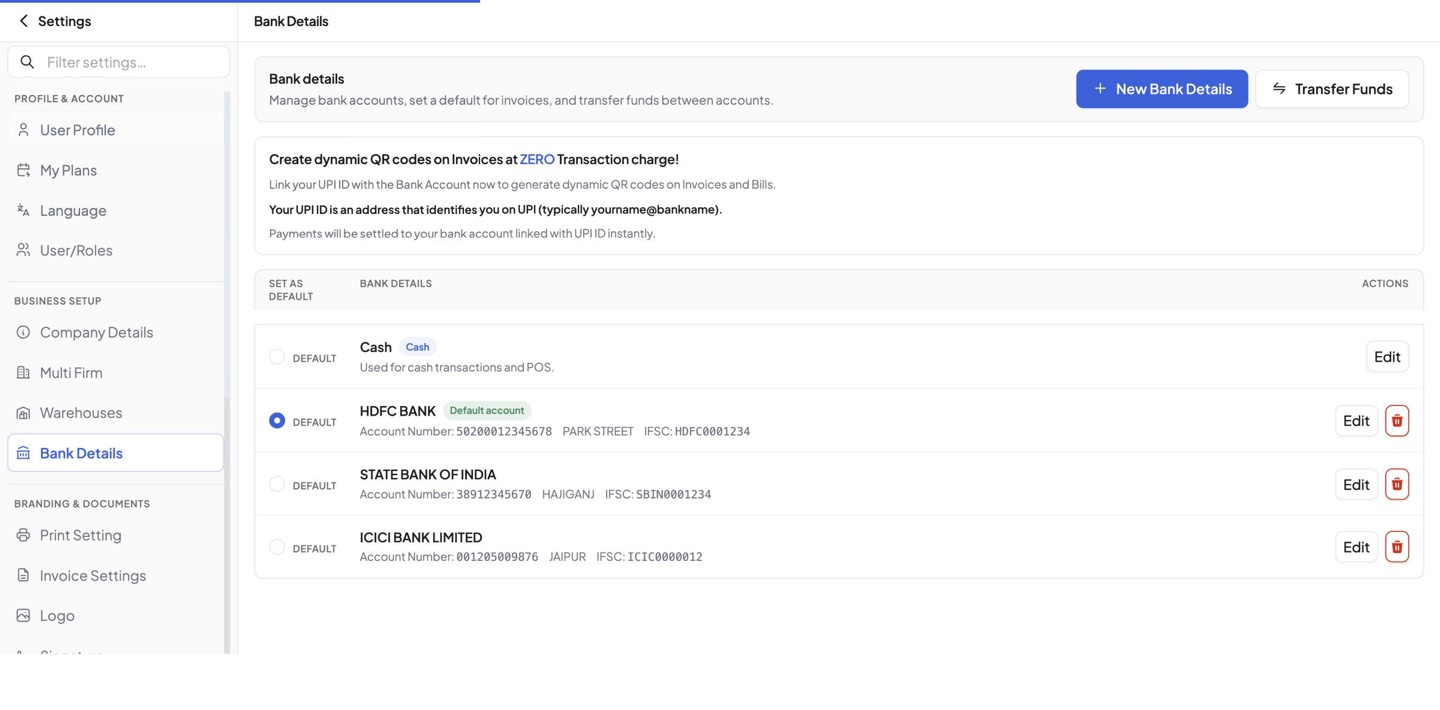
Go to Settings › Bank Details. Cash is already in the list. Click New Bank Details to add a bank account.
Step 2: Enter the account details
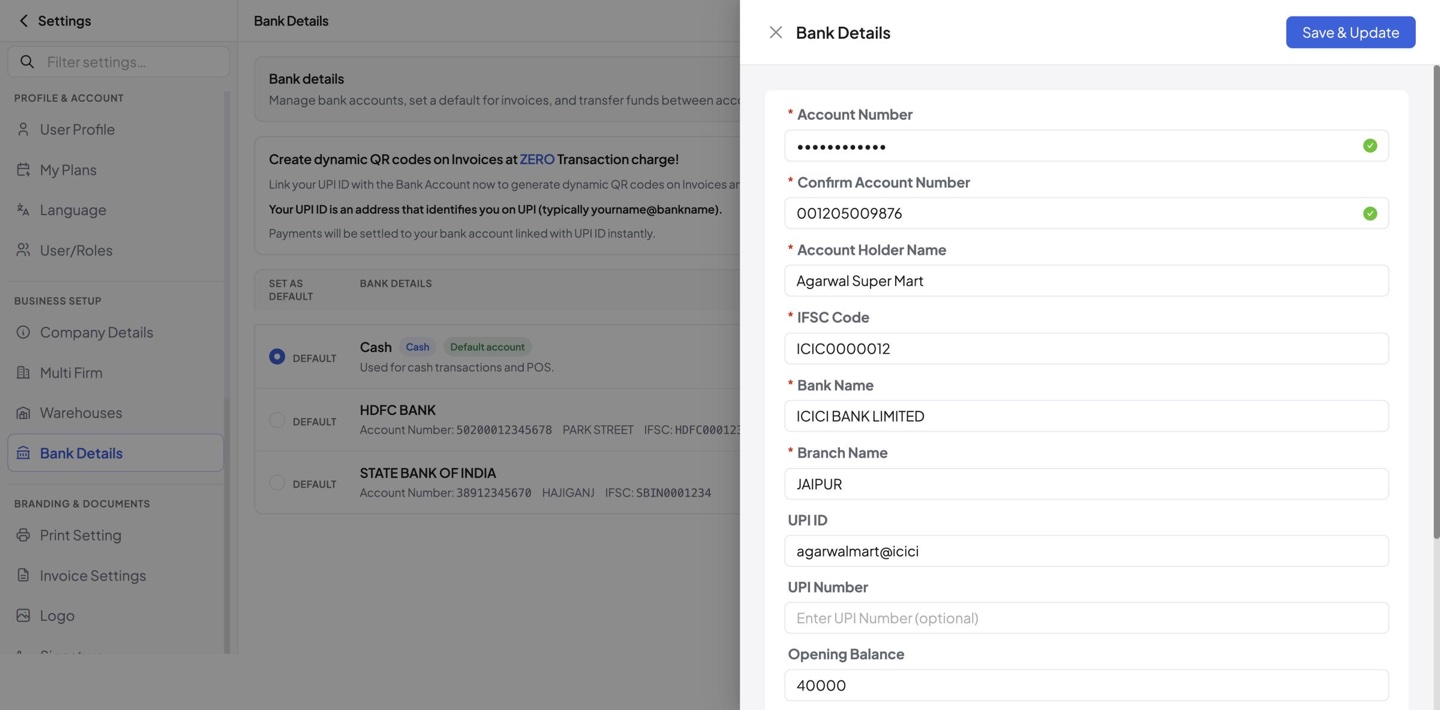
Enter the Account Number twice, the Account Holder Name and the IFSC Code. BillClap fills in the Bank Name and Branch Name from the IFSC code automatically.
Then add (optional):
- UPI ID: used to print a payment QR on your invoices.
- Opening Balance: the balance in this account today, from your passbook or net banking, so BillClap starts from the right number.
- Notes: what this account is used for, for example "Supplier payments & rent".
Click Save & Update.
Step 3: Add every account and set a default
Repeat for each account your business uses. In the list, select Default next to the bank you use most for customer payments. It is marked Default account. Use Edit to change an account, or the bin to delete it.
Part 2: Get paid into the right bank
Step 4: Bank details and UPI QR on your invoices
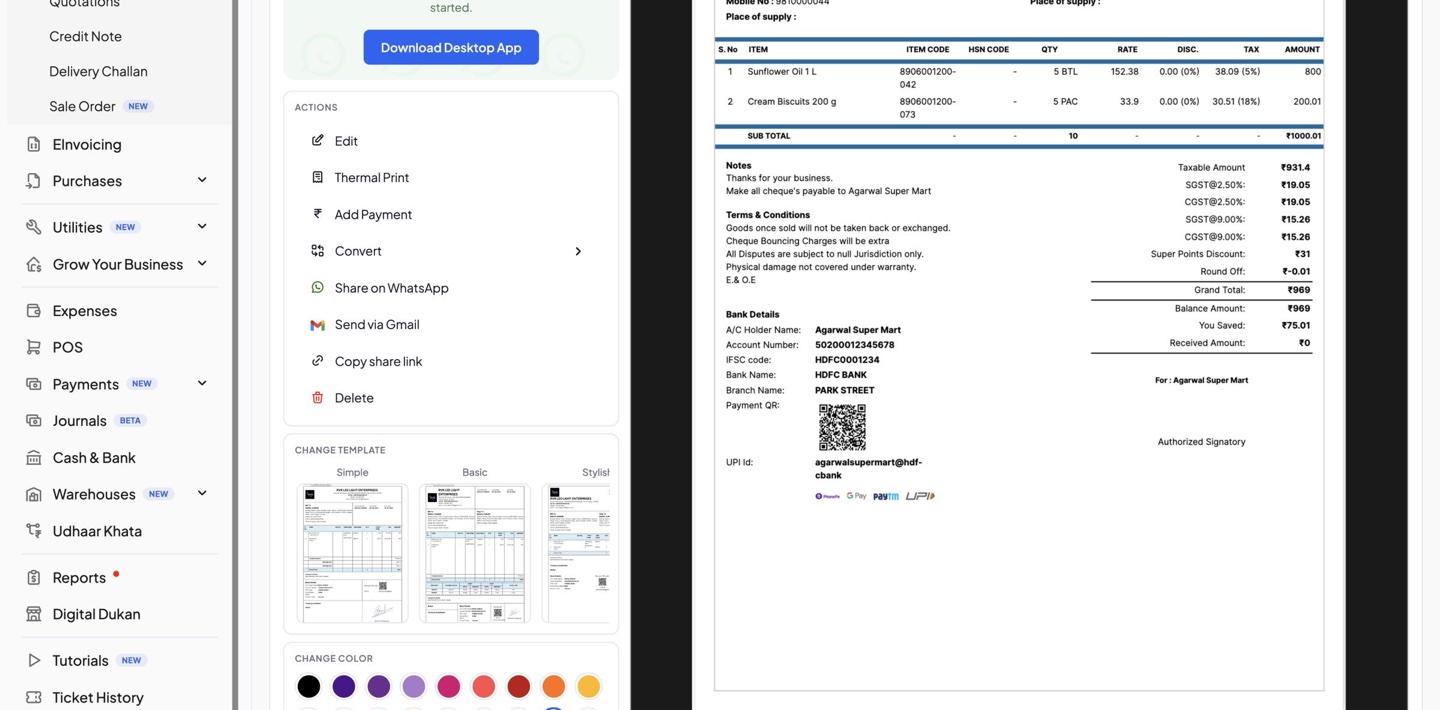
The bank selected on an invoice prints in the Bank Details section of the invoice PDF: account holder name, account number, IFSC, bank name and branch. If that account has a UPI ID, a Payment QR and the UPI ID print too, so customers can scan and pay straight into that account.
Step 5: Choose a different bank for one invoice
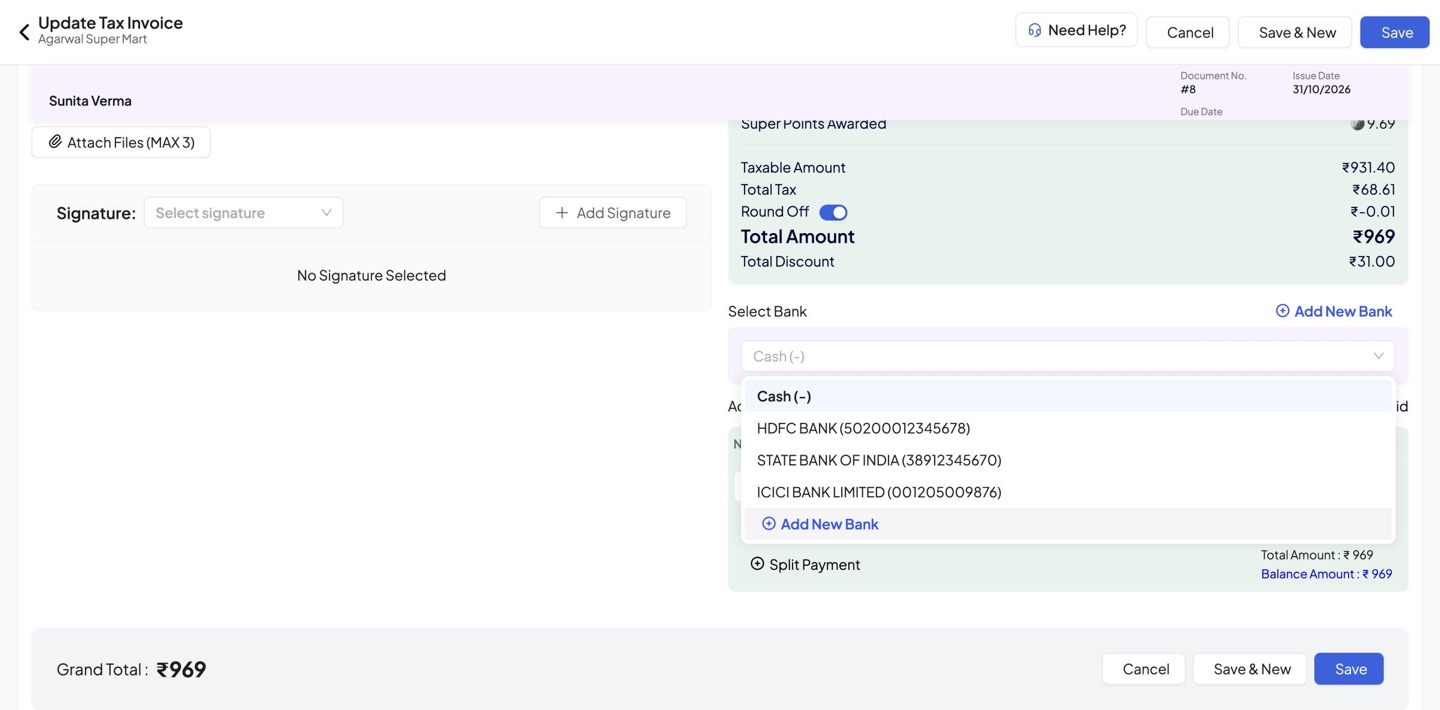
On Create Tax Invoice (or when editing one), scroll to Select Bank. Your default bank is already selected. Pick another account for this invoice only, or click Add New Bank to add one without leaving the bill.
Step 6: Record a payment into the right bank
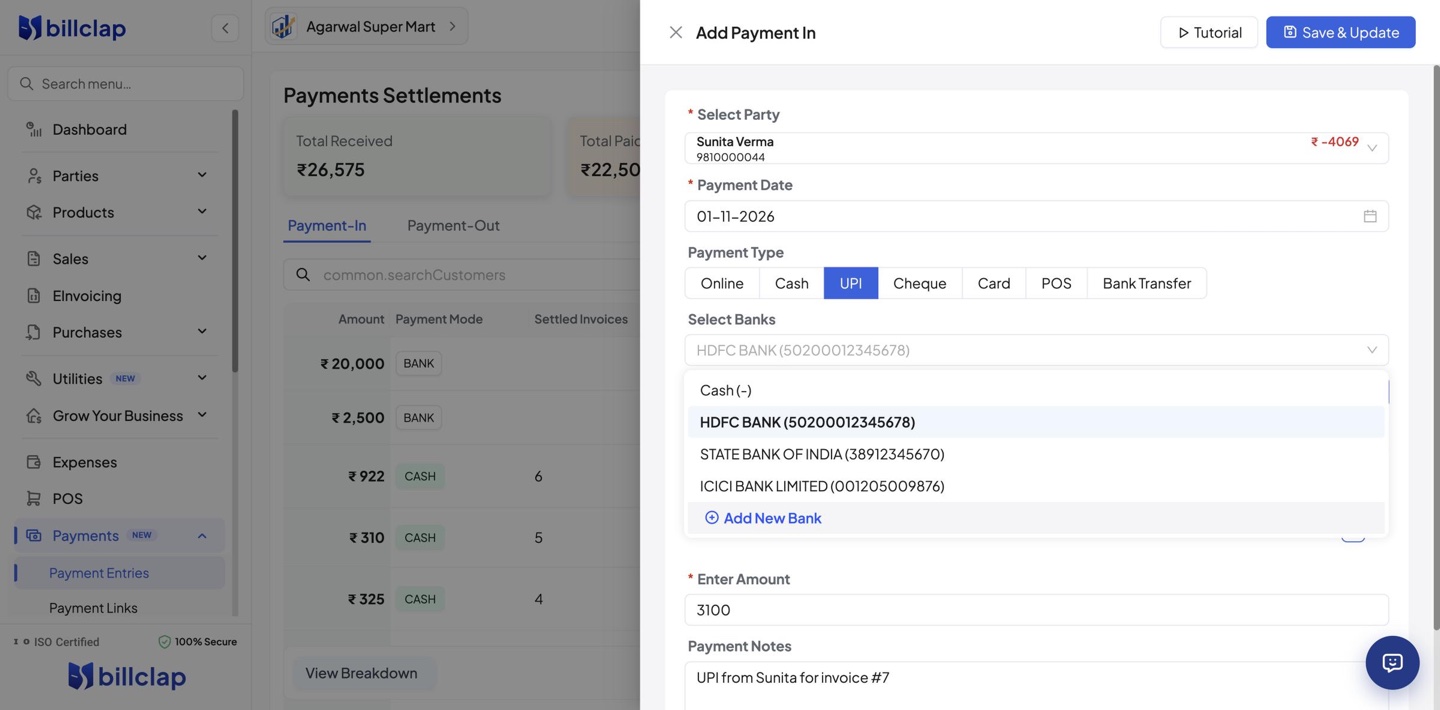
When a customer pays, go to Payments › Payment Entries and click Payment In. Select the party, choose the Payment Type (Online, Cash, UPI, Cheque, Card, POS or Bank Transfer) and, under Select Banks, the account the money landed in. Add the invoices it settles, check the amount and click Save & Update.
Part 3: Pay suppliers and move money
Step 7: Pay a supplier from a specific bank
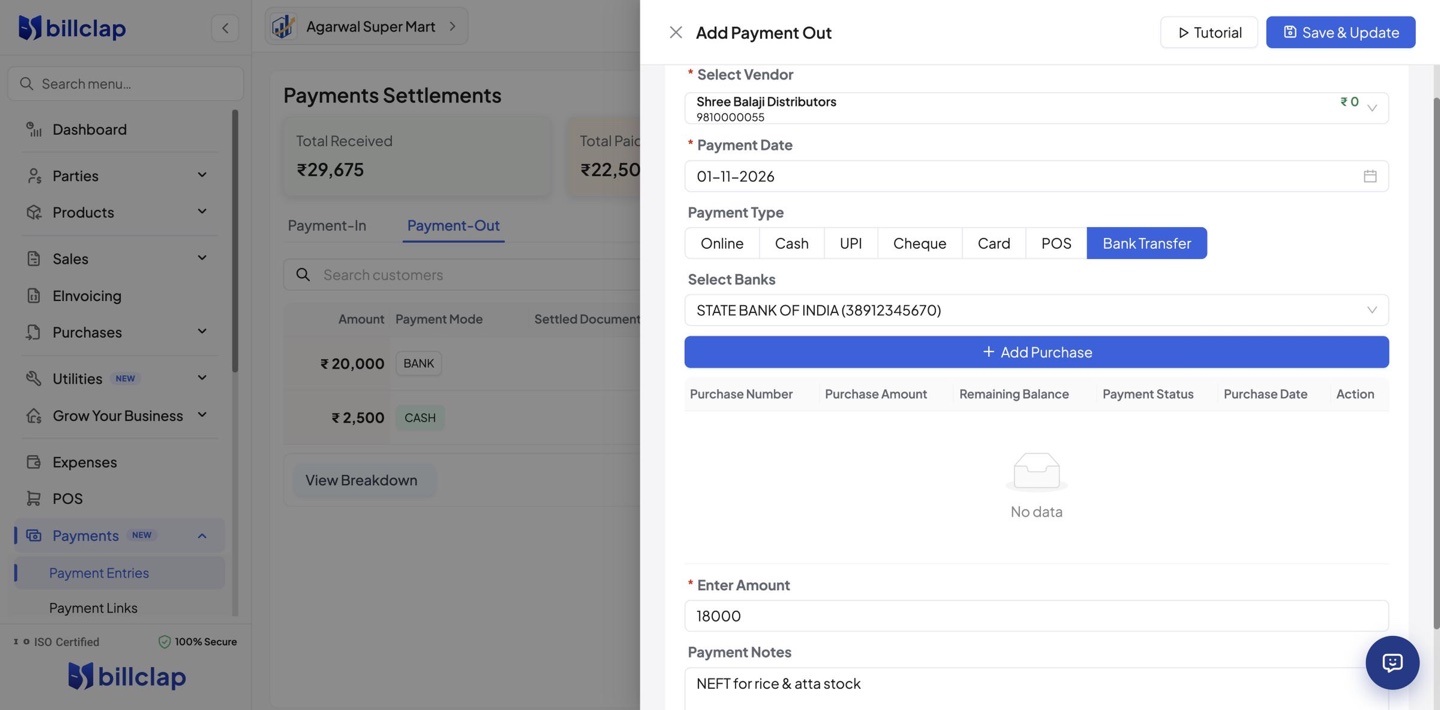
Click Payment Out, select the vendor, choose the payment type, for example Bank Transfer, and under Select Banks pick the account the money leaves from. Add the purchase bills it settles (optional), the amount and a note, then save.
Step 8: Transfer funds between accounts
Deposited the day's cash, or moved money from one bank to another? Click Transfer Funds (on Settings › Bank Details or the Cash & Bank page). Choose Transfer From Bank and Transfer To Bank; the current balance of each is shown below it. Enter the amount, date and a note, and click Transfer Funds.
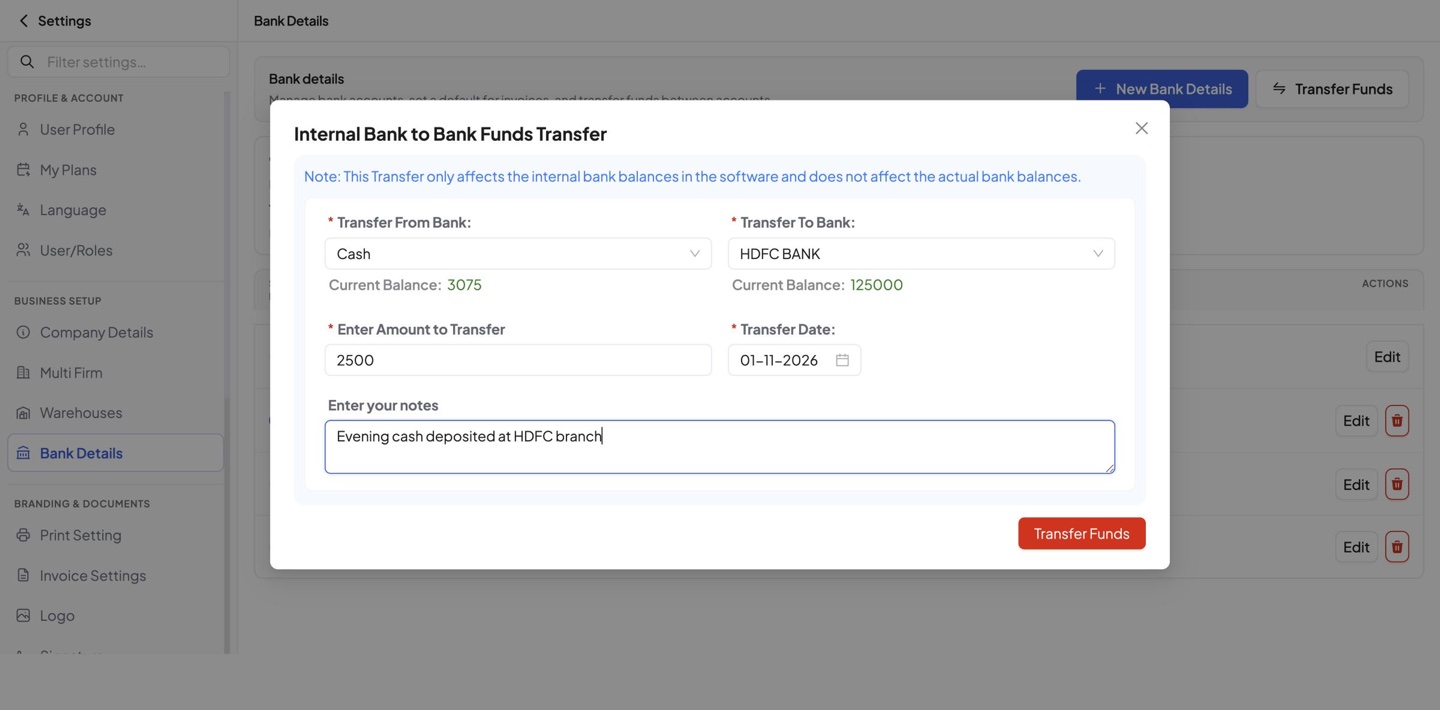
Note: Transfer Funds only updates the balances inside BillClap. It does not move money in your real bank account, so do the actual deposit or transfer at your bank as usual.
Part 4: Track every balance
Step 9: See all balances on Cash & Bank
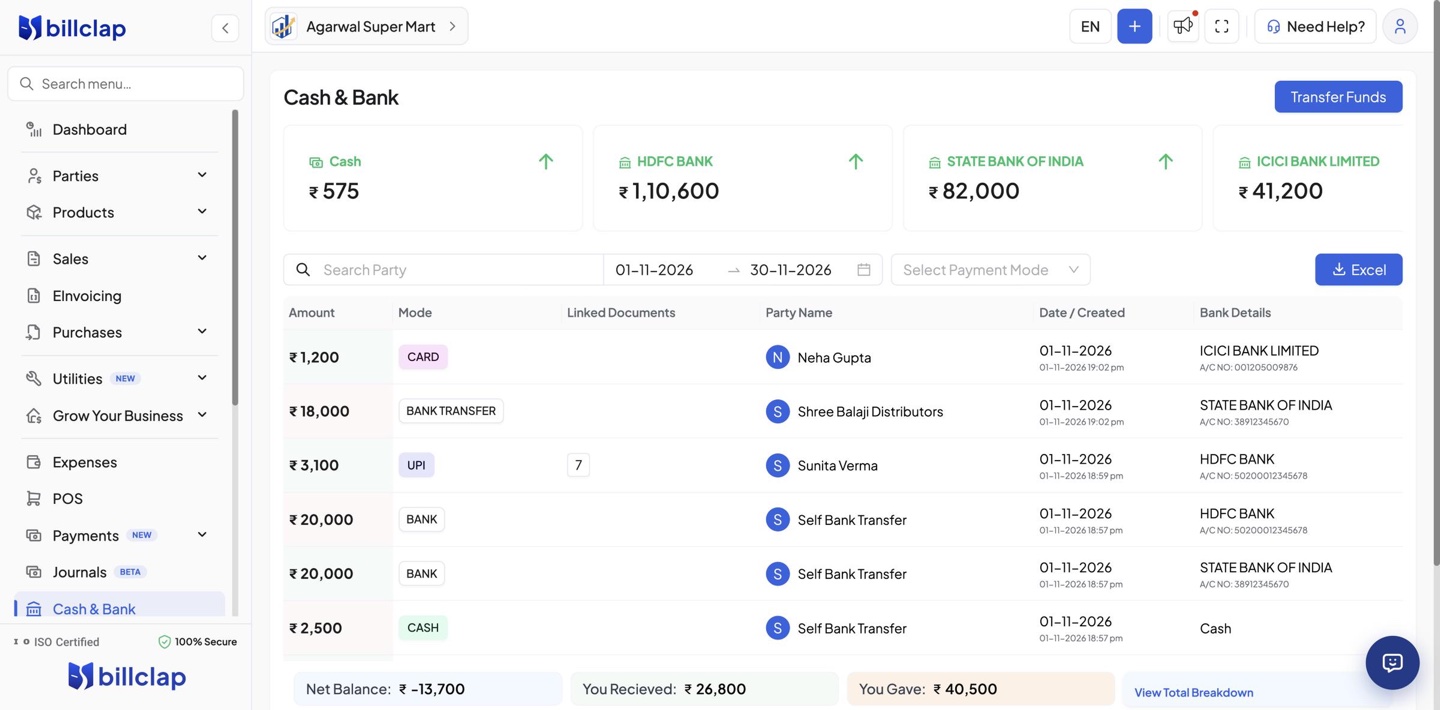
Open Cash & Bank from the left menu. Each account has a card with its live balance. Below, every entry shows the amount, mode, party, date and the bank it went into or out of. Search by party, change the date range, filter by payment mode, or click Excel to download the list.
Step 10: Open a bank's passbook
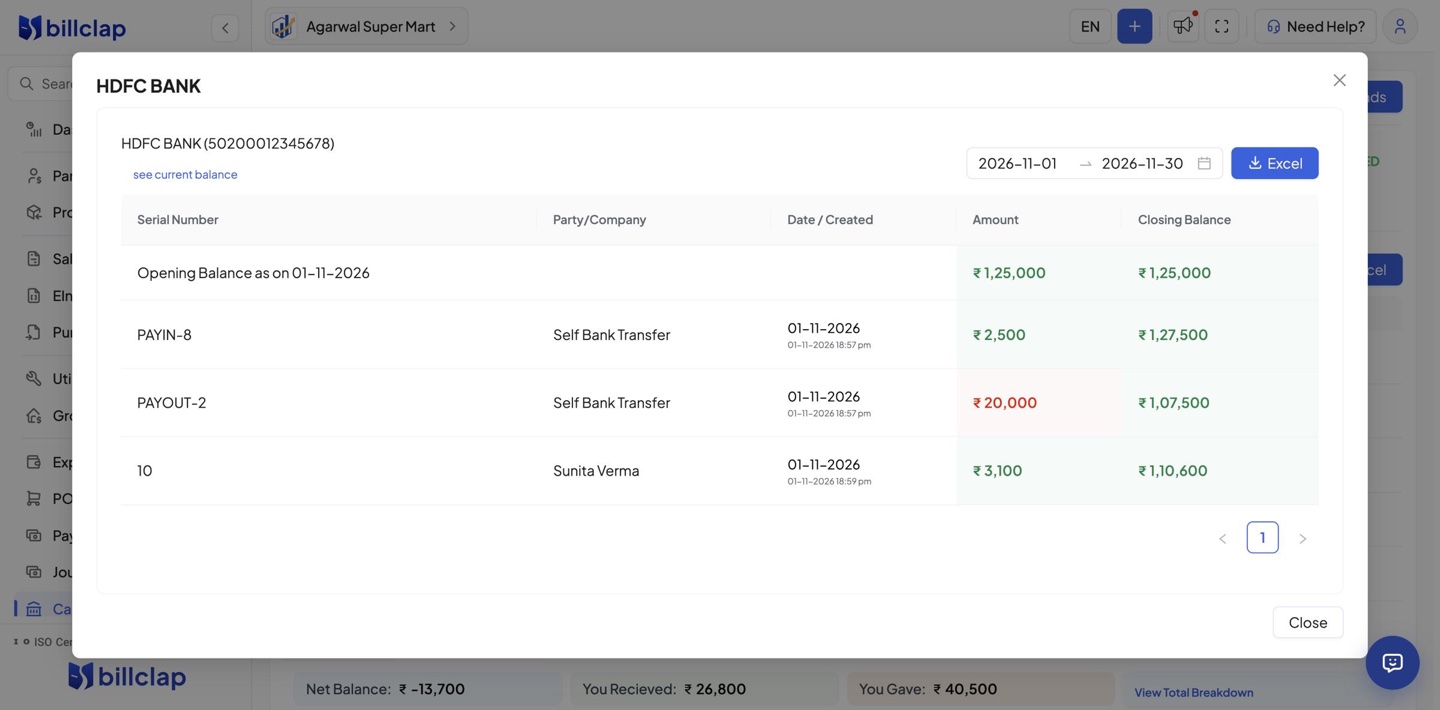
Click any bank card to open its passbook: the opening balance, every entry for the chosen dates and a running closing balance after each one. Download it to Excel and match it with your bank statement.
Tips
- Enter the opening balance as on the day you start using BillClap, so the balance matches your bank.
- Add a UPI ID to the account you want customers to pay into; the QR on invoices uses it.
- Always pick the right bank when recording a payment. That is what keeps each account's balance correct.
- Use the Notes field on each bank to remember what it is for.
Frequently asked questions
Is Cash tracked too?
Yes. Cash is a built-in account with its own balance card on the Cash & Bank page, and you can transfer between Cash and any bank.
Does Transfer Funds send money from my bank?
No. It only records the transfer in BillClap and updates both balances there.
Can I print a different bank on one invoice?
Yes. Change Select Bank on that invoice. Your default stays the same for new invoices.
Where do I change the default bank?
In Settings › Bank Details, select Default next to the account you want.